Table of Contents
Advertisement
Quick Links
Advertisement
Table of Contents

Related Manuals for Progress PCM43102X


Summary of Contents for Progress PCM43102X
- Page 1 User Manual Microwave combi-oven PCM43102X PCM43103B PCM43103X...
-
Page 2: Table Of Contents
2 Progress CONTENTS Safety information Automatic programmes Safety instructions Using the accessories Product description Additional functions Control panel Hints and tips Before first use Care and cleaning Daily use Troubleshooting Microwave mode Environmental concerns Clock functions Subject to change without notice. - Page 3 Progress 3 WARNING: Keep children and pets away from the • appliance when it operates or when it cools down. Accessible parts become hot during use. If the appliance has a child safety device, it should be • activated. Children shall not carry out cleaning and user maintenance •...
- Page 4 4 Progress WARNING: Only a qualified person can carry out any • service or repair operation that involves the removal of a cover which gives protection against exposure to microwave energy. WARNING: Do not heat liquids and other foods in sealed •...
-
Page 5: Safety Instructions
Progress 5 affect the life of the appliance and possibly result in a hazardous situation. SAFETY INSTRUCTIONS Installation Width of the back of 559 mm WARNING! Only a qualified the appliance person must install this appliance. Depth of the appli‐... - Page 6 6 Progress below the appliance, especially when it • Do not apply pressure on the open operates or the door is hot. door. • The shock protection of live and • Do not use the appliance as a work insulated parts must be fastened in surface or as a storage surface.
- Page 7 Progress 7 Care and cleaning • Concerning the lamp(s) inside this product and spare part lamps sold WARNING! Risk of injury, fire, separately: These lamps are intended or damage to the appliance. to withstand extreme physical conditions in household appliances, •...
-
Page 8: Product Description
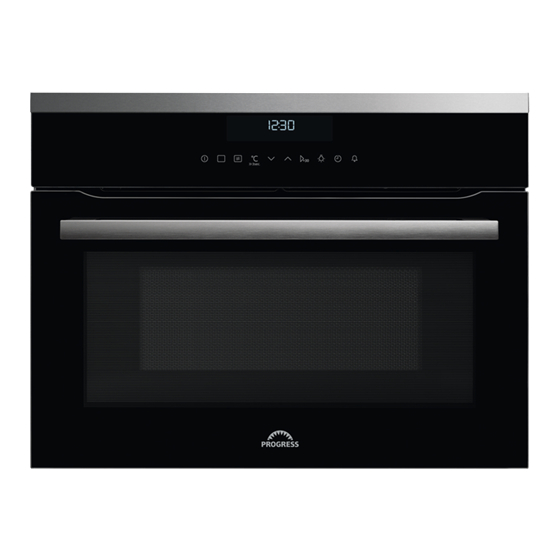
8 Progress PRODUCT DESCRIPTION General overview Control panel Electronic programmer Heating element Microwave generator Lamp Shelf support, removable Shelf positions Accessories Baking tray Wire shelf For cakes and biscuits. For cookware, cake tins, roasts. CONTROL PANEL Electronic programmer... - Page 9 Progress 9 Use the sensor fields to operate the appliance. Sensor Function Description Field DISPLAY Shows the current settings of the appliance. ON / OFF To activate and deactivate the appliance. OPTIONS To set an oven function or an automatic pro‐...
-
Page 10: Before First Use
10 Progress Other indicators of the display: Symbol Name Description Automatic programme You can choose an automatic programme. Microwave function The microwave function operates. kg / g An automatic programme with a weight in‐ put operates. h / min A clock function operates. -
Page 11: Daily Use
Progress 11 To set the new time of day, refer to Touch again and again until flashes "Setting the time". in the display. DAILY USE WARNING! Refer to Safety Oven func‐ Application chapters. tion Heating Functions To grill thin pieces of food and to toast bread. -
Page 12: Microwave Mode
12 Progress How to check: Temperature The Fast Heat Up is available only for some heating functions. If Faulty Tone is You can check the current temperature in turned on in the settings menu, the signal the oven when the function or programme sounds if the Fast Heat Up is not available works. -
Page 13: Clock Functions
Progress 13 2. Touch and do the same steps as If you do not touch , the when you set the Microwave function. appliance deactivates after 20 The Combi function is not available with seconds. the function END, SET + GO. - Page 14 14 Progress Clock function Application TIME OF DAY To show the time of day. To change the time of day, refer to "Setting the time". DURATION To set how long the appliance operates. To set when the appliance deactivates. You can use Dura‐...
-
Page 15: Automatic Programmes
Progress 15 5. Press a sensor field (apart from ON / 4. Touch a sensor field or open the oven OFF) to start the Set + Go function. door to stop the acoustic signal. Setting the MINUTE MINDER Setting the Time delay function... -
Page 16: Using The Accessories
16 Progress Automatic programmes Automatic programmes with weight input 1. Activate the appliance. If you set the weight of the meat, the 2. Touch appliance calculates the roasting time. The display shows and the number of 1. Activate the appliance. -
Page 17: Additional Functions
Progress 17 Wire shelf: Push the shelf between the guide bars of the shelf support and make sure that the feet point down. Baking tray: Push the tray between the guide bars of the shelf support. Wire shelf, Baking tray:... - Page 18 18 Progress Using the settings menu display shows SET and the number of the setting. The settings menu lets you turn on or turn off functions in the main menu. The Description Value to set SET+GO ON / OFF RESIDUAL HEAT INDICATOR...
-
Page 19: Hints And Tips
Progress 19 HINTS AND TIPS Refer to Safety chapters. Cooking recommendations The temperature and cooking times in the tables are guidelines only. They depend on the rec‐ ipes and the quality and quantity of the ingredients used. Your oven may bake or roast differently to the oven you had before. The hints below show rec‐... - Page 20 20 Progress Let's cook! Place the food on a plate on the bottom of the cavity. Turn or stir the food halfway through the defrosting and cooking time. Stir liquid dishes from time to time. Stir the food before serving.
- Page 21 Progress 21 Cookware / Material Microwave function Microwave Combi function De‐ Heating, frosting Cooking Ceramic and earthenware without any quartz or metal components and gla‐ zes which contain metal Ceramic, porcelain and earthenware with unglazed bottom or with small holes, e.g. on handles Heat-resistant plastic up to 200 °C...
- Page 22 22 Progress Baking results Possible cause Remedy The cake sinks and be‐ The oven temperature is Next time set slightly lower oven comes soggy or strea‐ too high. temperature. The oven temperature is Next time set a longer baking time too high and the baking and lower oven temperature.
- Page 23 Progress 23 BAKING IN TINS (°C) (min) Cheesecake, use a deep pan 160 - 170 60 - 90 Apple pie, 2 tins Ø20 cm 70 - 90 Use the first shelf position. Use the function: True Fan Cooking. Use the baking tray unless specified otherwise.
- Page 24 24 Progress BISCUITS (°C) (min) Short pastry biscuits 150 - 160 10 - 20 Biscuits made of sponge cake mixture 150 - 160 15 - 20 Puff pastries, preheat the empty oven 170 - 180 20 - 30 Short bread / Pastry strips...
- Page 25 Progress 25 (°C) (min) Sweet bakes Conventional Cooking 180 - 200 40 - 60 Pasta bake Conventional Cooking 180 - 200 45 - 60 Tips on Roasting Roast meat and fish in large pieces (1 kg or more). Use heat-resistant ovenware.
- Page 26 26 Progress VEAL (kg) (°C) (min) Roast veal 160 - 180 50 - 70 Veal knuckle 1.5 - 2 160 - 180 75 - 100 Use the function: Turbo Grilling. LAMB (kg) (°C) (min) Lamb leg / 1 - 1.5...
- Page 27 Progress 27 DISHES (kg) (°C) (min) Savoury dishes 400 - 600 160 - 180 20 - 45 with cooked in‐ gredients (noo‐ dles, vegetables) Savoury dishes 400 - 600 160 - 180 30 - 45 with raw ingredi‐ ents (potatoes,...
- Page 28 28 Progress GRILL (°C) (min) (min) 1st side 2nd side Roast beef, medium 210 - 230 30 - 40 30 - 40 Beef fillet, medium 20 - 30 20 - 30 Pork loin 210 - 230 30 - 40 30 - 40...
- Page 29 Progress 29 Use the first shelf position. (kg) (°C) (min) Roast beef 1 - 1.5 120 - 150 Beef fillet 1 - 1.5 90 - 110 Roast veal 1 - 1.5 120 - 150 Steak 0.2 - 0.3 20 - 40 Frozen Foods Remove the food packaging.
- Page 30 30 Progress (kg) (min) (min) Defrosting Further de‐ time frosting time Chicken 100 - 140 20 - 30 Turn halfway through. Meat 100 - 140 20 - 30 Turn halfway through. Trout 0.15 25 - 35 10 - 15 Strawberries...
- Page 31 Progress 31 VEGETA‐ (min) (min) (°C) BLES Cooking Continue Peppers 60 - 70 5 - 6 time until to cook at simmer‐ 100 °C Vegetables 60 - 70 5 - 6 for soup Carrots 50 - 60 5 - 10...
- Page 32 32 Progress MEAT / FISH Set power for 100 W unless specified (kg) (min) Standing otherwise. time (min) Steak 5 - 7 5 - 10 Minced meat, set 200 W 7 - 8 5 - 10 Chicken 30 - 35...
- Page 33 Progress 33 REHEATING (min) Standing time (min) Baby food in jars 0.2 kg 1 - 2 Baby milk, put a spoon into the bottle 180 ml 0:20 - 0:40 Milk 200 ml 1000 1 - 1:30 Water 200 ml 1000...
- Page 34 34 Progress COOKING (min) Standing time (min) Rice 0.2 kg + 400 ml 15 - 18 of water Popcorn 1000 1:30 - 3 Microwave Combi function Combine the functions: Turbo Grilling and Microwave. (kg) (°C) (min) Stand‐ ing time (min) Chicken, half, 0.55...
- Page 35 Progress 35 500 - 600 W Heating one-plate Defrosting and heat‐ Cooking egg dishes Simmering stews meals ing frozen meals 300 - 400 W Melting cheese, Simmering Heating baby Cooking / Heat‐ Continuing chocolate, but‐ rice food ing delicate food...
-
Page 36: Care And Cleaning
36 Progress Use the wire shelf. MICRO‐ WAVE COMBI (°C) (min) FUNC‐ TION Cake, True Fan 29 - 31 Turn container 0.7 kg Cooking + around by 1/4, halfway through the cooking time. Potato Turbo Grill‐ 40 - 45 Turn container... -
Page 37: Troubleshooting
Progress 37 Clean all accessories after each use and let them dry. Use a soft cloth with warm water and a mild detergent. Do not clean the accessories in a dish‐ washer. Do not clean the non-stick accessories using abrasive cleaner or sharp- Accessories edged objects. - Page 38 38 Progress What to do if... Problem Possible cause Remedy You cannot activate or oper‐ The oven is not connected Check if the oven is correct‐ ate the oven. to an electrical supply or it is ly connected to the electrical connected incorrectly.
-
Page 39: Environmental Concerns
Progress 39 The necessary data for the service centre is on the rating plate. The rating plate is on the front frame of the oven cavity. Do not remove the rating plate from the oven cavity. We recommend that you write the data here: Model (MOD.) - Page 40 867353458-D-482021...
Need help?
Do you have a question about the PCM43102X and is the answer not in the manual?
Questions and answers