Table of Contents
Advertisement
Advertisement
Table of Contents

Related Manuals for iLive ITB147B


Summary of Contents for iLive ITB147B
- Page 1 User’s Guide for Model ITB147B v1908-01...
- Page 2 Safety Instructions & Warnings Important Safety Instructions FCC Warnings • Read these Instructions. Warning: Changes or modifications to this unit not expressly approved by the party responsible for compliance could void the • Keep these Instructions. user’s authority to operate the equipment. • Heed all Warnings. NOTE: This equipment has been tested and found to comply • Follow all instructions. with the limits for a Class B digital device, pursuant to Part • Do not use this apparatus near water. 15 of the FCC Rules. These limits are designed to provide • Clean only with a dry cloth. reasonable protection against harmful interference in a residential installation. This equipment generates, uses, and can • Do not block any ventilation openings. Install in accordance radiate radio frequency energy and, if not installed and used in with the manufacturer’s instructions. accordance with the instructions, may cause harmful interference • Do not install near any heat sources such as radiators, heat to radio communications. However, there is no guarantee that registers, stoves, or other apparatus (including amplifiers) interference will not occur in a particular installation. If this that produce heat. equipment does cause harmful interference to radio or television • Do not defeat the safety purpose of the polarized or reception, which can be determined by turning the equipment off...
- Page 3 Battery Warnings WArNINg: To reduce the risk of electric CAUTION RISK OF ELECTRIC SHOCK shock, do not remove cover (or back). No DO NOT OPEN • WARNING: Do not ingest the battery, Chemical Burn user-serviceable parts inside. Refer servicing ATTENTION Hazard. to qualified service personnel. RISQUE D' ÉLECTROCUTION NE PAS OUVRIR • If the remote control supplied with this product contains a coin/button cell battery and the coin/button cell battery is The exclamation point within an equilateral swallowed, it can cause severe internal burns in just 2 hours triangle is intended to alert the user to and can lead to death. the presence of important operating and • Keep new and used batteries away from children. Iff the maintenance (servicing) instructions in the battery compartment does not close securely, stop using the literature accompanying the appliance. product and keep it away from children. • If you think batteries might have been swallowed or The lightning flash with arrowhead symbol, placed inside and part of the body, seek immediate medical within an equilateral triangle, is intended to...
-
Page 4: Table Of Contents
Table of Contents Setup ....................5 Features Includes Orientation . -
Page 5: Setup
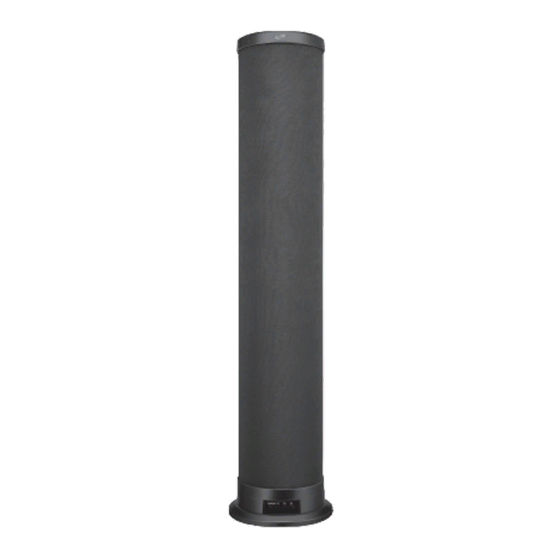
Setup Features • Bluetooth Wireless range: 60 ft. • 2 channel stereo sound • Line In (3.5mm audio input) • Aux In (RCA stereo audio inputs) Includes • Remote control: requires CR2025 battery (included) • RCA stereo audio cable • AC/DC power adapter Power Plug the AC/DC power adapter (included) into a standard wall outlet and the Micro-USB DC power... -
Page 6: Orientation
Orientation Function & Media Source Indicators Speaker Status Indicator Light Power OFF Red Light Line In Mode Green Light Aux In Mode White Light Bluetooth Pairing Flashing Blue Light Bluetooth Connected Blue Light Mute Volume Flashing Source Light (ex. Line In - flashing green) Adjusting Volume Source Light flashes with each... -
Page 7: Rear Inputs
Rear Inputs Aux In (RCA audio inputs) Line In ( 3.5mm audio input) DC Power Input... -
Page 8: Remote
Remote Functions Power Mute Press to turn Press to mute the unit on or off. the volume. Line In Volume Press to switch Press to adjust to Line In mode. the volume. Skip Back/Fwd In Bluetooth mode, Press to switch press to skip the to Bluetooth Mode. -
Page 9: Bluetooth Wireless
Bluetooth Wireless Pairing to a Bluetooth Device and Playing Audio Wirelessly After initial pairing, the unit will stay paired unless unpaired manually by the user or erased due to a reset of the device. If your device should become unpaired or you find it is unable to connect, repeat these steps. button on the speaker or the remote to switch to Bluetooth Mode, 1. -
Page 10: Audio Inputs
Audio Inputs Aux In (Stereo RCA Inputs) Requires an RCA stereo audio cable (included). When connecting an RCA stereo audio cable (Red/White), match the colored ports to their corresponding plugs. 1. Connect the RCA stereo audio cable to the RCA Stereo Inputs on the speaker and the audio outputs on a television or other audio source. -
Page 11: Line In
Line In Requires a 3.5 mm audio cable (not included). 1. Connect the 3.5 mm audio cable to the Line In on the speaker and the audio output/headphone jack on a smartphone or other audio source. 2. Power ON the speaker and press Source to select Line In Mode, indicated by a green light. 3. -
Page 12: Customer Support
Customer Support Contact Information Made Website: www.iLiveElectronics.com Email Support: prodinfo@dpiinc.com Green Email Parts: partsinfo@dpiinc.com Phone Support: 1-888-999-4215 Warranty For Warranty Information and the most up-to-date version of this User’s Guide, go to: www.iLiveElectronics.com International Support Protect for Today Sustain for Tomorrow To download this User’s Guide in English, Spanish, and French, or to get answers to frequently asked questions, visit the support section at: www.iLiveElectronics.com...
Need help?
Do you have a question about the ITB147B and is the answer not in the manual?
Questions and answers