Table of Contents
Advertisement
Quick Links
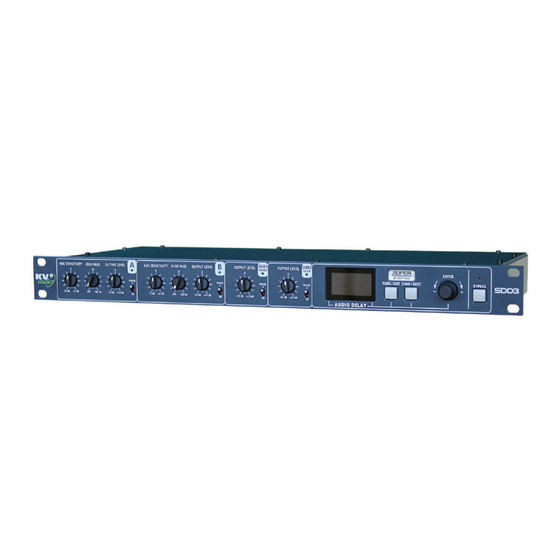
SDD3
User Guide
Super Digital Delay Line
The Future of Sound.
Made Perfectly Clear.
At KV2 Audio our vision is to constantly develop technologies
that eliminate distortion and loss of information providing
a true dynamic representation of the source.
Our aim is to create audio products that absorb you,
place you within the performance and deliver a listening
experience beyond expectations.
Advertisement
Table of Contents

Related Manuals for KV2 Audio KVV 987 302


Summary of Contents for KV2 Audio KVV 987 302
- Page 1 Super Digital Delay Line The Future of Sound. Made Perfectly Clear. At KV2 Audio our vision is to constantly develop technologies that eliminate distortion and loss of information providing a true dynamic representation of the source. Our aim is to create audio products that absorb you, place you within the performance and deliver a listening experience beyond expectations.
- Page 2 6. Clean only with dry cloth. 7. Do not block any ventilation openings. 8. Install in accordance with KV2 Audio's recommended installation instructions. 9. Do not install near any heat sources such as heat radiators, heat registers, stoves or other apparatus that produce heat.
-
Page 3: Table Of Contents
SDD3 · Contents Contents Introduction Introduction Dimensions Getting Started Unpacking Rack mounting AC Power requirements Voltage requirements Connector wiring Features Front Panel 5 - 6 Rear Panel Using the System 8 - 9 Setup Digital part description Menu Subwoofer mode Memory Lock Display... -
Page 4: Introduction
SDD3 · Introduction SDD3 - part number KVV 987 302 (230V) KVV 987 303 (115V) Application Especially designed as a super high quality audio delay line • Fixed installations • Live music and performance • Can be used to enhance the performance of third... -
Page 5: Getting Started
The SDD3 will mount in a standard 19” rack system. Use four screws and washers to mount the SDD3 to the rack rails. We recommend using a shock-mounted rack for touring use to prolong the life of your SDD3. To prevent accidental adjustment of settings, or unwanted tampering in a fixed installation, KV2 Audio provide an additional security panel as an accessory. -
Page 6: Features
SDD3 · Features · Front panel Front Panel Channel A and B ADC sensitivity For optimal analog to digital converter driving, the full range channels (A and B) are equipped with ADC sensitivity control which increases input level and reduces output level at the same time, so the level pass in the SDD3 does not change when adjustings the ADC sensitivity. - Page 7 SDD3 · Features · Front panel Front Panel Display Indicates the input levels for each channel separately. Shows the set delays and allows settings of various functions in the menu. Function / Exit button Allows the operator to toggle between three main screeens - LEVELS, DELAY, MENU. When you are inside the menu, the button serves as exit.
-
Page 8: Rear Panel
SDD3 · Features · Rear panel Rear Panel Power Connection Plug power connector For connection to a standard IEC 3-pole AC connector. Before connecting make sure that the mains voltage corresponds to the SDD3's voltage requirements as stated on the unit. Power switch Used to turn the SDD3 on or off. -
Page 9: Using The System
SDD3 · Using the System Delay for additional PA / fill-in delay, with mono cardioid subwoofers in center The main PA works directly, without delay. The left and right channel of the secondary, or side-fill PA works through the full range channels of the SDD3, (channel A and B) for proper time alingment with the main PA. - Page 10 SDD3 · Using the System Delay for main mono PA, delay for additional PA / mono fill-in delay, with stereo cardioid One SDD3 controls one channel of the system, the second channel controls the second SDD3 unit. The main PA works through SDD3 channel A to delay the PA for optimal time alingment with the stage position. The secondary, or side-fill PA works through the full range channel B of SDD3 for proper time alingment with the main PA.
-
Page 11: Setup
SDD3 · Setup Digital part description The SDD3 has three main display screens for setup and input levels indication. Main screens are: LEVEL - for input levels indications, DELAY for delay setup and MENU for attributes settings. For switching between these screens use FUNC/EXIT button. -
Page 12: Menu
SDD3 · Setup Menu Units mode Delay mode Delay can be set in time (miliseconds) or in distance (meters or feets depending on Units setup). When switching between time and distance, the delay time is kept and recalculated to each other. The delay distance depends on the ambient temperature. -
Page 13: Subwoofer Mode
SDD3 · Setup Subwoofer mode For cardioid setup, you can calculate and set the delay for each subwoofer manually, or you can use cardioid setup in the SDD3 menu. For manual - idependent sub outputs setup, use the normal mode. For cardioid setup use the cardioid mode. When cardioid mode is selected, the subwoofer outputs are linked together with λ/4 distance between front and rear subwoofer outputs. -
Page 14: Memory
SDD3 · Setup Memory New memory SDD3 is equipped with a dynamic memory list with up to 30 memory positions. New memory can be created when pressing ENTER at New in the memory list. When a new memory is created, it is marked with a position number from 1 to 30 whilst the memory function select is switched to the rename position. -
Page 15: Lock
SDD3 · Setup Lock The SDD3 is equipped with an option to lock the setup of the dital control part. The SDD3 can be locked using four arbitrary capital letters. When the SDD3 unit is locked, it is not possible to change digital parameters. LEVEL meters and delay settings are still visible. -
Page 16: Display
SDD3 · Setup Display The SDD3 is equipped with a high-contrast organic - LED display. Contrast The contrast of the display can be set in the range from 10% to 100% for comfortable use, depending on ambient lighting. Autodim To ensure long life of the display, the display automatically reduce s the contrast when the unit is not currently used. -
Page 17: Block Diagram
SDD3 · Block Diagram Block Diagram... -
Page 18: Dimensions
SDD3 · Dimensions Dimensions... -
Page 19: Input Cables And Output Cables
SDD3 · Input Cables and Output Cables Input Cables and Output Cables SDD3 Input Cables XLR output - XLR input Jack output (balanced) - XLR input Jack output (unbalanced) - XLR input Pin 2 - Pin 2 (Hot) - Pin 2 (Hot) - Pin 2 (Signal) Pin 3 - Pin 3 (Cold) -
Page 20: Specifications
SDD3 · Specifications Specifications System Acoustic Perfomance -1dB Response 2Hz to 40kHz -10dB Response 2Hz to 100kHz Sampling Frequency 20MHz, PDM Dynamic Range >105dB Channel Crosstalk 90dB Signal to Noise Ratio 105dB Total Harmonic Distortion <0.005% Signal Input Input Channels 2 Full range + 1 Subwoofer Input Impedance 20kΩ... -
Page 21: Warranty · Service
If the unit needs to be shipped back to the factory, it must be sent in its original carton. If improperly packed, the unit may be damaged. To obtain service, contact your nearest KV2 Audio Service Centre, Distributor or Dealer. - Page 22 The Future of Sound. Made Perfectly Clear. KV2 Audio International Nádražní 936, 399 01 Milevsko Czech Republic Tel.: +420 383 809 320 Email: info@kv2audio.com www.kv2audio.com KVV120093-00-02-0...
Need help?
Do you have a question about the KVV 987 302 and is the answer not in the manual?
Questions and answers