Advertisement
Quick Links
Operation Manual
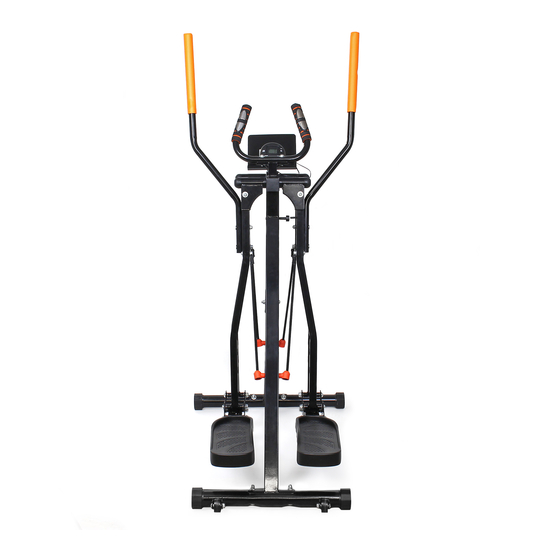
Air-Walker/Crosstrainer
62712
Illustration similar, may vary depending on model
Read and follow the operating instructions and safety information before using for the first time.
Technical changes reserved!
Due to further developments, illustrations, functioning steps and technical data can differ insignific -
antly.
Updating the documentation
If you have suggestions for improvement or have found any irregularities, please contact us.
Advertisement

Summary of Contents for WilTec 62712
- Page 1 Operation Manual Air-Walker/Crosstrainer 62712 Illustration similar, may vary depending on model Read and follow the operating instructions and safety information before using for the first time. Technical changes reserved! Due to further developments, illustrations, functioning steps and technical data can differ insignific - antly.
- Page 2 All rights reserved. The WilTec Wildanger Technik GmbH cannot be held accountable for any possible mistakes in this operating manual, nor in the diagrams and figures shown.
- Page 3 This product is intended for home use only. • Caution! The instructions must be followed carefully when assembling, using and maintain- • ing the appliance. © by WilTec Wildanger Technik GmbH Item 62712 Page 3 http://www.WilTec.de http://www.aoyue.eu 05 2021-1 http://www.teichtip.de...
- Page 4 Make sure to check the product regularly (weekly is recommended). • Make sure all fasteners are tight before use. • Always replace damaged or worn components with original parts. • Parts and part names © by WilTec Wildanger Technik GmbH Item 62712 Page 4 http://www.WilTec.de http://www.aoyue.eu 05 2021-1 http://www.teichtip.de...
- Page 5 Progress tracker Phone/tablet holder Screws Assembly of the Air-Walker Step 1 Fold out the legs of the A-frame and screw in the support bolts (9). © by WilTec Wildanger Technik GmbH Item 62712 Page 5 http://www.WilTec.de http://www.aoyue.eu 05 2021-1 http://www.teichtip.de...
- Page 6 While the legs are vertical, push the pin in completely and lower the treads. If the pin does not push in, do not use force, but move the leg slightly to release the pin and try again. © by WilTec Wildanger Technik GmbH Item 62712 Page 6 http://www.WilTec.de...
- Page 7 Step 4 Raise the legs and insert the soft shock absorbers on both sides. Step 5 Secure the mobile phones/tablet holder with the screws no. 14. © by WilTec Wildanger Technik GmbH Item 62712 Page 7 http://www.WilTec.de http://www.aoyue.eu 05 2021-1...
- Page 8 Attach the fixed handles. Use screw no. 6 and washers no. 7 for this. Step 7 Attach the wires to the progress tracker before plugging in the heart rate monitor cable and sliding the tracker on. © by WilTec Wildanger Technik GmbH Item 62712 Page 8 http://www.WilTec.de http://www.aoyue.eu...
- Page 9 Attach the movable handles, making sure that the bends face outwards. Use screws no. 6 and wash- ers no. 7. Step 9 Set your resistance levels and get going. © by WilTec Wildanger Technik GmbH Item 62712 Page 9 http://www.WilTec.de http://www.aoyue.eu...
- Page 10 4. We wish you a successful workout with lots of exercise. Important notice: The reprint or reproduction, even of excerpts, and any commercial use, even in part of this instructions manual require the written permission of WilTec Wildanger Technik GmbH. © by WilTec Wildanger Technik GmbH Item 62712 Page 10 http://www.WilTec.de...
Need help?
Do you have a question about the 62712 and is the answer not in the manual?
Questions and answers