
Related Manuals for Maytag MFT2772HEZ


Summary of Contents for Maytag MFT2772HEZ
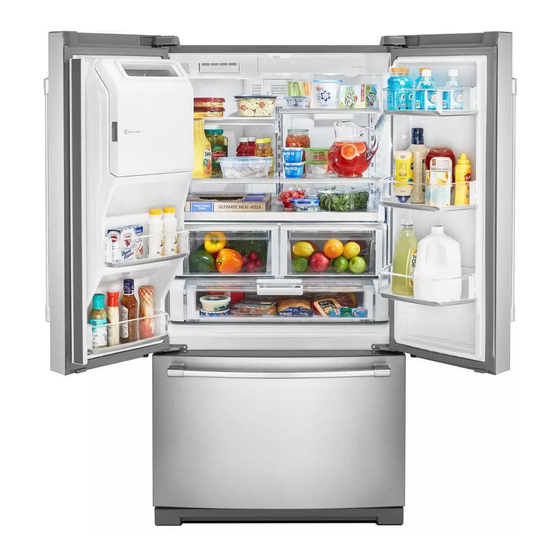
- Page 1 French Door Bottom Mount Refrigerator Use & Care Guide www.maytag.com www.maytag.ca Canada: 1-800-807-6777 U.S.: 1-800-688-9900 W11218737B...
-
Page 2: Table Of Contents
Congratulations on your purchase and welcome to the Please read the Use and Care Instructions in this guide Maytag Brand family o f high-quality appliances. Your new before operating your new refrigerator. Like all appliances, Maytag French Door Refrigerator combines advanced cooling your refrigerator may require maintenance or repair from technology with simple operation and high efficiency. -
Page 3: Refrigerator Safety
REFRIGERATOR SAFETY Your safety and the safety of others are very important. We have provided many important safety messages in this manual and on your appliance. Always read and obey all safety messages. This is the safety alert symbol. This symbol alerts you to potential hazards that can kill or hurt you and others. All safety messages will follow the safety alert symbol and either the word “DANGER”... -
Page 4: Proper Disposal Of Your Old Refrigerator
Proper Disposal of Your Old Refrigerator WARNING Suffocation Hazard Remove doors from your old refrigerator. Failure to do so can result in death or brain damage. IMPORTANT: Child entrapment and suffocation are not problems of the past. Junked or abandoned refrigerators are still dangerous—even if they will sit for “just a few days.”... -
Page 5: What's New Behind The Doors
What’s New Behind the Doors? Your Maytag ® French Door Refrigerator comes equipped with various innovative storage and energy efficient features. Energy and Normal Operating Sounds Water Filter Your new French Door Bottom Mount refrigerator has been Certified filter reduces chlorine taste and odor, particulates ®... -
Page 6: Installation Instructions
INSTALLATION INSTRUCTIONS Unpack the Refrigerator WARNING When Moving Your Refrigerator: Your refrigerator is heavy. When moving the refrigerator for Excessive Weight Hazard cleaning or service, be sure to cover the oor with cardboard or hardboard to avoid oor damage. Always pull Use two or more people to move and install the refrigerator straight out when moving it. -
Page 7: Remove And Replace Refrigerator Doors
Remove and Replace Refrigerator Doors NOTE: Measure the width of your door opening, to see whether or not you need to remove the refrigerator doors to move the refrigerator into your home. If door removal is necessary, see the following instructions. IMPORTANT: If the refrigerator was previously installed and you are moving it out of the home, before you begin, turn the refrigerator control OFF. -
Page 8: Remove Right-Hand Refrigerator Door
Remove Right-Hand Refrigerator Door Remove Left-Hand Refrigerator Door IMPORTANT: The tubing and wiring for the water dispenser run WARNING through the left-hand door hinge, so they must be disconnected before removing the door. 1. Using a Phillips screwdriver, remove the cover from the top hinge. -
Page 9: Replace Right-Hand Refrigerator Door
3. Disconnect the wiring plug located on top of the door hinge. Replace Right-Hand Refrigerator Door Grasp each side of the wiring plug. With your left thumb, ■ press down to release the catch and pull the sections of 1. Set the right-hand door onto the bottom hinge pin. the plug apart. -
Page 10: Remove And Replace Freezer Drawer Front
Remove and Replace Freezer Drawer Front Depending on the width of your door opening, it may be 3. Replace and tighten the two screws at the top of the drawer necessary to remove the freezer drawer front to move the front (one on the left-hand side and one on the right-hand refrigerator into your home. -
Page 11: Electrical Requirements
Electrical Requirements Before you move your refrigerator into its final location, it is WARNING important to make sure you have the proper electrical connection. Recommended Grounding Method A 115 V, 60 Hz, AC only 15 or 20 A fused, grounded electrical supply is required. -
Page 12: Connect To Water Line
Connect to Water Line Connect to Refrigerator IMPORTANT: If you turn the refrigerator on before the water is Follow the connection instructions specific to your model. connected, turn the ice maker OFF. Style 1 1. Unplug refrigerator or disconnect power. 1. -
Page 13: Complete The Installation
4. Install the water supply tube clamp around the water supply Complete the Installation line to reduce strain on the coupling. 5. Turn shutoff valve ON. WARNING 6. Check for leaks. Tighten any connections (including connections at the valve) or nuts that leak. 7. -
Page 14: Remove The Handles
9. With the drawer(s) closed, place the handle onto the shoulder 12. Using a left to right motion tighten the setscrew a quarter-turn screws so that the setscrews are facing down toward the at a time just until it begins to contact the shoulder screw. Do floor. - Page 15 4. Make sure the doors close easily. If you are satisfied with the 5. Make sure the doors are even at the top and that the space door opening and closing, skip the next section and go to between the bottom of the refrigerator doors and the top of “Align the Doors.”...
-
Page 16: Filters And Accessories
FILTERS AND ACCESSORIES Water Filtration System 5. Turn the filter clockwise 90 degrees (1/4 turn), until it locks Do not use with water that is microbiologically unsafe or into the housing. of unknown quality without adequate disinfection before NOTE: If the filter is not correctly locked into the housing, the or after the system. -
Page 17: Replace The Water Filter
Replace the Water Filter To purchase a replacement water filter, see “Accessories.” 2. Turn the water filter counterclockwise (to the left), and pull it straight out of the compartment. Replace the disposable water filter when indicated on the water filter status display or at least every 6 months. If water flow to NOTE: There may be some water in the filter. -
Page 18: Replacing The Air Filter
Models without notches: 1. Remove the used air filter by squeezing in on the side tabs. 2. Remove the used status indicator. Place the indicator somewhere it is easily visible — either ■ inside the refrigerator, or elsewhere in your kitchen or home. 3. -
Page 19: Installing The Status Indicator
® order an accessory, contact us and ask for the part number. In U.S.A., order Part #W10355010 In Canada, order Part #W10355010B In the U.S.A., visit our www.maytag.com/accessories accessories or call 1-800-901-2042. Water Filter: Order Part #W10413645A or FILTER2 In Canada, visit our webpage www.maytag.ca or call 1-800-807-6777. -
Page 20: Refrigerator Use
REFRIGERATOR USE Opening and Closing Doors There are two refrigerator compartment doors. The doors can be opened and closed either separately or together. There is a vertically-hinged seal on the left refrigerator door. When the left side door is opened, the hinged seal ■... -
Page 21: Cooling On/Off
The recommended set points should be correct for normal 3. Press the adjust UP ARROW to raise the temperature ■ household use. The controls are set correctly when milk or set point or press the adjust DOWN ARROW to lower the juice is as cold as you like and when ice cream is firm. -
Page 22: Options
NOTE: REPLACE will remain illuminated if a filter is not installed Options or installed incorrectly. Style 1 To access available features, press the OPTIONS button to toggle through the following choices in a continuous loop: Fast Ice - The Fast Ice feature assists with temporary periods ■... -
Page 23: Water And Ice Dispensers
Water and Ice Dispensers IMPORTANT: If necessary, remove the ice clogging the storage bin and ■ delivery chute, using a plastic utensil. Allow 3 hours for the refrigerator to cool down and chill water. ■ Clean the ice delivery chute and the bottom of the ice storage ■... -
Page 24: The Dispenser Light
1. Press a sturdy glass against the dispenser paddle. The Dispenser Light 2. Remove the glass to stop dispensing. To Dispense Ice and Water When you use the dispenser, the light will automatically turn on. Two dispenser types will be shown on the control panel. Either To turn on the light when you are not dispensing: Water and Crushed Ice or Water and Cubed Ice will appear on the Press LIGHT to toggle through the following choices in a... -
Page 25: Style 2 - Ice Maker In The Freezer (On Some Models)
Your ice maker has an automatic shutoff. The sensor will ■ Style 2 - Ice Maker in the Freezer (on some automatically stop ice production if the storage bin is full, models) if the door is open or the storage bin is removed. The control will remain in the ON (left) position. -
Page 26: Crisper And Crisper Cover
Crisper and Crisper Cover To remove the crisper(s) cover: To remove and replace the crisper(s): 1. Slide crisper(s) straight out to the stop. Lift the crisper(s) from 1. Remove crisper(s). the slide rails and pull out the rest of the way. 2. -
Page 27: Drawer Removal And Replacement
To replace the divider: Drawer Removal and Replacement 1. Position the divider so that the features on the bottom of the divider align with the matching features in the drawer. To remove the drawer: 2. Lower the divider into place. 1. -
Page 28: Refrigerator Care
REFRIGERATOR CARE Cleaning Style 2 - Stainless Steel IMPORTANT: WARNING Damage to stainless steel finish due to improper use of ■ cleaning products, or using non-recommended cleaning products, is not covered under the warranty. DO USE DO NOT USE Soft, clean cloth Abrasive cloths ✔... -
Page 29: Condenser Cleaning
Condenser Cleaning There is no need for routine condenser cleaning in normal 3. Use a vacuum cleaner with a soft brush to clean the grille, the home operating environments. If the environment is particularly open areas behind the grille and the front surface area of the greasy or dusty or there is significant pet traffic in the home, the condenser. -
Page 30: Troubleshooting
TROUBLESHOOTING First try the solutions suggested here. If you need further assistance or more recommendations that may help you avoid a service call, refer to the warranty page in this manual, or visit www.maytag.com/product_help. In Canada, visit www.maytag.ca. Contact us by mail with any questions or concerns at the address below: In the U.S.A.:... -
Page 31: Noise
PROBLEM POSSIBLE CAUSES SOLUTIONS The motor seems to run too High efficiency compressor and fans Larger, more efficient refrigerators run longer at lower, more much energy efficient speeds. The room or outdoor temperature is It is normal for the refrigerator to work longer under hot. -
Page 32: Temperature And Moisture
PROBLEM POSSIBLE CAUSES SOLUTIONS Pulsating/Whirring Fans/compressor adjusting to optimize performance This is normal. during normal compressor operation Popping Contraction/expansion of inside walls, especially during This is normal. initial cool-down Hissing/Dripping Flow of refrigerant, or flow of oil in the compressor This is normal. -
Page 33: Ice And Water
PROBLEM POSSIBLE CAUSES SOLUTIONS Temperature is too cold in the The refrigerator air vent(s) are blocked. If the air vent located in the top, left, rear corner of the refrigerator/crisper refrigerator compartment is blocked by items placed directly in front of it, the refrigerator will get too cold. Move items away from the air vent. - Page 34 PROBLEM POSSIBLE CAUSES SOLUTIONS The ice cubes are hollow The water shutoff valve is not fully Turn the water shutoff valve fully open. or small open. NOTE: This is an indication There is a kink in the water source line. A kink in the line can reduce water flow.
- Page 35 PROBLEM POSSIBLE CAUSES SOLUTIONS The water and ice The refrigerator is not connected to Connect the refrigerator to the water supply and turn the water dispenser will not operate a water supply or the water supply shutoff valve fully open. properly shutoff valve is not turned on.
-
Page 36: Doors
PROBLEM POSSIBLE CAUSES SOLUTIONS Water from the dispenser is Water from the dispenser is chilled This is normal. warm to 50°F (10°C). The refrigerator has just been Allow 24 hours after installation for the water supply to cool installed. completely. A large amount of water was Allow 3 hours for the water supply to cool completely. -
Page 37: Performance Data Sheet
PERFORMANCE DATA SHEET Water Filtration System Model P9WB2L/P9RFWB2L Capacity 200 Gallons (757 Liters) System tested and certified by NSF International against NSF/ANSI Standard 42, Standard 53, and Standard 401 for the reduction of contaminants specified on the Performance Data Sheet. This system has been tested according to NSF/ANSI Standards 42, 53, 401, and CSA B483.1 for the reduction of the substances listed below. -
Page 38: Warranty
Please take a few minutes to review the Troubleshooting or Problem Solver section of the Use and Care Guide, or visit https://www.maytag.com/product_help. 2. All warranty service is provided exclusively by our authorized Maytag Service Providers. In the U.S. and Canada, direct all requests for warranty service to: Maytag Customer eXperience Center In the U.S.A., call 1-800-688-9900. - Page 40 Serial Number Model Number Country Call or Visit Us Online At Write U.S.A. 1-800-688-9900 www.maytag.com Maytag Brand Home Appliances Customer eXperience Center 553 Benson Rd. Benton Harbor, MI 49022-2692 Canada 1-800-807-6777 www.maytag.ca Maytag Brand Home Appliances Customer eXperience Center 200 – 6750 Century Ave.
Need help?
Do you have a question about the MFT2772HEZ and is the answer not in the manual?
Questions and answers