Advertisement
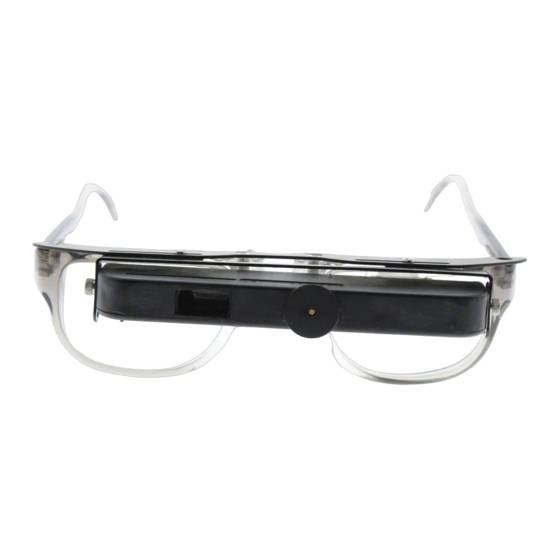
Positioning the VES
The VES
is a monocular telescopic system.
®
The choice of which eye to choose for the
prescription of the VES
®
is a function of which has the better visual
acuity as well as the patient's preferred
sighting eye. The VES
gives you the option
®
to evaluate either eye, as it is completely
interchangeable for the right or the left.
Focusing is Quick and Convenient
Adjusting the focus of the VES
The front focusing knob doubles as a
focusing correction for the patient's
prescription as well as to focus the
telescope for different distances.
Changing the Positioning of the Telescope
From Standard to Low Mounting Position
The VES
can be prescribed in the standard
®
"above the frame" position or in the optional
"low mounting" position. The choice of the
appropriate positioning is a function of the
intended use of the device as well as the
anatomical features of the patient. Patients
with wide or high bridges may prefer the low
mounting position, as do users who intend to
use it for intermediate and near rather than
distance tasks.
Bottom mounting is accomplished by
attaching the telescope beneath the
mounting plate rather than above it using
the optional bottom mounting bracket as
described in the four steps that follow:
(The standard mounting bracket will work
in many circumstances, however the
optional bottom bracket will provide a wider
range of adjustment.)
Ocutech VES
(Vision Enhancing System)
Fitting Guide
®
for the Proper Eye
in binocular patients
is easy.
®
If the VES
is not positioned
®
on the frame for the proper eye,
remove the "side screws" with
the allen wrench and flip the
telescope over to position it for
the proper side. Then re-insert
the "side screws".
Demonstrate the convenient
focusing of the VES
®
cautioning the patient not to
block the front window opening
of the telescope.
1. Remove the VES
from the
®
bracket by unscrewing the allen
screws from each end.
2. Remove the bracket from the
mounting plate by removing the
two bottom screws.
3. Reattach the bottom mounting
bracket beneath the mounting
plate with the feet facing toward
the back of the frame.
4. Attach the telescope back onto
the bracket with the back of the
telescope flush to the front of
the bridge of the frame and the
bottom screws coming down
through the top of the plate.
Use of a screw-holding screwdriver
is recommended.
(Available from Ocutech and
included in the diagnostic kit.)
II
®
© OCUTECH
© OCUTECH
© OCUTECH
© OCUTECH
Frame should position
slightly higher on the bridge.
© OCUTECH
The eyepiece should position
slightly above the pupil
shown here.
Advertisement
Table of Contents

Related Manuals for Ocutech VES II


Summary of Contents for Ocutech VES II
- Page 1 Use of a screw-holding screwdriver © OCUTECH is recommended. in many circumstances, however the The eyepiece should position (Available from Ocutech and optional bottom bracket will provide a wider slightly above the pupil included in the diagnostic kit.) range of adjustment.)
- Page 2 NOT DOWN THE NOSE. brightest image. telescope in position. ® 109 Conner Drive, Suite 2105, Chapel Hill, NC 27514 USA +1 (800) 326-6460 • +1 (919) 967-6460 • Fax: +1 (919) 967-8146 Info@ocutech.com • www.ocutech.com Effective August 2010...
Need help?
Do you have a question about the VES II and is the answer not in the manual?
Questions and answers