Table of Contents
Advertisement
Quick Links
Advertisement
Table of Contents

Related Manuals for Leibinger JET Rapid

Summary of Contents for Leibinger JET Rapid
- Page 1 Technical information The new LEIBINGER High Speed Line Version 2.4...
- Page 2 Page 2 of 61...
-
Page 3: Table Of Contents
JET Rapid Wire with Wire print head and beveled print head cover ......20 3.4.3 JET Rapid Wire PI with Wire print head and stepped print head cover ...... 21 3.4.4 JET Rapid Wire PI with Wire print head and stepped print head cover ...... 21 Features and applications ..................... - Page 4 Available print modes for the JET Rapid Wire / Rapid Wire PI ......... 38 JET Rapid Wire – Rapid Wire PI - JET Rapid with option Speed Plus - Print head adjustments and exchange of print head- parts ................39 7.2.1...
-
Page 5: Introduction
It is highly recommended thoroughly checking the manuals and the accessories catalogue for the differences between the JET3up and the JET3 JET Rapid series. The following list gives an overview about the parts that are different for the JET Rapid series in comparison to the JET3up: Controller board... -
Page 6: The Jet Rapid Printer
If, for instance, a print job for the JET3up printed with the 32-dot high quality print mode allows a printing speed of 30 meter/minute, it will be possible to print the same job with the JET Rapid at a speed of around 40 m/min. -
Page 7: The Speed Plus Option
The JET Rapid printer 2.2 The Speed Plus option The SPEED PLUS option for the JET Rapid comes with a special Speed Plus print head, which provides single line printouts up to a speed of 800 m/min. With the special design, it is possible to mount the print head in a slightly inclined position. This will prevent the printer from contaminations by bursting ink drops. -
Page 8: Technical Data Jet Rapid
15mm. There are no special recommendations regarding the settings for the print height. The print mode selected has a direct effect on the maximum printing speed. However, the JET Rapid provides a 30% higher printing speed in comparison to a JET3up with the same print mode settings. - Page 9 The JET Rapid printer Print modes This column shows the print modes available for the JET3up JET Rapid Wire and JET3up Wire PI. The speed modes work with one dot less in full strokes. The small modes place the dots closer to each other than the standard modes.
- Page 10 Parameter Settings for the option Speed Plus Print mode Height [mm] Recommended stroke Speed [m/min] distance [mm] Print height setting [% 1 dot ------- 0,15 – 0,29 580 - 800 Line mode 100% PH 3x7 dots 1,2 – 1,7 mm 0,3 –...
-
Page 11: Features And Applications
The JET Rapid printer 2.5 Features and applications The JET Rapid printer itself and in combination with option SPEED PLUS cover a wide range of high speed applications. 2.5.1 Overview about features and applications JET Rapid Option SPEED PLUS Up to 800 m/min maximum printing •... -
Page 12: Cleaning Requirements
Print samples: JET Rapid in comparison with JET3up – 2D codes The print samples show that the JET Rapid provides the same print quality as the JET3up but at a 30% higher production speed. The printouts of the JET Rapid are a shade lighter than the printouts of the JET3up. -
Page 13: Print Sample: Jet Rapid With 70000-00031 Ink
[A] < Vertical Print Growth = +10% of X The PQA show the highest readability for the printouts of a JET Rapid with the small-drop-ink 70000- 00031. The smaller nozzle size combined with a small-drop-ink has no significant effects on the Print Quality Assessment (PQA). -
Page 14: Print Samples: Jet Rapid In Comparison With Jet3Up - 2D Codes
Print samples: JET Rapid in comparison with JET3up – 2D codes The print samples show that the JET Rapid provides the same print quality as the JET3up but at a 30% higher production speed. The printouts of the JET Rapid are a shade lighter than the printouts of the JET3up. -
Page 15: Overview: The Jet Rapid And The Option Speed Plus
The JET Rapid printer 2.7 Overview: The JET Rapid and the option SPEED PLUS JET3up RAPID 128 kHz drop 55 µm Nozzle frequency print head Option: Speed+ SK6 Print head cover 128 kHz drop 50 µm Nozzle frequency SK6 HS •... -
Page 16: The Jet Rapid Wire And Jet Rapid Wire Pi Printer
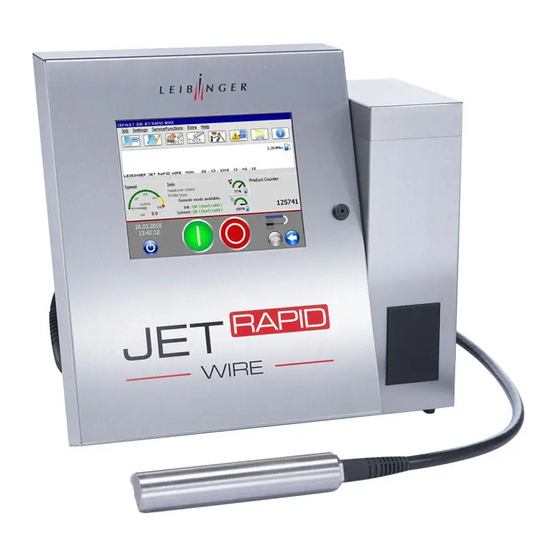
The JET Rapid Wire and JET Rapid Wire PI printer 3.1 General description of the JET Rapid Wire and JET Rapid Wire The JET Rapid Wire / JET Rapid Wire PI works with a special Wire print head. The printer comes with two special head covers:... -
Page 17: Print Head With Beveled Design
The JET Rapid Wire and JET Rapid Wire PI printer 3.2.2 Print head with beveled design For objects with larger diameters, it is recommended using the beveled print head cover. With the special design, it is possible to mount the print head in a slightly inclined position. This will prevent the printer from becoming contaminated by bursting ink drops. -
Page 18: General Technical Specifications Jet Rapid Wire / Jet Rapid Wire Pi
3.3 General technical specifications JET Rapid Wire / JET Rapid Wire PI 3.3.1 Overview JET Rapid Wire Wire print head with stepped head cover Wire print head with beveled head cover Print head Wire Wire Print head dimensions 217 mm... -
Page 19: Basic Parameters For Print Height, Stroke Distance And Speed
Print modes This column shows the print modes available for the JET3up JET Rapid Wire and JET3up Wire PI. The speed modes work with one dot less in full strokes. The small modes place the dots closer to each other than the standard modes. -
Page 20: Jet Rapid Wire With Wire Print Head And Stepped Print Head Cover
3.4.1 JET Rapid Wire with Wire print head and stepped print head cover Print mode Height [mm] Recommended Speed [m/min] stroke distance [mm] Print height setting [% 1 dot ------- 0,15 – 0,26 580 - 1000 Line mode 100% PH 3x7 dots 1,0 –... -
Page 21: Jet Rapid Wire Pi With Wire Print Head And Stepped Print Head Cover
The JET Rapid Wire and JET Rapid Wire PI printer 3.4.3 JET Rapid Wire PI with Wire print head and stepped print head cover Print mode Height [mm] Recommended Speed [m/min] stroke distance Print height setting [% PH] [mm] 1 dot ------- 0,15 –... -
Page 22: Features And Applications
3.5 Features and applications 3.5.1 JET Rapid Wire - Overview about features and applications Print head cover Beveled print Stepped print head head cover cover Up to 800 m/min maximum printing • Features 1000 m/min maximum printing speed in •... -
Page 23: Jet Rapid Wire Pi - Overview About Features And Applications
The JET Rapid Wire and JET Rapid Wire PI printer 3.6.1 JET Rapid Wire PI - Overview about features and applications Print head cover Beveled print Stepped print head head cover cover • High-speed printing with pigmented Features • High-speed printing with pigmented... -
Page 24: Ink List Jet Rapid Wire
Attention Due to the higher printing speed of the JET Rapid printers, the number of printouts per time unit may be much higher than with the JET3up. Therefore, it is necessary to check the gutter tube for ink staining on a regular basis. -
Page 25: Print Samples
3.8.2 Print samples: JET Rapid Wire in comparison with JET Rapid The print sample show that with a 7x5 font the JET Rapid Wire has quality advantages compared with the JET Rapid at speed higher than 200 m/min. JET Rapid Wire - 200 m/min... -
Page 26: Print Sample: Jet Rapid Wire Cable Printouts
3.8.3 Print sample: JET Rapid Wire cable printouts The following example show the printout quality of the JET Rapid Wire a printer at 800 m/min with the beveled print head and at 1000 m/min with the stepped print head. Printout JET Rapid Wire / 1000 m/min / 3x7 tower font/ full printout... -
Page 27: Which Printer For Which Applications
1000 m/min. The JET Rapid is a good choice for applications for which the JET3up is not fast enough for the printout quality required. The JET Rapid provides the same print modes as the JET3up but it is possible to work at speeds that are up to 30% higher in comparison with the JET3up. -
Page 28: Overview: The Leibinger High Speed Line
4.1 Overview: The LEIBINGER HIGH SPEED LINE February 2019 Page 28 of 61... -
Page 29: Jet Rapid Wire: The Print Head Ventilation
5.1 Basics about the functionality The print head of the JET Rapid Wire has to be mounted at a distance between nearly zero und 5 mm to the substrate. This close installation provides the shortest trajectories for ink droplets. This is the basic requirement for a fast and precise printout. -
Page 30: Technical Details
5.2 Technical details The JET Rapid Wire and the option Speed Plus are equipped with a connector for compressed air. The connector is located on the back panel of the hydraulic cabinet. Connector for compressed air Technical data Maximum input pressure: 10 bar (145.035 psi) -
Page 31: Information About Encoders
X1 encoder input interface of the printer. 6.1 Basics Regarding speed measuring the JET Rapid printers work with internal speed as well as with an external encoder. An external encoder has the advantage that a varying production speed would not affect the quality of the printout. -
Page 32: The Specifications Of The Encoder Input Of The Printer
6.3 The specifications of the encoder input of the printer The JET Rapid printer offers 3 different signal inputs: An input for RS422 signals An input for HTL signals An input for TTL signals Each type of input has its own specifications regarding the voltage levels, the input resistance and the maximum frequency. -
Page 33: Recommendations Regarding The Encoder / Printer Combination For High Speed Applications
When designing a high speed application for a JET Rapid printer, the first step has to be the selection of an appropriate encoder! The following chapter provides an example based on the shaft encoder from the LEIBINGER accessories catalogue. -
Page 34: Appendix
Ink selection (JET Rapid , JET Rapid Wire): The availability of inks depends on the type of JET Rapid. There are specific ink types tested and approved for the JET Rapid printer series and for these inks, the operator will find default settings in the hydraulic menu. - Page 35 3. The settings are confirmed with a click on the button <Yes>. Confirm the settings With an unapproved ink The ink 70000-00105 is not approved for the JET Rapid printer. With this ink selected, no default values will be listed. No defaults value will be listed for an...
-
Page 36: Print Modes
Select <Settings> in the menu of the job editor and then select the <Printstyle> tab. • Information The available print modes for the JET Rapid are the same as for the JET3up. For the JET Rapid are the same print modes available as for the JET3up. -
Page 37: Available Print Modes For The Jet Rapid With The Option Speed Plus
Appendix 7.1.2.2 Available print modes for the JET Rapid with the Option Speed Plus The following steps show how to get to the <Printstyle> tab in the <Job settings> dialog box. Select <Settings> in the menu of the job editor and then select the <Printstyle> tab. -
Page 38: Available Print Modes For The Jet Rapid Wire / Rapid Wire Pi
7.1.2.3 Available print modes for the JET Rapid Wire / Rapid Wire PI The following steps show how to get to the <Printstyle> tab in the <Job settings> dialog box. Select <Settings> in the menu of the job editor and then select the <Printstyle> tab. -
Page 39: Jet Rapid Wire - Rapid Wire Pi - Jet Rapid With Option Speed Plus - Print Head Adjustments And Exchange Of Print Head- Parts
Attention The following service documentation has three sections: Adjustment of the ink jet for JET Rapid Wire, Rapid Wire PI and JET Rapid with option Speed Plus. For JET Rapid see chapter 7.3 JET Rapid - Print head adjustments and exchange of print head- parts •... - Page 40 2. Touch the soft key <Hydraulic settings> (1) and change to the menu <Print head> (2). Turn off the function <Ink-Flow-Sensor> (3) 1 – Softkey <Hydraulik settings> 2 – Menu <Print head> 3 – Button <Ink Flow Sensor> 3. Use the hex key to untighten the mounting screws of the cover. You do not have to remove the screws.
- Page 41 Appendix 4. Switch to the tab <Print head> (1) and touch the left arrow button in order to open the nozzle (2) completely. The wire print head with the nozzle opened 1 – Tab <Print head> 2 – Arrow Button for opening the nozzle 5.
- Page 42 6. Use a 1,5 hex key for the two adjusting screws 1 and 2 of the nozzle retainer to adjust the ink jet. Screw 2: Jet adjustment left /right Screw 1: Jet adjustment up/down Attention The adjusting screws have a lost motion. Changing the rotational direction during the adjustment procedure will not have an immediate effect.
- Page 43 • The pictures below show the JET Rapid Wire. The adjustment procedure for the JET Rapid or the JET Rapid with the option Speed Plus is just the same! Correct adjustment ...
-
Page 44: Adjustment Of The Drop Production Unit
7.2.2 Adjustment of the drop production unit JET Rapid Wire - JET Rapid Wire PI – JET Rapid with option Speed Plus Attention The following steps are only necessary after the entire drop production unit • was disassembled and reassembled e.g. after exchanging defective parts. - Page 45 Appendix * The distance of 0,1mm must also be checked and/or adjusted after: • - Exchange or removal of nozzle / sealing ring - Exchange of removal retaining plate • Bring the print head in adjustment Use a feeler gauge with a 0,1 mm blade. position and switch OFF the ink jet.
- Page 46 4. Check and adjust the ink stream position Switch on the Ink flow sensor by pushing the button <Ink flow sensor active> (1) again. • Push the button <Jet Adjust> (2). The nozzle opens automatically to the • <Jet adjust position> (ca. 2100 -2300) Check the ink jet: The jet must be positioned at the inner edge of the charging tunnel: •...
- Page 47 Appendix 5. After adjusting the ink jet and swivel mechanic, refasten the five mounting screws. Then recheck the position of the ink jet. 6. Close the nozzle seal and mount the cover. Attention Be careful not to damage any tubes or cables. Reassemble the cover and fix the mounting screws 7.
-
Page 48: Adjusting The Distance Between Ink Jet And Ink Drop Voltage Detector
Adjusting the distance between ink jet and ink drop voltage detector JET Rapid Wire - JET Rapid Wire PI – JET Rapid option Speed Plus After a reassembling of the drop production unit, it may be necessary to adjust the distance between the ink drop voltage detector and the ink jet. - Page 49 Appendix Ink jet Charging tunnel H=1,8 mm D =H/2 = 0,8 mm Voltage detector D= Distance between ink jet and the surface of the ink drop voltage detector Optimum: D = ~ Half of the height H (1,8 mm) of the charging tunnel = 0,8 mm Fix the inside cover again and put on the head cover Attention Be careful not to damage any tubes or cables!
-
Page 50: Exchange Of The Complete Drop Production Body
7.2.4 Exchange of the complete drop production body JET Rapid Wire - JET Rapid Wire PI – JET Rapid option Speed Plus Information There are some significant differences between the JET3up and the JET Rapid Wire/JET Rapid Wire PI/JET Rapid with option Speed Plus regarding the exchange of the drop production body. - Page 51 Appendix 4. Remove head cover. Loose the retaining screws with a 2mm hex key around one turn and remove the inner head cover. 5. Pull out the coax connector of the oscillator by using the tweezers. Remove the retaining screw of the grounding cable.
- Page 52 6. Remove the retainer of the drop production body: Attention It is important to remove screw 1 before screw 2. Remove screw 1 Remove screw 2 7. Remove the old drop production body 8. Mount the new drop production body back on the adapter of the ground plate. 9.
- Page 53 Appendix 11. The drop production body has to be properly positioned. For this, there are notches on the drop production body and the nozzle retainer on which the drop production body has to be mounted. The notch on the drop production unit has to be positioned in alignment with the notch on the nozzle retainer.
-
Page 54: Jet Rapid: Print Head Adjustments And Exchange Of Print Head- Parts
Sixfold magnifier 2mm hex key T6x50 torx. Switch on the JET Rapid and wait while the system is bleeding Touch the soft key <Hydraulic settings> (1) and change to the menu <Print head> (2). Turn off the function <Ink-Flow-Sensor> (3) 1 –... - Page 55 Appendix 3. Use the hex key to untighten the mounting screws of the cover. You do not have to remove the screws. Untighten the mounting screws. Remove the cover. Do not remove them! 4. Switch to the tab <Print head> (1) and touch the left arrow button in order to open the nozzle (2) completely.
- Page 56 6. Adjust the ink jet just like in the sketch below. The sketch shows the view from nozzle to gutter. The ink jet is adjusted by moving the oscillator body, which is connected, to the nozzle retainer. See picture above. When the ink jet is in the correct position, fix the screws again. Ink jet position in gutter tube 7.
- Page 57 Appendix 9. Turn on the Ink flow sensor by pushing the button <Ink flow sensor> (1). Open the nozzle seal complete by using the <arrow key> (2). The Ink stream must be in the middle of the charging tunnel and parallel to the inner edges of the tunnel. 1 –...
-
Page 58: Jet Rapid: Exchange Of The Complete Drop Production Body
Art. Nr.: 55-006360 K Special inlet for oscillator Art.-Nr.: 55-006012 S Slotted screwdriver Tweezers Hex key 1,5mm Hex key 2mm Special tool for nozzle SK6 Art.-Nr.: E55-005548 S 1. Switch on JET Rapid and wait until bleeding is finished. Page 58 of 61... - Page 59 Appendix 2. Select <ServiceFunctions> (1) and open the dialog box <Hydraulic> (2). 3. Select tab <Printhead> (3) and push the buttons <Ink off> (4) and <Jet adjust> (5). 1 – Button <Hydraulic settings> 2 – Menu <Hydraulic> 3 – Menu <Printhead> 4 –...
- Page 60 6. Pull out the coax connector of the oscillator by using the tweezers. Screw out the retaining screw of the grounding cable. 7. Remove the retainer of the tubus after removing the two torx screws. 8. Push the drop production body slightly to the side and remove the oscillator with the special tool. Clean the drop production body with solvent.
- Page 61 Appendix 9. Plug in the new oscillator into the special tool and screw it into the drop production body. The torque to tighten the oscillator is 0,16 Nm. 10. Mount the drop production body back on the adapter of the ground plate. Torque to tighten the retaining screws is 0,4 Nm.
Need help?
Do you have a question about the JET Rapid and is the answer not in the manual?
Questions and answers