Advertisement
Quick Start Guide
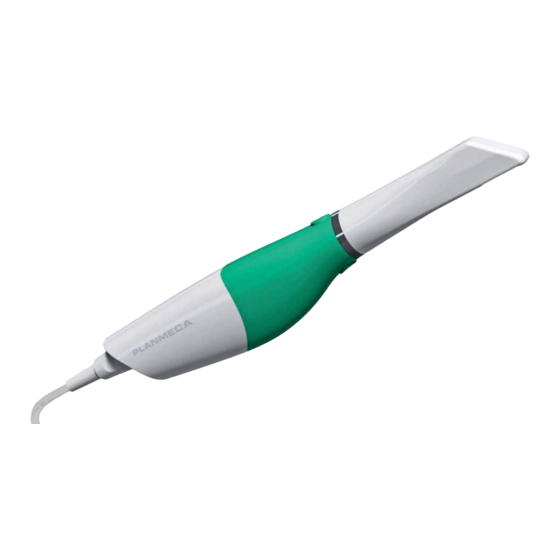
Planmeca Emerald Scanner
Congratulations on purchasing the Planmeca Scanner!
Unpack the system and verify you have everything!
Inside you'll find:
1 Planmeca Scanner (body)
1 Scanner connection USB cable
3 Autoclavable scanning tips
1 Color balancer
Connecting the parts for one awesome experience!
First we will get the laptop ready for a test scan
1. Connect the power cable to the laptop and plug it into the power outlet.
2. Power ON the laptop.
3. Open Romexis and create yourself as a patient.
4. Open the CAD/CAM module, choose any setup, then go to the Scan page.
5. You're ready to test scanning!
Now for the Planmeca Emerald
1. Connect the USB-C scanner connection to the back of the scanner.
2. Plug the USB into the laptop.
3. Remove the protective scanner tip and connect an autoclavable scanning tip.
1
Insert the USB-C cable base into the back of the
Planmeca Emerald Scanner. Align the long notch
of the cable to the short notch on the back of
the scanner. Turn the base of the cable clockwise
aligning to the long notch on the scanner, locking
it in place.
3
The scanner should only be plugged into the laptop during use. It should not be left plugged
in for extended periods of time.
Download the User Manual!
Go to planmecacadcam.com/material-bank to digitally download the Planmeca Emerald User Manual or
call 800.537.6070 to request a hard copy.
1 Protective tip
1 Scanner holder
1 Scanning holder stand
1 Chair adapter
2
Insert the USB-C cable into a USB 3 port on
the laptop. All of the ports on the Planmeca
laptop are USB 3.
If you are not using a laptop provided by Planmeca,
If you are not using a laptop provided
refer to your laptop's user manual to find the USB 3 port.
by Planmeca, refer to your laptop's user
Laptop must have an appropriate NRTL mark for
manual to find the USB 3 port.
compliance with IEC 60601-1 or IEC 60950.
STOP
Place the scanning tip on the end of the scanner
body, aligning the long notch of the tip to the
short notch on the scanner. While firmly holding
the scanner body, turn the scanning tip clockwise
to the long notch, locking it in.
will be a snug fit and require more force.
START
Autoclave the tips initially before use and then
after each use.
In some instances it
Advertisement
Table of Contents

Related Manuals for Planmeca Emerald


Summary of Contents for Planmeca Emerald
- Page 1 The scanner should only be plugged into the laptop during use. It should not be left plugged in for extended periods of time. Download the User Manual! Go to planmecacadcam.com/material-bank to digitally download the Planmeca Emerald User Manual or call 800.537.6070 to request a hard copy.
- Page 2 Quick Start Guide Planmeca Emerald™ Scanner ©2019 July Planmeca, All rights reserved 15697100.D...
Need help?
Do you have a question about the Emerald and is the answer not in the manual?
Questions and answers