Table of Contents
Advertisement
Quick Links
Aerohive QuickStart
for the HiveAP 100 Series
This QuickStart guide explains how to set up a HiveAP 100 series device as a managed HiveAP and
how to mount it on a ceiling or wall.
Connect a standard Ethernet
cable with RJ-45 connectors
from ETH0 on the HiveAP to
a switch.
1
DHCP
Server
Switch
Eth0
Some other network devices (They
Ethernet
might all be incorporated in the same
Cable
device, such as a router or firewall.)
2
If the switch provides
PoE (Power-over-
Ethernet), cabling the
HiveAP to the switch
will cause the HiveAP
to power on in a few
seconds.
Connecting to HiveManager
3
Cable the HiveAP to an Ethernet network—a HiveAP connected directly to the network
like this is called a portal (P)—or place it within radio range of a portal so that it forms
a wireless link through the portal to the wired network. This kind of HiveAP is called a
mesh point (MP). By default, a HiveAP acts as a DHCP client and gets its network settings
automatically from a DHCP server. (You can also configure it with static network settings
through the CLI. See the next section, "Using the Virtual Access Console".)
CAPWAP (Control and Provisioning of Wireless Access Points) is a protocol that access points
use to contact a management device and communicate with it. After getting its network
settings through DHCP, the HiveAP then acts as a CAPWAP client and sends CAPWAP Discovery
messages until HiveManager, acting as the CAPWAP server, responds. A mesh point initially
forms a hive with its portal using a default hive called hive0. Through this link, the mesh
point can reach the network and get its network settings from the DHCP server. Then it can
form a CAPWAP connection with HiveManager. (To add mesh points after changing the hive
name, first connect them to the wired network. Next, push the configuration with the new
hive name and password to them from HiveManager. Finally, deploy them as mesh points.)
DHCP traffic
DHCP Server
CAPWAP Traffic
Wired link
Wireless link
HiveManager
HiveManager
P
MP
P
MP
First, HiveAP portals and mesh points access
Second, they connect with the CAPWAP
a DHCP server to get their network settings;
server (HiveManager).
that is, unless you configure them yourself.
The HiveAP 100 can form a CAPWAP connection to HiveManager in one of these ways:
a
HiveManager Online (its domain name
If the HiveManager Online domain name is
is preconfigured on the HiveAP)
preconfigured on the HiveAP as the CAPWAP
server, the HiveAP makes a secure CAPWAP
Firewall
connection to it by sending unicast Discovery
Request messages to that domain name. Make
sure that the firewall allows the following
outgoing traffic: CAPWAP (UDP port 12222) for
HiveManager
management traffic and SSHv2 (TCP port 22) for
Online
HiveOS image and full configuration uploads.
P/N 330026-02 Rev. A
b
Same Subnet (Automatic Discovery)
HiveManager
CAPWAP Server
Internet
c
Different Subnets (DNS Resolution)
Firewall
Router
Note: For further options, see "Connecting to the CAPWAP Server" in the HiveOS and
HiveManager release notes.
If the switch does not
provide PoE, use the
AC/DC power adaptor
(available as an
Using the Virtual Access Console
accessory) to connect
the HiveAP to a 100-
240 AC power source.
The virtual access console is a way of accessing the CLI on a HiveAP wirelessly through a special
SSID that the HiveAP, by default, automatically activates for administrative access when it has
no configuration and cannot reach its default gateway. As explained in the previous section,
after connecting a HiveAP to the network and powering it on, it acts as a DHCP client and tries
to get its network settings automatically from a DHCP server in VLAN 1. However, if there is no
DHCP server in that VLAN, if the native VLAN for the network segment is not 1, or if you just
want to assign the HiveAP a static IP address, then you can access the CLI through the virtual
access console SSID and define the network settings yourself.
The default virtual access console SSID name is "<hiveap-hostname>_ac". The default host
name of a HiveAP consists of "AH-" plus the last six digits of its MAC address; for example,
AH-123456. In this case, the name of the default virtual access console SSID would be "AH-
123456_ac". By default, this SSID uses aerohive as the PSK (preshared key) for authenticating
user access. To access the virtual access console, do the following:
4
Using your wireless client,
scan for wireless networks.
If you are within range, an
SSID such as "AH-123456_ac"
appears.
Select the SSID, and when
prompted to enter a
network key, type aerohive,
DHCP Server
and then click Connect.
5
Check the IP address of the
default gateway that the
DHCP server on the HiveAP
assigned your client. Then
make an SSH or
Telnet connection
to the HiveAP at that IP
address. When prompted to
enter your credentials, enter
the default Aerohive login name
(admin) and password (aerohive).
C:\>ipconfig
Windows IP Configuration
Ethernet adapter Wireless
Network Connection:
Connection-specific DNS Suffix
IP Address. . . . . . : 1.1.1.2
Subnet Mask . . . . . : 255.255.255.0
Default Gateway . . . : 1.1.1.1
C:\>telnet 1.1.1.1
If the HiveAP does not have the HiveManager
IP address or domain name in its configuration,
it broadcasts CAPWAP Discovery Request
messages until it receives a response from a
Broadcast
HiveManager system in the same broadcast
domain. The two devices then form a secure
HiveAP
CAPWAP connection.
CAPWAP Client
If the HiveManager system is in a different
subnet, add a DNS A or host record that
resolves "hivemanager" to the HiveManager IP
address. By default, HiveAPs perform a DNS
lookup to resolve "hivemanager.<domain>" to
DNS Server
an IP address, where <domain> is the domain
that the DHCP server assigns the HiveAPs.
Unicast
The HiveAPs then make a secure CAPWAP
connection with the HiveManager system at
that domain name.
Beacons
Wireless
Client
. :
6
After logging in to the virtual access console, you can view the status of various
functions and make configuration changes. Here are some commonly used commands.
Use these commands:
show interface
show interface mgt0
no interface mgt0 dhcp client
interface mgt0 ip <ip_addr>
<netmask>
interface mgt0 native-vlan <id>
show capwap client
capwap client server name
<string>
capwap client vhm-name <string>
show hive
show hive <string> neighbor
hive <string> ...
show ssid
ssid <string> ...
interface { wifi0 | wifi1 } ssid
<string>
To see a list of commands, and their accompanying CLI Help, type a question mark ( ? ).
For example, to see all the show commands, enter show ?
If you want to find a command that uses a particular character or string of characters,
you can do a search using the following command: show cmds | include
<string>, where <string> is the word or string of characters you want to find.
Device- and platform-specific CLI reference guides are available online. (To learn how
to access them, see "Where to go for more information" elsewhere in this document.)
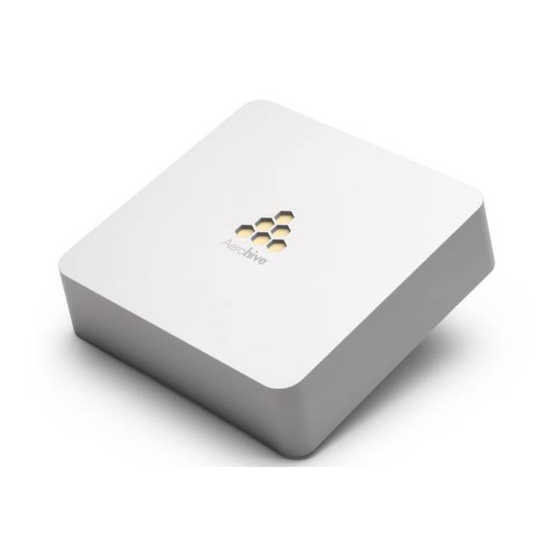
Status LEDs
The status indicator has been incorporated into the Aerohive logo on the top of the
HiveAP 110 and 120. It is illuminated by various colors to indicate different states of
activity. The meanings of the colors are explained below.
• Dark: There is no power or the status indicator is disabled.
• Blue: (solid) The device is booting up or there is no backhaul link; (flashing) the
device is shutting downy
Beacons
• Green: The default route is through the backhaul Ethernet interface, but not all
conditions for normal operations (white) have been met.
• Yellow: The default route is through a backhaul wifi interface, but not all
conditions for normal operations (white) have been met.
• White: The device is powered on and the firmware is operating normally; that
is, a wireless interface in access mode is up, a wired or wireless backhaul link
is up, and the HiveAP has a CAPWAP connection to either HiveManager or a
management AP.
• Purple: A new image is being loaded from HiveManager or a management AP.
• Orange: An alarm indicating a firmware or hardware issue has occurred.
For locations where the status indicator might be a distraction or attract unwanted
attention, you can adjust its brightness level from bright (the default) to soft to dim.
You can even turn it off completely. In HiveManager, choose the brightness level that
you want from the LED Brightness drop-down list on the Configuration > Management
Services > Management Options page. Through the CLI, enter
brightness { soft | dim | off }
Bright
Soft
To do the following:
Check the status of both wired and
wireless interfaces
See the network settings (IP address,
netmask, default gateway) and VLAN ID
of the mgt0 interface
Disable the DHCP client
Set the IP address and netmask of the
mgt0 interface
Set the native (untagged) VLAN that the
switch infrastructure in the surrounding
wired and wireless network uses
See CAPWAP client settings and status
Set the IP address or domain name of the
CAPWAP server (HiveManager)
Set the VHM (virtual HiveManager) to
which the client belongs
See the hive name
Check for any neighboring hive members
Create a hive and set its parameters
See a list of all SSID names
Configure an SSID
Bind an SSID to a wireless interface in
access mode
[ no ] system led
. The four settings are shown below.
Dim
Off
Advertisement
Table of Contents

Related Manuals for Aerohive HiveAP 100 Series


Summary of Contents for Aerohive HiveAP 100 Series
- Page 1 Use these commands: To do the following: messages until it receives a response from a This QuickStart guide explains how to set up a HiveAP 100 series device as a managed HiveAP and Broadcast HiveManager system in the same broadcast how to mount it on a ceiling or wall.
- Page 2 For instructions about setting up a HiveAP to manage other HiveAPs If necessary, slide the clip along the track to position it exactly where you want it to be. through the HiveUI, see the Aerohive QuickStart: HiveAP as a Management AP (PDF). To access Aerohive product documentation, visit www.aerohive.com/techdocs.
Need help?
Do you have a question about the HiveAP 100 Series and is the answer not in the manual?
Questions and answers