Advertisement
Quick Links
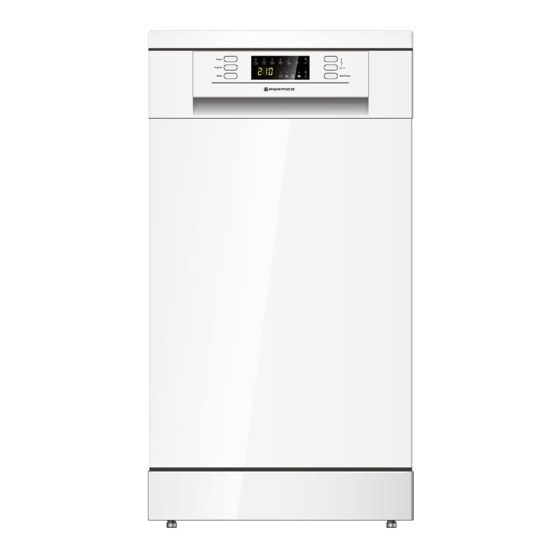
Model:
PD45-SLIM-SS-1
PD45-SLIM-W-1
As part of Parmco Appliances commitment to improving and updating product ranges,
we reserve the right to alter, change and update technical specifications and appearance
attributes of all Parmco Appliances products. E&OE.
Installation
and Operating
Instructions
727626032017
Advertisement

Related Manuals for Parmco PD45-SLIM-SS-1


Summary of Contents for Parmco PD45-SLIM-SS-1
- Page 1 Installation and Operating Instructions Model: PD45-SLIM-SS-1 PD45-SLIM-W-1 As part of Parmco Appliances commitment to improving and updating product ranges, we reserve the right to alter, change and update technical specifications and appearance attributes of all Parmco Appliances products. E&OE. 727626032017...
- Page 2 • Normal or scheduled maintenance including blocked filters or ducting. Please retain this Warranty card together with receipt or other proof of purchase date when seeking service during the warranty period • Consumable items such as light bulbs. • Any damage to hobs caused by spills when cooking. • Any breakage or damage of glass items. • Any damage caused by non recommended product used for cleaning, Please contact Parmco at 09 573 5678 if your maintaining, lubricating or similar. appliance needs servicing under warranty. Please • Any aspect relating to the installation of the product, or damage caused have your model number and proof of purchase ready. during installation including blocked access for repair. Warranty repairs must be authorized by Parmco. • Any third party (including reseller) or consequential loss or damage (direct or indirect) however arising. Subject to updates without prior notice, please visit www.parmco.co.nz for E & O.E. 727626032017 the latest version.
- Page 3 Dear Valued Customer, Thank you and congratulations on purchasing your new Parmco appliance. All Parmco products are made to the highest quality and design standards. We are sure you will enjoy your new appliance. As a note, please read through these instructions carefully. These will assist you in gaining a complete understanding of the functions and features o ered by your appliance.
-
Page 4: Table Of Contents
Requirements with particular reference to the New Zealand Electrical Standards. Any attempt to install this or any other Parmco product without an authorised person could result in damage to the product and a possible health hazard. Not having an authorised person install this appliance may result in all associated warranties from Parmco Appliances being null and void. -
Page 5: Important Safety Information
IMPORTANT SAFETY INFORMATION We recommend that for best performance and to extend the life of your appliance you read the instructions in this owner’s manual thoroughly before using your new appliance. It will provide you with all the information you need to ensure its safe installation, proper use and maintenance. - Page 6 WARNING! PROPER USE Do not abuse, sit on, or stand on the door or dish baskets of the dishwasher. Do not operate your dishwasher unless all enclosure panels are properly in place. Open the door very carefully if the dishwasher is operating. There is a risk of water squirting out.
- Page 7 This appliance is identified according to the European guideline Packaging material could be dangerous for children! Parmco has a commitment to being environmentally responsible. To avoid potential negative impacts on the environment, please ensure that this appliance is disposed of correctly. This product must not be treated as household waste. Instead it should be handed over to an appropriate collection point for recycling of electrical, electronic and steel components.
-
Page 8: Product Description
PRODUCT DESCRIPTION Control Panel 1. Power Button: to turn on/off the power supply. 2. Program button: press the button to scroll through the wash cycles. The corresponding programme light will indicate which wash cycle has been selected. 3. Delay button: the delay start function will allow you to delay the start time of any cycle of up to 24 hours. -
Page 9: Use And Care
USE AND CARE Before using your dishwasher for the first time A. Fill the rinse aid dispenser B. Fill the detergent dispenser A. Fill the Rinse Aid Dispenser Function of Rinse Aid The rinse aid is released during the final rinse to prevent water from forming droplets on your dishes that can leave spots and streaks. - Page 10 1. To open the dispenser, turn the cap to the "open" (left) arrow and lift it out. 2. Pour the rinse aid into the dispenser until the level indicator turns completely black. Be careful not to overfill this could cause over sudsing. The volume of the rinse aid container is about 140ml.
- Page 11 Therefore please use long programmes when using detergent tablets, to ensure the complete removal of detergent residues. Detergent Dispenser The dispenser must be refilled before the start of each washing cycle following the instructions provided in the Wash Cycle Table. Your dishwasher uses less detergent and rinse aid than conventional dishwashers.
- Page 12 Use of "3 in 1" Detergent Tablets General Advice 1. Before using these products you should first check that the water hardness is compatible with the use of these products as per the detergent manufacturer’s instructions (on the product packaging). 2.
- Page 13 Loading the dishwasher baskets For best performance of the dishwasher, follow these loading guidelines. Features and appearance of baskets and cutlery tray may vary from your model. Attention Before or after Loading the Dishwasher Baskets 1. Scrape off any large amounts of leftover food. It is not necessary to rinse the dishes under running water.
- Page 14 Loading the Lower Basket We recommend that you place large items which are most difficult to clean in to the lower basket: pots, pans, lids, serving dishes and bowls, as shown in the figure below. It is preferable to place serving dishes and lids on the side of the baskets in order to avoid blocking the rotation of the top spray arm.
- Page 15 The following cutlery and dishes are not suitable to be washed in a dishwasher: Cutlery with wooden, horn china or mother-of-pearl handles Plastic items that are not heat resistant Older cutlery with glued parts that is not temperature resistant ...
- Page 16 Attention! Long bladed knives stored in an upright position are a potential hazard! Long and/or sharp items of cutlery such as carving knives must be positioned horizontally in the upper basket Damage to Glassware and other Dishes Possible causes: Type of glass or manufacturing process. Chemical composition of detergent. ...
-
Page 17: Washing Cycles
WASHING CYCLES NOTE: We recommend you open the door slightly 50mm to assist in drying of the dishes after every wash. Turning on the appliance Starting a wash cycle 1. Draw out the lower and upper basket, load the dishes and push them back. It is recommended to load the lower basket first, then the upper one (see the section entitled "Loading the Dishwasher"). - Page 18 Change the programme Premise: A cycle that is underway can only be modified if it has only been running for a short time. Otherwise, the detergent may have already been released, and the appliance may have already drained the wash water. If this is the case, the detergent dispenser must be refilled (see the section entitled “Fill in the Detergent”).
-
Page 19: Cleaning And Maintenance
CLEANING AND MAINTENANCE Filtering system: The filter is used to collect large leftovers and other sundries getting inside the pump. The residue can sometimes obstruct the filter. The filter system consists of a coarse filter, a flat (Main filter) and a micro filter (fine filter). 1 Flat filter Food and debris will be trapped by a special jet on the lower spray arm. - Page 20 reinsert the entire assembly in the dishwasher, positioning in its seat, pressing downward and twisting into place. The dishwasher must never be used without the filters. Incorrect replacement of the filter may reduce the performance level of the appliance and damage dishes and utensils.
- Page 21 WARNING! Never use a spray cleaner to clean the door panel for it could damage the door lock and electrical components. Do not use abrasive agents or paper towel because of the risk of scratching or leaving spots on the stainless steel surface. How to Keep Your Dishwasher in Shape ...
-
Page 22: Installation
INSTALLATION Keep this instruction manual in a safe place for future reference. If the appliance is sold, given away or moved, please ensure the manual is kept with the appliance, so that the new owner may benefit from the information contained within it. Please read this instruction manual carefully: it contains important information regarding the safe installation, use and maintenance of the appliance. - Page 23 Connecting the water outlet hose Fit the drain hose of your machine to the drainage pipe without bending. Take extra care to ensure the drainage pipe is not kinked during installation. If the length of the hose is not sufficient, contact the authorized service supplier for an extension made from the same material as the original.
- Page 24 Positioning the Appliance Position the appliance in the desired location. The back should rest against the wall behind it, and the sides, along the adjacent cabinets or wall. The dishwasher is equipped with water supply and drain hoses that can be positioned to the right or the left to facilitate proper installation.
-
Page 25: Troubleshooting Tips
TROUBLESHOOTING TIPS ERROR CODES When some malfunctions occurs, the appliance will display error codes to warn you. Codes Meanings Possible Causes Door open The door is opened when the dishwasher is operating Water inlet Water inlet malfunction Water drainage Water drainage malfunction Temperature sensor Temperature sensor malfunction... - Page 26 Before Calling for Service Problem Possible Causes What To Do Fuse blown, or the Replace fuse or reset circuit breaker. Remove any circuit breaker tripped other appliances sharing the same circuit with the dishwasher. Dishwasher Power supply is Make sure the power cord is properly plugged into doesn’t run not turned on the wall socket.
- Page 27 Combination of soft or Use less detergent if you have soft water and select a Cloudiness hard water and too shortest cycle to wash the glassware and to get them on glassware much detergent clean. Tea or coffee stains Using a solution of 1/2 cup of bleach and 3 cups of warm water to remove the stains by hand.
-
Page 28: Technical Information
TECHNICAL INFORMATION W x D x H 450mm 600mm 845mm Voltage connected load: See data label Water pressure: 0.04--1.0MPa Power supply: See data label Capacity: 9 Place settings Hot water connection: Max 60°C...
Need help?
Do you have a question about the PD45-SLIM-SS-1 and is the answer not in the manual?
Questions and answers