Table of Contents
Advertisement
Quick Links
Advertisement
Table of Contents

Related Manuals for LAUREL K12


Summary of Contents for LAUREL K12
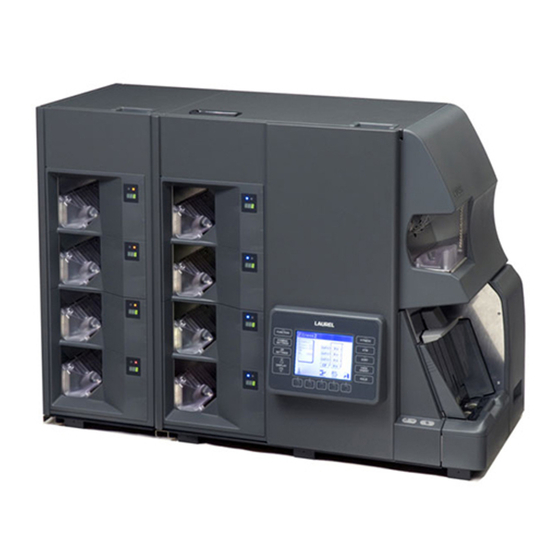
- Page 1 Note Sorter User Manual...
-
Page 2: Note
Introduction Thank you very much for purchasing the "LAUREL K12 note sorter". This User Manual describes safety instructions, operations, functions, specifications etc. Please read carefully and understand this manual before operating the machine. Keep this User Manual handy for ready reference. Note 1. It is strictly prohibited to use part or this entire manual to other publication without per- mission of publisher. 2. The contents of this manual and the specification of the product may change without a preliminary notice for future improvement. 3. Please contact a regional distributor of LAUREL, if there are any doubtful points, errors, etc. in this manual. 4. It is understood that LAUREL will not be responsible for any loss caused by use of the product, regardless of any errors in the manual. 5. The illustrations in this manual may differ from the actual product as they are abstract. 6. The display screen illustrated in this manual may differ from an actual display screen. 7. Please contact a regional distributor of LAUREL if the manual has disorderly binding or missing pages. 8. Please contact a regional distributor of LAUREL for loss or damage of the manual. FCC Caution Changes or modifications not expressly approved by the party responsible for com- pliance could void the user’s authority to operate the equipment. -
Page 3: Fcc Note
Introduction (Continued) FCC Note This equipment has been tested and found to comply with the limits for a Class A digital device, pursuant to part 15 of the FCC Rules. These limits are designed to provide reasonable protection against harmful interference when the equipment is operated in a commercial environment. -
Page 4: Request From Us
Introduction (Continued) Request from us If you don’t use the machine for long, be sure to turn off the power switch. About the installation of the machine: Avoid high temperature, high humidity, dust, vibration, and direct sunlight. In case the environment of operation exceeds room temperature (5°C to 35°C) and humidity (35% to 80%), the performance of the machine will deteriorate remarkably. -
Page 5: Table Of Contents
Contents Introduction ................ii Note ..................... ii FCC Caution ..................ii FCC Note ....................iii FCC Label in The Machine ..............iii Request from us ................... iv Safety Caution .................vii Description of Warning, Caution and Examples ........vii Description of Symbol and Examples ............vii Caution Mark in The Machine .......... - Page 6 Contents (Continued) Setting of Fitness Level ............24 Setting of CF Level ..............26 Function Setting ..............28 Cleaning ................33 Periodical Cleaning and Position ............33 Cleaning the Dust Tray 1 ..............33 Cleaning the Dust Tray 2 ..............34 Cleaning Sensors .................
-
Page 7: Safety Caution
Safety Caution This manual is used to follow symbols to make you cautious in order to use the machine safely and to prevent you from a risk of an injury or from losing your property. It describes contents of danger and/or how to prevent the danger together with marking which indicates contents of the danger near the symbols. - Page 8 If smoking, abnormal smell, noise is detected from the machine, stop the oper- ation and pull out the plugs from outlet. Then contact A regional distributor of LAUREL. Without respect to this caution, there is risk of failure, an electric shock or a fire.
-
Page 9: Caution Mark In The Machine
These labels are for always making an operator conscious of the danger while operating the machine. If the caution label is unreadable due to not attached, peeling off and/or stain, please contact a regional distributor of LAUREL. •Don’t touch during operation! •Nicht während des Beiriebes berühren! •Ne pas toucher pendant le fonctionnement! -
Page 10: Description Of This Manual
Description of This Manual Chapter 2 DESCRIPTION OF OPERATION Count STEP-1 It describes operation procedure. Align the notes and put the notes STEP-1 onto the Hopper. The count starts automatically. If the count does not start automat- Point ically, press START/STOP Switch to It describes important start count. -
Page 11: Chapter 1 Overall Descriptions
Chapter 1 OVERALL DESCRIPTIONS Chapter 1 OVERALL DESCRIPTIONS... -
Page 12: Description Of Each Part
Chapter 1 OVERALL DESCRIPTIONS K-12 Description of Each Part Overall Unit 2. Status LED 1. Pocket LED 3. Sub-Display 4. Pocket 9 5. Pocket 10 6. Pocket 11 7. Pocket 12 19. Reject Pocket 8. Pocket 5 20. Reject Pocket LED 9. Pocket 6 10. - Page 13 K-12 Chapter 1 OVERALL DESCRIPTIONS Overall Unit (Continued) 1. Pocket LED ....... indicates status of pocket by lighting or blinking. Please refer to Indication of Pocket Status Page 5. 2. Status LED ......indicates a category of note at the Pocket. Please refer to Indication of Pocket Status Page 5.
-
Page 14: Operation Panel
Chapter 1 OVERALL DESCRIPTIONS K-12 Operation Panel 1. Main-Display 7. FITNESS 2. FUNCTION FUNCTION FITNESS 8. ATM 3. FITNESS SETTING FITNESS SETTINGS 9. SORT 4. CF SETTING SORT SETTINGS 10. FACE/ORIENT FACE ORIENT DISPLAY 11. ISSUE ISSUE 12. F1 13. F2 14. -
Page 15: Indication Of Pocket Status
K-12 Chapter 1 OVERALL DESCRIPTIONS Indication of Pocket Status 1. Status LED 2. Pocket LED 3. Sub-Display 1. Status LED ......LED indicates note category by color of light. Blue Green Orange Sorting Mode FITNESS Unfit Unfit SORT (Denom.) Single Mixed FACE ORIENT... -
Page 16: Description Of Display
Chapter 1 OVERALL DESCRIPTIONS K-12 Description of Display Stand-by Display Stand-by Display indicates present sorting mode, preset number and target currency. While showing Stand-by Display, the count starts by pressing START/STOP SW. Present mode Present sorting pattern Status Information Press F1 key “System Info” to indicate Total count results. -
Page 17: Count Display
K-12 Chapter 1 OVERALL DESCRIPTIONS Count Display When counting starts, the display turns from Stand-by Display to Count Display and count result will be shown. Acceptable operation or Present mode pocket status. Pocket status Blinking: The Pocket is full. Lighting: A note remains. Count results in value and pieces. -
Page 18: Guidance For Cleaning
Chapter 1 OVERALL DESCRIPTIONS K-12 Guidance for Cleaning When the cleaning is required, the display indicates Cleaning Guidance on the display after turning on the power. If the Cleaning Guidance is indicated, clean the dust trays. Refer to Cleaning Page 33 for further details about cleaning. Description of Display... -
Page 19: Error Display
K-12 Chapter 1 OVERALL DESCRIPTIONS Error Display If a note jam occurs, the display switches Error Display and the display indi- cates error code and error location by graphic guidance. Refer to How to clear an error Page 40 and clear the error. Error code. -
Page 20: Description Of Sorting Mode And Sorting Pattern
Chapter 1 OVERALL DESCRIPTIONS K-12 Description of Sorting Mode and Sorting Pattern About mode of sorting Following modes are available. 1) FITNESS Mode......Sorting out fit and unfit notes. 2) ATM Mode .......Sorting out ATM-fit notes. 3) SORT Mode ......Sorting out denominations. 4) FACE/ORIENTATION Mode ..Sorting out facing or orientation of notes. - Page 21 K-12 Chapter 1 OVERALL DESCRIPTIONS FITNESS Mode (Continued) Press F1 or F4 key to select the display screen. Press F2 or F3 key to set sorting pattern. The contents of sorting patterns are following. Sorting Pattern Pocket Pocket 1 Fit(Face) Fit(Face) Fit1 Fit1...
-
Page 22: Atm Mode
Chapter 1 OVERALL DESCRIPTIONS K-12 ATM Mode Press ATM key to activate ATM Mode and display indicates sorting pattern for each pocket. FUNCTION FITNESS FITNESS SETTINGS SORT SETTINGS FACE ORIENT DISPLAY ISSUE Press F1 or F4 key to select the display screen. Press F2 or F3 key to set sorting pattern. -
Page 23: Sort Mode
K-12 Chapter 1 OVERALL DESCRIPTIONS SORT Mode Press SORT key to activate SORT Mode and display indicates sorting pattern for each pocket. FUNCTION FITNESS FITNESS SETTINGS SORT SETTINGS FACE ORIENT DISPLAY ISSUE Press F1 or F4 key to select the display screen. Press F2 or F3 key to set sorting pattern. -
Page 24: Face/Orientation Modes
Chapter 1 OVERALL DESCRIPTIONS K-12 FACE/ORIENTATION Modes Press FACE/ORIENT key to activate FACE/ORIENTATION Mode and display indi- cates sorting pattern for each pocket. FUNCTION FITNESS FITNESS SETTINGS SORT SETTINGS FACE ORIENT DISPLAY ISSUE Press F1 or F4 key to select the display screen. Press F2 or F3 key to set sorting pattern. -
Page 25: Issue Mode
K-12 Chapter 1 OVERALL DESCRIPTIONS ISSUE Mode Press ISSUE key to activate ISSUE Mode and display indicates sorting pattern for each pocket. FUNCTION FITNESS FITNESS SETTINGS SORT SETTINGS FACE ORIENT DISPLAY ISSUE The machine sorts out the notes corresponding to old or new issue and the first issue type goes to Issue1 pocket and second issue type goes to Issue2 pocket in order. -
Page 27: Chapter 2 Description Of Operation
Chapter 2 DESCRIPTION OF OPERATION Chapter 2 DESCRIPTION OF OPERATION... -
Page 28: Starting-Up And Closing-Down Of The Unit
Chapter 2 DESCRIPTION OF OPERATION Starting-up and Closing-down of the Unit The unit starts up by turning on Main SW. Turn OFF Main SW when closing the Unit. The self-check function activates when the power is on. When no error is found in self-check, the stand-by display is indicated and gets ready for counting. -
Page 29: Count
Chapter 2 DESCRIPTION OF OPERATION Count If necessary change Sorting Mode STEP-1 or Sorting Pattern. Refer to Setting of Sorting Modes FUNCTION FITNESS and Sorting Pattern Page 10 for FITNESS SETTINGS further details. SORT SETTINGS FACE ORIENT DISPLAY ISSUE If necessary, change a preset num- STEP-2 ber. - Page 30 Chapter 2 DESCRIPTION OF OPERATION Count (Continued) Align the notes and put the notes STEP-4 onto the Hopper. The count starts automatically. If the count does not start automat- ically, press START/STOP Switch to start count. It is possible to put additional notes to the Hopper.
-
Page 31: Setting Of Sorting Modes And Sorting Pattern
Chapter 2 DESCRIPTION OF OPERATION Setting of Sorting Modes and Sorting Pattern Press sorting key to set a Sorting STEP-1 Ex. Fitness Mode. FUNCTION FITNESS FITNESS SETTINGS SORT SETTINGS FACE ORIENT DISPLAY ISSUE Press F1 or F4 key to select the dis- STEP-2 Ex. -
Page 32: Setting Of Preset Number
Chapter 2 DESCRIPTION OF OPERATION Setting of Preset Number If the display indicates sorting pat- STEP-1 Ex. Fitness tern, press F5 key “Exit” to return to Stand-by Display. FUNCTION FITNESS FITNESS SETTINGS SORT SETTINGS FACE ORIENT DISPLAY ISSUE Press F3 key “Preset”. STEP-2 Ex. - Page 33 Chapter 2 DESCRIPTION OF OPERATION Setting of Preset Number (Continued) Press F5 key “Exit” to return to STEP-4 Stand-by Display after saving the preset number. FUNCTION FITNESS FITNESS SETTINGS SORT SETTINGS FACE ORIENT DISPLAY ISSUE Setting of Preset Number...
-
Page 34: Setting Of Fitness Level
Chapter 2 DESCRIPTION OF OPERATION Setting of Fitness Level Press FITNESS SETTING key while STEP-1 Ex. Fitness the display is showing Stand-by Display. FUNCTION FITNESS The display indicates Fitness Setting FITNESS SETTINGS Display. SORT SETTINGS FACE If Admin Mode is activated, the pass- ORIENT DISPLAY ISSUE... - Page 35 Chapter 2 DESCRIPTION OF OPERATION Setting of Fitness Level (Continued) 3. Move the cursor to your desired Fit- ness Level by F1 key or F2 key. If L, M, H or (EU) of ALL is selected, FUNCTION FITNESS Fitness Level of all denominations FITNESS SETTINGS will be set all together.
-
Page 36: Setting Of Cf Level
Chapter 2 DESCRIPTION OF OPERATION Setting of CF Level CF Level means the level of security feature detection. Press CF SETTING key while the STEP-1 Ex. Fitness display is showing Stand-by Dis- play. FUNCTION FITNESS CF Setting Display is indicated. FITNESS SETTINGS If Admin Mode is activated, the pass-... - Page 37 Chapter 2 DESCRIPTION OF OPERATION Setting of CF Level (Continued) 3. Move the cursor to desired CF Level by F1 key or F2 key. 4. Skip STEP-3 and go to STEP-4. FUNCTION FITNESS FITNESS SETTINGS SORT SETTINGS FACE ORIENT DISPLAY ISSUE Detailed CF Level Setting.
-
Page 38: Function Setting
Chapter 2 DESCRIPTION OF OPERATION Function Setting 1) Currency ....Currency Selection. 2) Language ....Language Selection. 3) Bright ....Bright Setting of Main-Display. 4) Contrast ....Contrast Setting of Main-Display. 5) Back Light ....Time Setting of Back Light saving mode. 6) Buzzer ....Volume Setting of Buzzer. 7) Date ......Date Setting of internal clock. - Page 39 Chapter 2 DESCRIPTION OF OPERATION Function Setting (Continued) Language 1. Move the cursor to select Language by Key or key. FUNCTION FITNESS FITNESS 2. Move the cursor to desired Language SETTINGS SORT SETTINGS by F1 Key or F2 key. FACE ORIENT DISPLAY ISSUE...
- Page 40 Chapter 2 DESCRIPTION OF OPERATION Function Setting (Continued) Buzzer 1. Move the cursor to set the Buzzer by Key or key. FUNCTION FITNESS FITNESS 2. Adjust the buzzer sound by F3 key “-” SETTINGS SORT SETTINGS or F4 key “+”. FACE ORIENT DISPLAY...
- Page 41 Chapter 2 DESCRIPTION OF OPERATION Function Setting (Continued) 3. Select a number by F1 key or F2 key and input it by F3 key “ENT” one by one. FUNCTION FITNESS If the password is identical, the dis- FITNESS SETTINGS play indicates Administrator Setting SORT SETTINGS Display.
- Page 42 Chapter 2 DESCRIPTION OF OPERATION Function Setting (Continued) Press F5 key “Exit” to return to STEP-3 Stand-by Display. FUNCTION FITNESS FITNESS SETTINGS SORT SETTINGS FACE ORIENT DISPLAY ISSUE Function Setting...
-
Page 43: Cleaning
Chapter 2 DESCRIPTION OF OPERATION Cleaning Periodical Cleaning and Position Clean the Dust Trays at least once in a day.“Dust Tray 1, Dust Tray 2” Clean the Transportation Path 1 and the Validator periodically. Cleaning the Dust Tray 1 Hold the handle of Dust Tray 1 and STEP-1 pull it out. -
Page 44: Cleaning The Dust Tray 2
Chapter 2 DESCRIPTION OF OPERATION Cleaning the Dust Tray 2 Open the Front Door by the han- STEP-1 dle. Pull out Dust Tray 2 by holding STEP-2 green parts. Remove the dust in the trays. Dust Tray 2 Set Dust Tray 2 back. STEP-3 Close the Front Door. -
Page 45: Cleaning Sensors
Chapter 2 DESCRIPTION OF OPERATION Cleaning Sensors Open the Front Door by the han- STEP-1 dle. Open the Transportation Path 1 STEP-2 and remove the dust. 1. Unlock the Transportation Path 1 by lever 1 and open it. Lever 1 2. - Page 46 Chapter 2 DESCRIPTION OF OPERATION Cleaning Sensors (Continued) Open the Validator and clean the STEP-3 sensors. 1. Unlock the clamp of Validator. Lever 3 2. Open Validator with holding lever 3. Clamp 3. Clean the Validator by cotton swab or brush.
- Page 47 Chapter 2 DESCRIPTION OF OPERATION Cleaning Sensors (Continued) 6. Close the Validator by holding lever 3. 7. Lock the Validator by clamp. Lever 3 Clamp Close the Front Door. STEP-4 Cleaning...
-
Page 49: Chapter 3 If An Error Occur
Chapter 3 IF AN ERROR OCCUR Chapter 3 IF AN ERROR OCCUR... -
Page 50: How To Clear An Error
Chapter 3 IF AN ERROR OCCUR How to clear an error This chapter describes action to be taken when an error occurs. Error Display If an error occurs such as note jam, the main-display switches to Error Display which shows error code and location of the error by guidance. In order to clear the error, check the error code and location of error and take remedial action correspond to Error and Remedial Measure page 41. -
Page 51: Error And Remedial Measure
Chapter 3 IF AN ERROR OCCUR Error and Remedial Measure Error Code Content of Error Remedial Measure 1. Remove remaining notes according to the guidance on the display. 2. Press Reset key. Error 10 to 32 Mechanical Error 3. If the notes are discharged to the pockets after the reset actions, remove the notes from the pockets. -
Page 52: How To Remove Jam Notes
Chapter 3 IF AN ERROR OCCUR How to remove jam notes Description of Guidance Pocket Transportation Unit 1 (P.xx) Pocket Transportation Unit 1(P.54) Upper Transportation Unit (P.xx) Upper Transportation Unit(P.49) Pocket Transportation Unit 2 (P.xx) Pocket Transportation Unit 2(P.58) Pocket Transportation Unit 3 (P.xx) Pocket Transportation Unit 3(P.58) Reject Pocket (P.xx) Reject Pocket(P.43) -
Page 53: Reject Pocket
Chapter 3 IF AN ERROR OCCUR Reject Pocket Remove all the notes from the Re- STEP-1 ject Pocket. Press F5 key “Reset”. STEP-2 The reset action gets started. FUNCTION FITNESS Stand-by Display is shown after com- FITNESS SETTINGS pleting the reset action normally. SORT SETTINGS FACE... -
Page 54: Feed Unit
Chapter 3 IF AN ERROR OCCUR Feed Unit Open the Front Door by the han- STEP-1 dle. Remove remained note by opening STEP-2 the Transportation Path. 1. Hold Lever 1 to unlock the Transpor- tation Path 1 to open. Lever 1 2. - Page 55 Chapter 3 IF AN ERROR OCCUR Feed Unit (Continued) Close the Front Door. STEP-3 The reset action gets started. Stand-by Display is shown after com- pleting the reset action normally. If the reset action does not gets start- ed, press F5 “Reset” key to activate it. FUNCTION FITNESS FITNESS...
-
Page 56: Main Transportation Unit
Chapter 3 IF AN ERROR OCCUR Main Transportation Unit Open the Front Door by the han- STEP-1 dle. Open the Upper Door and be sure STEP-2 to lock the door kept open. Open the Transportation Path 4. STEP-3 Lever 4 1.
Need help?
Do you have a question about the K12 and is the answer not in the manual?
Questions and answers