Table of Contents
Advertisement
User Manual
V21.01
Model: DGTCHKSK43
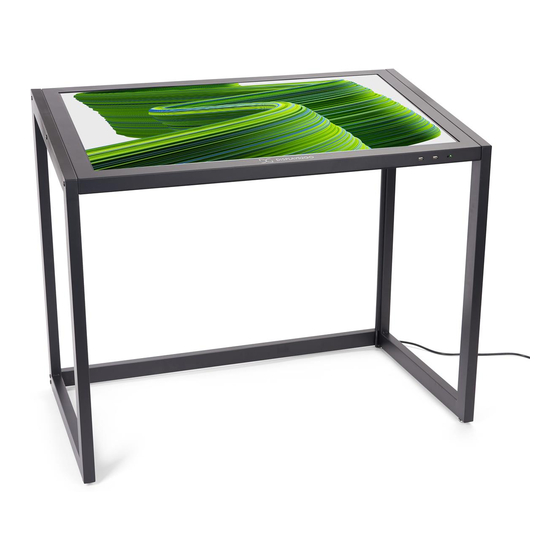
Description: 43" Digital Touch Kiosk
Scan QR code to visit the product page:
Operating Instructions for Digital Signage
Note: Before using the product, please read the instructions carefully!
Do not attempt to disassemble this product. If the product does not work properly, please call
our Customer Service Department at 1-844-221-3393.
1 / 24
Advertisement
Table of Contents

Related Manuals for Displays2go DGTCHKSK43


Summary of Contents for Displays2go DGTCHKSK43
- Page 1 User Manual V21.01 Model: DGTCHKSK43 Description: 43” Digital Touch Kiosk Scan QR code to visit the product page: Operating Instructions for Digital Signage Note: Before using the product, please read the instructions carefully! Do not attempt to disassemble this product. If the product does not work properly, please call our Customer Service Department at 1-844-221-3393.
-
Page 2: Table Of Contents
Contents Features ..........................3 Safety Warnings and Precautions ................... 3 Assembly and Connection ...................... 5 Packing List ............................ 5 Interfaces ............................6 Unpacking and installation steps ....................6 Cable trough installation mode ..................... 8 Remote Control ........................9 Description of Basic Operation ..................... 10 Power on/Standby ........................ -
Page 3: Features
Thank you for purchasing the high-performance multi-functional LED backlight Digital Signage from Displays2Go. We have considered the factors to ensure personal safety in product design and have tested rigorously at the factory. However, improper installation and use may result in electric shock and fire. - Page 4 WARNING ⚫ Do not use power supply other than AC 110V, 60Hz. ⚫ Cut off the power supply before connecting or disconnecting any cables. ⚫ Do not place the Digital Signage on any instable positions, or else it may be damaged or cause fire. ⚫...
-
Page 5: Assembly And Connection
CAUTION ⚫ Do not let children climb onto the Digital Signage. ⚫ Keep the small parts away from children to prevent them from swallowing. ⚫ If the Digital Signage won’t be used for a long time, please turn it off and pull out the power plug. ⚫... -
Page 6: Interfaces
class-A product, which may cause radio interference in living environment. In this case, please take feasible measures, and use power plug as the disconnection device. Interfaces 1.WiFi interface; 2.RJ45 interface(Ethernet); 3.On/Off button; 4.Power port; 5.USB interface; 6.USB interface; Note: Please pull out the power plug before installing or disassembling the unit! Unpacking and installation steps 1. - Page 7 2. Take out the supporting legs from the package, as shown in Figure 3; 3. Carefully lift out the unit as shown in Fig. 4 and place it on the shipping box (avoid scratching) (Fig. 5); (Fig. 3) (Fig. 4) (Fig.
-
Page 8: Cable Trough Installation Mode
Cable Management Installation mode 1. Take out the cord management channel and tear off the surface coating of the bottom adhesive on the back. Refer to Figure 1. 2. Paste the channel on one of the leg of the table, leaving space from the top and bottom to let cord come through, as shown in Figure 2. -
Page 9: Remote Control
Remote Control Installing batteries for the remote control: Remove the battery cover and insert two AAA batteries (1.5V). Ensure that the battery polarity matches the “+”/“-” marks in the battery compartment of the remote control. Precautions for using the remote control: ⚫... -
Page 10: Description Of Basic Operation
Note: Press the SETUP button in the main interface to call out the OSD menu. After exiting the playback mode by pressing the STOP button, the playback will start according to the schedule next time。 Remark: The real appearance of the remote control may be different from the picture, please refer to the actual product. -
Page 11: Local Settings
Fig. 1 Fig. 2 Fig. 3 Local Settings 1. Click the Main Apps button “ ” in the Home page to enter the “APPS” menu interface (Fig. 1) 2. Click the “Settings” icon in the “APPS” menu interface (Fig. 2) and enter “Wi-Fi” menu (Fig. 3); 3. -
Page 12: Status Of Menu Bar
Description of Settings Interface (shown on the right) Icon Function WIFI switch Bluetooth Data usage Display Notifications Sound Apps Screenshot Setting Storage Battery Memory Users Location Security Accounts Google Languages & input Backup & reset Date & time Status of Menu Bar 1. -
Page 13: Diviex App Introduction
Fig. 1 Fig. 2 Fig. 3 Fig. 4 DiViEx APP Introduction System requirements: Step 1: Before using this application, make sure your machine meets or exceeds the following system requirements: RK3288 16GB Operating system Android 7.1 How to upload media files : Step 2: Make new directory named “MediaFolder”... -
Page 14: Setting
Image JPG/JPEG/BMP/PNG Video MPEG1/MPEG2/MPEG4/MKV Music Step 3: Plug in the USB drive into the device and click the DiViEx App to open it. Step 4:When the screen shows “Copy finished” after “Usb Disk:”, Setting: Step 1: Select the time you would like each picture to be on the screen for by dragging the bar to the desired time. -
Page 15: Edit Picture
Edit picture: This function show all pictures, you can edit all pictures, and remove it. ⚫ Edit picture There are four corners and four border to crop the picture, you can drag it ⚫ Filter Set different filter for the picture, we support the following filter: AUTO_FIX, BLACK_WHITE, BRIGHTNESS, CONTRAST, CROSS_PROCESS, DOCUMENTARY, DUE_TONE, FILL_LIGHT, FISH_EYE, FLIP_HORIZONTAL, FILP_VERTICAL, GRAIN, GRAY_SCALE, LOMISH, NEGATIVE, PSTERIZE, ROTATE, SATURATE, SEPIA, SHARPEN, TEMPERATURE, TINT, VIGNETTE. -
Page 16: Music
⚫ Image deletion Click " " to delete unwanted pictures Music: List all music files int Playlist library ⚫ Add music to playing list music from Playlist library, you can click right arrow, music title will show the number of playlist music. ⚫... -
Page 17: Screen Rotate
2. Click “Factory data reset” (Fig. 2) 3. Choose “Erase SD card”, then click “RESET DEVICE” to get the unit to Factory Reset (Fig. 3) Fig. 1 Fig. 2 Fig. 3 Screen Rotate: 1. Click the Main Apps button “ ”... -
Page 18: Choose System Language
Choose System Language: 1. Get into Settings, then click “Language & input” (Fig. 1) 2. Click “Languages”, then click “Add a language” (Fig. 3) 3. You can add the required system language (Fig. 4) 4. Drag the system language you just added up to the front(Fig. 5) Fig. -
Page 19: Technical Specifications
Technical Specifications ITEM SPECIFICATION LCD size 43” Light source LED backlight Resolution 1920*1080 (pixels) Brightness (typ.)/(min) 400cd/m (typ.) Contrast (typ.) 1200:1 (typ.) Response (ms) 10ms (typ.) Panel Pixel pitch 0.16 (H) mm * 0.49 (V) mm Refresh rate 60Hz Viewing angle 178°... - Page 20 Supported Video Files AVI, MPEG4, WMV, MKV, FLV, MP4, MOV Supported Photo Files JPG, JPEG, BMP, PNG, GIF Audio output, supported files Left and right audio channel, MP3 Functions RTC (real-time clock) Schedule power on/off System update USB compatible App installation Support download and installation Ethernet (RJ45) HDMI...
-
Page 21: Troubleshooting
Troubleshooting the Digital Signs –DGTCHKSK43 Issue Probable Cause Solutions ⚫ ➢ No picture or sound Unit not plugged into wall outlet □ Check that the unit is plugged into wall ➢ Power cord not properly outlet. connected to the terminal on the □... - Page 22 Having problems Did you purchase the □ If you purchased DisplayIt!Xpress software with installing DisplayIt!Xpress software from from Displays2go or from Best Wave directly, software or getting Displays2go? please contact Best Wave at ➢ content to play Did the customer purchase or support@bestwave.
-
Page 23: Cleaning And Maintenance
➢ App is defective Copy > Home > NAND > MediaFolder > ➢ Android board is defective. Images> Editor > Paste Open SlideShow app and select desired trasitions, slide time and looping > Play MX Player steps > Follow same steps as SlideShow App >... -
Page 24: Names And Contents Of Toxic And Hazardous Substances Or Elements In The Product
Names and Contents of Toxic and Hazardous Substances or Elements in the Product Toxic and hazardous substances or elements Part name PBDE О О О О О Display О О О О × × Shell О О О О О Circuit board assembly * О...
Need help?
Do you have a question about the DGTCHKSK43 and is the answer not in the manual?
Questions and answers