Table of Contents
Advertisement
Available languages
Available languages
Quick Links
Het toestel-identifi catieplaatje bevindt zich aan de onderkant van het toestel.
The appliance identifi cation card is located on the bottom of the appliance.
Plak hier het toestel-identifi catieplaatje.
Stick the appliance identifi cation card here.
Houd, wanneer u contact opneemt met de serviceafdeling,
het complete typenummer bij de hand.
When contacting the service department,
have the complete type number to hand.
Adressen en telefoonnummers van de serviceorganisatie vindt u op de garantiekaart.
You will fi nd the addresses and phone numbers of the service organisation on the guarantee card.
Handleiding - Manual
IDK674
IDK884
IDK995
Advertisement
Chapters
Table of Contents

Subscribe to Our Youtube Channel
Related Manuals for Pelgrim IDK674


Summary of Contents for Pelgrim IDK674
- Page 1 IDK674 IDK884 Het toestel-identifi catieplaatje bevindt zich aan de onderkant van het toestel. IDK995 The appliance identifi cation card is located on the bottom of the appliance. Plak hier het toestel-identifi catieplaatje. Stick the appliance identifi cation card here. Houd, wanneer u contact opneemt met de serviceafdeling, het complete typenummer bij de hand.
- Page 2 Handleiding 3 - 38 Manual 39 - 74 Gebruikte pictogrammen - Pictograms used Belangrijk om te weten - Important information...
-
Page 3: Table Of Contents
Inhoud 1 Uw inductiekookplaat 1.1 Inleiding 1.2 Bedieningspaneel 1.3 Beschrijving 1.4 Veiligheidsvoorschriften 7 - 9 2 Gebruik 2.1 Even wennen 10 - 11 2.2 Pannen 12 - 13 3 Bediening Instellen 14 - 24 4 Koken 4.1 Gezond koken 4.2 Kookstanden 5 Onderhoud Reinigen 6 Storingen... -
Page 4: Uw Inductiekookplaat
1 Uw inductiekookplaat 1.1 Inleiding Deze inductiekookplaat is ontworpen voor de echte kookliefhebber. Koken op een inductiekookplaat heeft een aantal voordelen. Het is comfortabel, omdat de kookplaat snel reageert en ook op een zeer laag vermogen is in te stellen. Dankzij het hoge vermogen gaat het aan de kook brengen zeer snel. -
Page 5: Bedieningspaneel
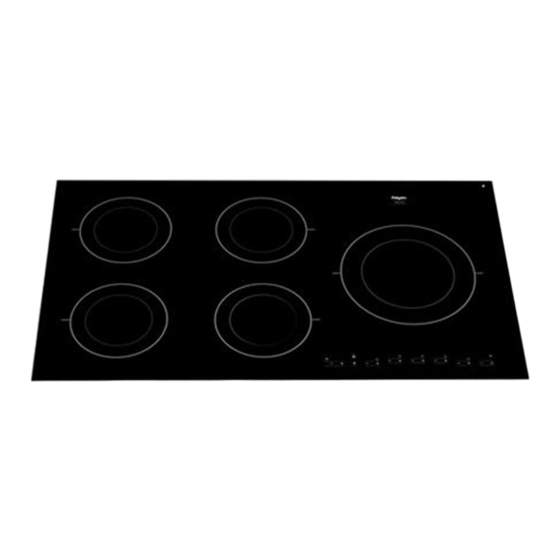
1 Uw inductiekookplaat 1.2 Bedieningspaneel Type IDK674/IDK884 Type IDK995 20 21 19 Warmhouden/smelten met Pauze met indicatielampje indicatielampjes Standen-indicatie zone rechtsvoor Indicatie kookwekker zone linksvoor Standen-indicatie zone rechtsachter Tijd verlagen toets Standen-indicatie zone linksachter Indicatie eierwekker Kookzoneaanduiding zone linksvoor Tijd ophogen toets... -
Page 6: Beschrijving
1 Uw inductiekookplaat 1.3 Beschrijving IDK674 IDK884 Kookzone linksvoor Ø210 3,7 kW Kookzone linksachter Ø145 2,2 kW Kookzone rechtsachter Ø180 3,0 kW Kookzone rechtsvoor Ø180 3,0 kW IDK995 Kookzone linksvoor Ø180 3,0 kW Kookzone linksachter Ø180 3,0 kW Kookzone rechtsachter Ø180 3,0 kW Kookzone rechtsvoor Ø180 3,0 kW... -
Page 7: Veiligheidsvoorschriften
1 Uw inductiekookplaat 1.4 Veiligheidsvoorschriften 1.4.1 Waar u op moet letten Inductiekoken is uiterst veilig. De kookplaat is uitgerust met diverse beveiligingen zoals restwarmte-signalering en kookduurbegrenzing. Toch is er net als bij elk toestel een aantal zaken waar u op moet letten. 1.4.2 Aansluiten en reparatie •... - Page 8 1 Uw inductiekookplaat • Vet en olie zijn bij oververhitting ontvlambaar. Ga niet te dicht bij de pan staan. Wanneer olie vlam vat, het vuur nooit doven met water. Leg onmiddellijk een deksel op de pan en schakel de kookzone uit. •...
- Page 9 1 Uw inductiekookplaat 1.4.4 Temperatuurbeveiliging • Elke kookzone is voorzien van een sensor. Deze sensor controleert ononderbroken de temperatuur van de bodem van de kookpan en van de onderdelen van de kookplaat om elk risico op oververhitting, bij bijvoorbeeld een drooggekookte pan, te vermijden.
-
Page 10: Gebruik
2 Gebruik 2.1 Even wennen 2.1.1 Werking van de aanraaktoetsen Het bedienen van de kookplaat door middel van de aanraaktoetsen is even wennen als u andere bediening gewend bent. Leg uw vingertoppen plat op de toetsen voor het beste effect. U hoeft niet hard te drukken. De aanraaksensoren zijn zodanig ingesteld dat deze alleen reageren op de druk en het formaat van vingertoppen. - Page 11 2 Gebruik 2.1.3 Werking inductie In het toestel wordt een magnetisch veld opgewekt. Door een pan met een ijzeren bodem op een kookzone te plaatsen ontstaat in de panbodem een inductiestroom. Deze inductiestroom wekt warmte op in de panbodem. De spoel (1) in de kookplaat (2) wekt een magnetisch veld (3) op.
-
Page 12: Pannen
2 Gebruik 2.2 Pannen Pannen voor inductiekoken Inductiekoken stelt eisen aan de kwaliteit van de pannen. Let op • Pannen waarmee al eerder op een gaskookplaat is gekookt, zijn niet meer geschikt voor inductiekoken. • Gebruik alleen pannen die geschikt zijn voor elektrisch- en inductiekoken met: º... - Page 13 2 Gebruik Let op Gebruik nooit pannen met een vervormde bodem. Een holle of bolle bodem kan de werking van de oververhittingsbeveiliging belemmeren. Het toestel kan dan te warm worden waardoor de glasplaat kan barsten en de panbodem kan smelten. Schade, ontstaan door het gebruik van ongeschikte pannen of droogkoken, valt buiten de garantie.
-
Page 14: Bediening
3 Bediening Instellen 3.1.1 Inschakelen en vermogen instellen Het vermogen is in te stellen in 9 standen. Daarnaast is er nog een ‘boost’ stand, te herkennen aan een ‘P’ in de display (zie pagina 16; ‘Boost’). Zet een pan op een kookzone. Druk op de aan-/uittoets van de kookplaat. - Page 15 3 Bediening 3.1.2 Kookautomaat Met de kookautomaat functie wordt het vermogen tijdelijk opgehoogd (stand ‘9.’) om de inhoud van de pan sneller op temperatuur te brengen. Deze functie werkt bij alle vermogensstanden behalve de ‘boost’ stand en stand ‘9.’. De kookautomaat inschakelen De kookplaat is ingeschakeld en er staat een pan op een kookzone.
- Page 16 3 Bediening 3.1.3 Boost De ‘boost’ functie kunt u gebruiken om gedurende een korte tijd (maximaal 10 minuten) op het hoogste vermogen te koken. Na het verstrijken van de maximale boosttijd wordt het vermogen verlaagd naar stand 9. De boost functie inschakelen De kookplaat is ingeschakeld en er staat een pan op een kookzone.
- Page 17 3 Bediening 3.1.4 Smelt-/warmhoudfunctie Met de toets kunt u de smeltfunctie en de warmhoudfunctie inschakelen. Met behulp van een kookwekker kunt u de maximale smelt-/warmhoudtijd instellen. De smeltfunctie (u) De warmhoudfunctie (U) In de smeltfunctie wordt de temperatuur In de warmhoudfunctie wordt de van het gerecht automatisch op een temperatuur van het gerecht automatisch constante temperatuur van 42 °C...
- Page 18 3 Bediening 3.1.5 Uitschakelen Eén kookzone uitschakelen De kookzone is ingeschakeld. In de display is een vermogensstand tussen 1 en 9, of ‘P.’ zichtbaar. Houd gedurende 1 seconde de toets ingedrukt van de kookzone die u wilt uitschakelen. Kies kookstand ‘0.’ met de toets.
- Page 19 3 Bediening Vanuit de stand-by modus kunt u direct beginnen met koken door op de toets van de gewenste kookzone te drukken. 3.1.7 (Kinder)slot U kunt de kookplaat met het (kinder)slot vergrendelen. Onbedoeld inschakelen of wijzigen van instellingen van de kookzones wordt hiermee voorkomen. Met de toets heeft u toegang tot de volgende twee functies: De (standaard) slotmodus...
- Page 20 3 Bediening Druk binnen 10 seconden nogmaals op de toets om het kinderslot uit te schakelen en het bedieningspaneel te ontgrendelen. Ná 10 seconden moet de kookplaat eerst weer ingeschakeld worden met de aan-/ uittoets van de kookplaat voordat u het kinderslot kunt uitschakelen. Zet de kookplaat in de kinderslot modus voordat u de kookplaat gaat reinigen om te voorkomen dat deze per ongeluk inschakelt.
- Page 21 3 Bediening 3.1.9 Geheugen Met de geheugenfunctie kunt u de laatste instellingen van de kookplaat terughalen binnen 6 seconden na het uitschakelen van de kookplaat. Dit is bijvoorbeeld handig wanneer u de gehele kookplaat per ongeluk heeft uitgeschakeld met de aan-/uittoets 3.1.10 Herkennen van een modus In de display van elke kookzone is ‘0.’...
- Page 22 De eierwekker inschakelen De kookplaat is ingeschakeld. Type IDK674/884 Druk eenmaal gelijktijdig op de toets van de kook-/eierwekker. ‘00.’ verschijnt in de display en het rode lampje midden onder de display (IDK674884) of rechts onder de display (IDK995) knippert.
- Page 23 3 Bediening Houd de toets van de kook-/eierwekker ingedrukt tot ‘01.’ in de display verschijnt. Druk daarna nogmaals op de toets. De kook-/eierwekker staat nu in stand-by modus. Na 10 seconden schakelt de kook-/eierwekker automatisch uit. De kookwekker toewijzen en inschakelen De kookplaat is ingeschakeld.
- Page 24 3 Bediening Het kook-/eierwekker alarm uitschakelen Wanneer de ingestelde tijd/kookduur verstreken is gaat het alarm af terwijl het rode lampje van de actieve kookzone/eierwekker en ‘00’ blijven knipperen. Druk op een willekeurige bedieningstoets om het alarm uit te schakelen. • U kunt de toets ingedrukt houden om sneller de gewenste kookduur in te stellen.
-
Page 25: Koken
4.1 Gezond koken Rookpunt van verschillende oliesoorten Om gezond te bakken, adviseert Pelgrim om de oliesoort af te stemmen op de baktemperatuur. Elke oliesoort heeft een ander rookpunt waarbij giftige gassen vrijkomen. In onderstaande tabel ziet u de rookpunten van verschillende oliesoorten. -
Page 26: Kookstanden
4 Koken 4.2 Kookstanden Het onderstaande overzicht is uitsluitend bedoeld als leidraad, omdat de instelwaarde afhankelijk is van de hoeveelheid en samenstelling van het gerecht en de pan. • Gebruik ‘boost’ en stand 9 voor: º snel aan de kook brengen; º... -
Page 27: Onderhoud
5 Onderhoud Reinigen Schakel, voordat u met schoonmaken begint, eerst het kinderslot in. Dagelijkse reiniging • Hoewel overgekookt voedsel niet kan inbranden verdient het aanbeveling de kookplaat direct na gebruik schoon te maken. • Voor de dagelijkse reiniging kunt u het beste een mild reinigingsmiddel en een vochtige doek gebruiken. -
Page 28: Storingen
6 Storingen 6.1 Algemeen Voor het telefoonnummer van de servicedienst kunt u de bijgeleverde garantiekaart raadplegen of kijken op ‘www.pelgrimservice.nl’. Indien u een barstje of scheurtje (hoe klein ook) op de glasplaat ziet, schakel dan de kookplaat onmiddellijk uit, neem direct de stekker van de kookplaat uit het stopcontact, verbreek de (automatische) zekering(en) in de meterkast of zet de schakelaar in de meterkast op nul bij een vaste aansluiting. - Page 29 6 Storingen SYMPTOOM MOGELIJKE OORZAAK OPLOSSING Nadat u een kookzone heeft De gebruikte kookpan is Gebruik een goede pan (zie ingeschakeld blijft de display niet geschikt voor koken pagina 11 en 12). knipperen. op inductie of heeft een diameter kleiner dan 12 cm. Een kookzone stopt De ingestelde timertijd is Schakel het signaal uit door...
-
Page 30: Installatievoorschrift
7.1.2 Benodigde vrije ruimte rondom Voor een veilig gebruik is voldoende ruimte romdom de kookplaat noodzakelijk. Controleer of deze ruimte aanwezig is. * IDK674: min. 65 cm IDK884: min. 78 cm IDK995: min. 91 cm... - Page 31 7 Installatievoorschrift 7.1.3 Inbouwmaten In de volgende illustraties zijn de afmetingen van de uitsparingen aangegeven. Type IDK674 Type IDK884 min.40 min.40 Type IDK995 min.40 Wanneer de kookplaat breder is dan het kastje, met een werkblad met een dikte van minder dan 46 mm, moet u een uitsparing aan beide zijden in het kastje zagen, zodat het toestel vrij ligt van het kastje.
- Page 32 7 Installatievoorschrift 7.1.4 Beluchting De elektronica in het toestel heeft koeling nodig. Het toestel schakelt na korte tijd uit wanneer er onvoldoende lucht circuleert. Aan de onderzijde van het toestel bevinden zich de ventilatie-openingen. Door deze openingen moet koele lucht aangezogen kunnen worden.
-
Page 33: Elektrische Aansluiting
7 Installatievoorschrift 7.2 Elektrische aansluitingen 7.2.1 Veel voorkomende aansluitingen: • 3 fasen met 1 nul aansluiting (3 1N, 400 V~ / 50 Hz): º De spanning tussen de fasen en de nul is 230 V~. Tussen de fasen staat een spanning van 400 V~. Breng een verbindingsbrug aan tussen de aansluitpunten 4-5. - Page 34 7 Installatievoorschrift Met de op het aansluitblok aanwezige bruggen, kunt u de vereiste doorverbindingen maken, zoals in deze illustraties staat aangegeven. Zet de kabel vast met de trekontlasting en sluit het deksel. Aansluitpunt, wandcontactdoos en stekker moeten te allen tijde bereikbaar blijven.
-
Page 35: Inbouwen
7 Installatievoorschrift 7.3 Inbouwen Controleer of het keukenmeubel en de uitsparing voldoen aan de gestelde eisen ten aanzien van afmetingen en venti- latie. Behandel van kunststof of houten werkbladen de kopse kanten met eventueel afdichtvernis, om uitzetten van het werkblad door vocht te voorkomen. Leg het toestel omgekeerd op het aanrechtblad. -
Page 36: Bijlage
8 Bijlage 8.1 Afvoeren toestel en verpakking Bij de vervaardiging van dit toestel is gebruik gemaakt van duurzame materialen. Dit toestel moet aan het eind van zijn levenscyclus op verantwoorde wijze worden afgevoerd. De overheid kan u hierover informatie verschaffen. De verpakking van het toestel is recyclebaar. -
Page 37: Vermogens- En Inbouwtabel
8 Bijlage 8.2 Vermogens- en inbouwtabel Deze toestellen voldoen aan alle relevante CE richtlijnen. Kookplaattype IDK674 IDK884 IDK995 Inductie Aansluiting 230V - 50Hz 230V - 50Hz 230V - 50Hz Aantal fasen Max. vermogen kookzones Linksvoor 3,7 kW (Ø210) 3,7 kW (Ø210) 3,0 kW (Ø180) - Page 38 Notities...
- Page 39 Contents 1 Your induction hob 1.1 Introduction 1.2 Control panel 1.3 Description 1.4 Safety instructions 43 - 45 2 Use 2.1 Getting used to it... 46 - 47 2.2 Pans 48 - 49 3 Operation Settings 50 - 60 4 Cooking 4.1 Healthy cooking 4.2 Cooking settings 5 Maintenance...
-
Page 40: Your Induction Hob
1 Your Induction Hob 1.1 Introduction This hob has been designed for the real lover of cooking. Cooking on an induction hob has a number of advantages. It is easy, because the hob reacts quickly and can also be set to a very low power level. Because, moreover, it can also be set to a high power level, it can bring things to the boil very quickly. -
Page 41: Control Panel
1 Your induction hob 1.2 Control panel Type IDK674/IDK884 Type IDK995 20 21 19 Keep food warm/melt with indicator Setting indicator right front zone Cooking timer indicator left front zone Setting indicator left rear zone Reduce time button Setting indicator left rear zone... -
Page 42: Description
1 Your induction hob 1.3 Description IDK674 IDK884 Cooking zone front left Ø210 3,7 kW Cooking zone rear left Ø145 2,2 kW Cooking zone rear right Ø180 3,0 kW Cooking zone front right Ø180 3,0 kW IDK995 Cooking zone front left Ø180 3,0 kW Cooking zone rear left Ø180 3,0 kW... -
Page 43: Safety Instructions
1 Your induction hob 1.4 Safety instructions 1.4.1 What you should pay attention to Induction cooking is extremely safe. Various safety devices have been incorporated in the hob such as a residual heat indicator and a cooking time limiter. There are nevertheless a number of precautions you should take. - Page 44 1 Your induction hob • Grease and oil are infl ammable when overheated. Do not stand too close to the pan. Should oil catch fi re, never try to extinguish the fi re with water. Put a lid on the pan immediately and switch the cooking zone off.
- Page 45 1 Your induction hob 1.4.5 Cooking-time limiter The cooking-time limiter is a safety function of your cooking appliance. It will operate if you forget to switch off your hob. Depending on the setting you have chosen, the cooking time will be limited as follows: Setting The cooking zone switches automatically off after:...
-
Page 46: Use
2 Use 2.1 Getting used to it... 2.1.1 Using the touch controls The touch controls may take some getting used to if you are used to other (rotary) controls. Place the tip of your fi nger fl at on the control to achieve the best results. You do not have to apply any pressure. - Page 47 2 Use 2.1.3 Induction cooking A magnetic fi eld is generated in the appliance. By placing a pan with an iron base on a cooking zone, a current is induced in the pan base. This induced current generates heat in the base of the pan.
-
Page 48: Pans
2 Use 2.2 Pans Pans for induction cooking Induction cooking requires a particular quality of pan. Attention • Pans that have already been used for cooking on a gas hob are no longer suitable for use on an induction hob. •... - Page 49 2 Use Attention Never use pans with a misshapen base. A hollow or rounded base can interfere with the operation of the overheating protection, so that the appliance becomes too hot. This may lead to the glass top cracking and the pan base melting. Damage arising from the use of unsuitable pans or from boiling dry is excluded from the guarantee.
-
Page 50: Operation
3 Operation Settings 3.1.1 Switching on the hob and setting the power The power has 9 settings. There is also a ‘boost’ setting, which is indicated by a ‘P.’ in the display (see page 52 ‘Boost’). Put a pan on a cooking zone. Touch the On/Off button. - Page 51 3 Operation 3.1.2 Automatic heat-up function The automatic heat-up function temporarily increases the power (setting ‘9.’) to heat the contents of the pan faster. This function is available in all settings except the ‘Boost’ setting and setting ‘9.’. Switching on the automatic heat-up function The hob is switched on and a pan has been placed in a cooking zone.
- Page 52 3 Operation 3.1.3 Boost The ‘Boost’ function is used to cook at maximum power for a short period of time (maximum 10 minutes). The power is reduced to setting 9 at the end of the maximum boost time. Switching on the boost function The hob is switched on and a pan is on the cooking zone.
- Page 53 3 Operation 3.1.4 Melting/keeping food warm Use the button to switch on the function to melt or keep food warm. The cooking timer is used to set the maximum melting/warming time. The melt function (u) The function to keep food warm (U) The melt function keeps the temperature The function to keep food warm keeps of the food at a constant 42 °C.
- Page 54 3 Operation 3.1.5 Switching off the hob Switching off one cooking zone The cooking zone is switched on. The display shows a power setting between 1 and 9, or ‘P.’. Touch and hold the and the buttons for one second to switch off the cooking zone.
- Page 55 3 Operation 3.1.7 (Child)lock You can secure the hob with the (child)lock. With this setting, the hob cannot be switched on and the cooking zone settings cannot be changed. button gives you access to the following two functions: (Standard) lock mode Child lock mode The (standard) lock mode prevents The child lock mode prevents...
- Page 56 3 Operation Touch the button again within 10 seconds to switch off the child lock and unlock the control panel. You must wait 10 seconds before switching the hob on again with the On/Off button in order to switch off the child lock. Switch the hob to child lock mode before cleaning it to prevent it from accidentally switching on.
- Page 57 3 Operation 3.1.9 Memory The memory function enables you to retrieve the last settings within 6 seconds of the hob switching off. This is convenient, for example, if the whole hob was accidentally switched off by touching the On/Off button 3.1.10 Recognising a mode The display for each cooking zone shows ‘0.’.
- Page 58 3 Operation 3.1.11 Cooking timer/Egg timer A cooking timer can be set for each cooking zone. All of the cooking timers can be used at the same time. The hob also has an egg timer. Both the cooking timer and the egg timer can be set to a maximum of 99 minutes.
- Page 59 3 Operation Touch and hold the button for the cooking timer/egg timer until ‘01.’ shows in the display. Touch the button again. The cooking timer/egg timer is now in stand-by mode. The cooking timer/egg timer automatically switches off after 10 seconds. Assigning and switching on the cooking timer The hob is switched on.
- Page 60 3 Operation Switching off the cooking timer/egg timer alarm When the set time/cooking time has elapsed, the alarm rings and the red light for the active cooking zone/egg timer fl ashes ‘00’. Touch any button to switch off the alarm. •...
-
Page 61: Cooking
4.1 Healthy cooking Burning point of different types of oil To ensure your food is fried as healthily as possible, Pelgrim recommends choosing the type of oil according to the frying temperature. Each oil has a different burning point at which toxic gasses are released. -
Page 62: Cooking Settings
4 Cooking 4.2 Cooking settings Because the settings depend on the quantity and composition of the contents of the pan, the table below is intended as a guideline only. • Use setting ‘boost’ and setting 9 to: º bring the food or liquid to the boil quickly; º... -
Page 63: Maintenance
5 Maintenance Cleaning Set the child lock before you start cleaning the hob. Daily cleaning • Although food spills cannot burn into the glass, we nevertheless recommend you to clean the hob immediately after use. • Best for daily cleaning is a damp cloth with a mild cleaning agent. •... -
Page 64: General
6 Troubleshooting 6.1 General The service department telephone number can be found on the guarantee card provided or on ‘www.pelgrimservice.nl’. If you notice a crack in the glass top (however small), switch the hob off immediately, unplug the hob, turn off the (automatic) fuse switch(es) in the meter cupboard or, in the event of a permanent connection, set the switch in the power supply lead to zero.) Contact the service department. - Page 65 6 Troubleshooting SYMPTOM POSSIBLE CAUSE SOLUTION You have switched a cooking The pan you are using is Use a suitable pan, see (see zone on but the display not suitable for induction page 48 and 49). keeps fl ashing. cooking. or has a diameter of less than 12 cm.
-
Page 66: Installation Instructions
Damage caused by incorrect connection, installation or use, will not be covered by the guarantee. 7.1.2 Clearance Suffi cient all-round clearance is essential to the safe use of the hob. Check that there is enough clearance. * IDK674: min. 65 cm cooker hood IDK884: min. 78 cm cabinet IDK995: min. 91 cm... - Page 67 7 Installation instructions 7.1.3 Installation dimensions The dimensions and recesses are shown in the illustrations beneath. Type IDK674 Type IDK884 min.40 min.40 Type IDK995 min.40 If the hob is wider than the cupboard, with a worktop less than 46 mm thick, saw a cut- out in both sides of the cupboard, so the appliance is detached from the cupboard.
- Page 68 7 Installation instructions 7.1.4 Ventilation The electronics in the appliance need cooling. The appliance will automatically switch off if there is insuffi cient air circulation. There are ventilation openings on the underside of the appliance. It must be possible for cool air to be drawn in through these openings.
-
Page 69: Electrical Connection
7 Installation instructions 7.2 Electrical connection 7.2.1 Common connection: • 3 phase and 1 zero connection (3 1N, 400 V~/ 50 Hz): º The voltage between the phases and the zeros is 230 V~. The voltage between the two phases is 400 V~. - Page 70 7 Installation Instructions The bridges on the connecting block can be used to create the required connections, as indicated in these illustrations. Fix the cable with a pull relief and close the cover. Connection point, wall-mounting socket and plug must be accessible at all times.
-
Page 71: Building In
7 Installation Instructions 7.3 Building in Check that the cabinet and the cut-out meet the dimension and ventilation requirement Threat the sawn ends of wooden or synthetic worktops with sealing varnish if necessary, to prevent moisture causing the worktop to swell. Lay the hob upside down on the worktop. -
Page 72: Appendix
8 Appendix 8.1 Disposal of packaging and appliance In the manufacturing of this appliance durable materials were used. Make sure to dispose of this equipment responsibly at the end of its lifecycle. Ask the authorities for more information regarding this. The appliance packaging is recyclable. -
Page 73: Technical Details
8 Appendix 8.2 Technical details This appliance complies with all relevant CE directives. Hob type IDK674 IDK884 IDK995 Induction Connection 230V - 50Hz 230V - 50Hz 230V - 50Hz Max. capacity cooking zones Front left 3,7 kW (Ø210) 3,7 kW (Ø210) 3,0 kW (Ø180) - Page 74 Notes...
Need help?
Do you have a question about the IDK674 and is the answer not in the manual?
Questions and answers