Advertisement
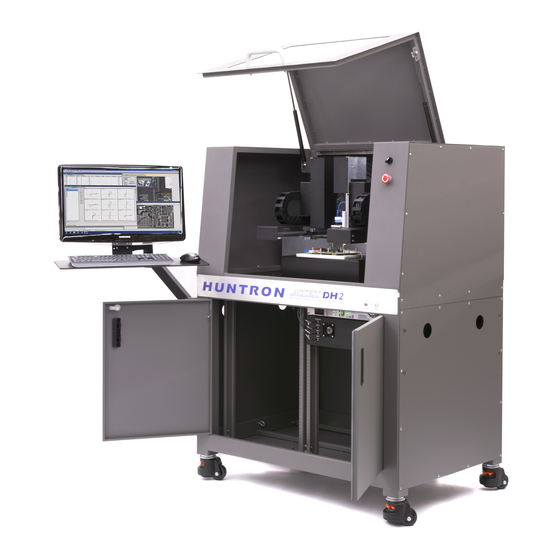
Getting Started Instructions for the Access DH2 Probers
** Read the Access DH2 CAUTION SHEET before proceeding with these
instructions **
Tools Needed
• ½' wrench or socket
• Philips Screw driver
Monitor Arm Setup
1. Connect the two CABLE, USB EXTENSION 3M (98-0531) on the back of the computer.
2. Connect the CABLE DVI 10FT MALE-MALE (98-0704) to the add-in Graphics card on the
back of the computer.
3. Connect the POWER CORD C14 C15 6FT 14 AWG (98-0742) to the back of the PDU.
4. Feed the other ends of the cables out the access hole at the upper from of the Access DH
on the side where the ARM, MONITOR/KEYBOARD/MOUSE (98-0597) will be
mounted.
5. Remove the bolts holding the straps on the sides of the Access DH.
6. Secure the arm mount to the side of the Prober using provided bolts to the existing
threaded holes. The arm mount can be secured to either side of the Prober.
7. Assemble arm as per instructions included with kit and insert into arm mount.
8. Mount Keyboard holder and monitor stand with 4 flathead screws.
Getting started instructions for Access DH2 Prober
21-2627 Rev A Version 1.4
1
Advertisement
Table of Contents

Related Manuals for Huntron Access DH2

Summary of Contents for Huntron Access DH2
- Page 1 Getting Started Instructions for the Access DH2 Probers ** Read the Access DH2 CAUTION SHEET before proceeding with these instructions ** Tools Needed • ½’ wrench or socket • Philips Screw driver Monitor Arm Setup 1. Connect the two CABLE, USB EXTENSION 3M (98-0531) on the back of the computer.
- Page 2 10. Connect the CABLE DISPLAY PORT 10FT MALE-MALE (98-0704) to the monitor. 11. Connect the POWER CORD, 6' (98-0742) to the monitor. 12. Connect the two CABLE, USB EXTENSION 3M (98-0531) to the keyboard and mouse. Getting started instructions for Access DH2 Prober 21-2627 Rev A Version 1.4...
- Page 3 Access DH2 with Pixelink Cameras The current DH2 configuration uses high quality auto-focus cameras from Pixelink. When configuring your Huntron Workstation set up (Tools menu/Options/Hardware tab) be sure to select your Frame Grabber type as “Pixelink”. Getting started instructions for Access DH2 Prober...
- Page 4 Starting Huntron Workstation The Huntron Workstation is preinstalled on the Access DH2 PC and an icon will be located on your Windows desktop. Double click this icon to start the software. Follow the Software Tutorial Huntron Workstation software tutorials are included in the software DVD Documents folder and in the default installed folder (C:\Program Files\Huntron Workstation 4.3\Documents).
Need help?
Do you have a question about the Access DH2 and is the answer not in the manual?
Questions and answers