Advertisement
Quick Links
Advertisement

Related Manuals for AQUATHERMA Nature Series

Summary of Contents for AQUATHERMA Nature Series
- Page 1 Nature Series Urbaine Series January 2018 edition...
- Page 2 Summary of the steps for installing your spa Details Description on page Before installing your spa, you must contact your municipality to understand and comply with local regulations. Contact Info-Excavation (www.info-ex.com or 1 800 663-9228) and Hydro-Québec (http://www.hydroquebec.com/securite/piscine.html so that you can comply with safety standards for determining the location of your spa.
- Page 3 Summary of the steps for installing your spa Details Description on page Use ONLY ½ net gravel for levelling the bottom and backfilling around the spa. In general, 8 to 12 tons of gravel will be required to complete these steps. Refer to your dealer for details on approximate amounts of gravel as these may vary depending on the spa model and the digging method.
- Page 4 Summary of the steps for installing your spa Details Description on page WARNING: Carefully follow the manufacturer's recommendations for the safe method for unloading and moving the spa basin. Depending on the size of the spa, this stage will be done manually or with a excavator of a suitable size to unload, 10 - 11 move and place the spa basin in the hole.
- Page 5 PLANNING When carrying out a project of this size, there are several steps to plan before the delivery and installation of your spa. Here are some tips and tricks to make your dream come true. MUNICIPAL REGULATIONS It is your responsibility to check with your municipality for rules applying to your property. Here are some examples: •...
- Page 6 CONTENT Upon delivery of the spa, you will receive the following: - One fibreglass spa basin - A hard cover (if included with the purchase) - A wood housing (or fibreglass if included with the purchase) including the items for the motor, filter and heating systems - A set of pipe fittings Note that spa models that contain more than 3 pumps generally do not include housing because of their size.
- Page 7 PREPARATION The installation and excavation of your spa must be determined according to your plan. A spa located under trees will certainly look impressive, but consider that you will eventually have to deal with falling leaves or twigs which will make spa maintenance a little more difficult.
- Page 8 EXCAVATION The excavation width should be approximately 12'' wider all around the spa basin. For spas with a curved shape, you are not required to follow this shape with great precision during the excavation. However, you may need more gravel for backfilling. The excavation depth should be approximately 3"...
- Page 9 INSTALLATION AND LEVELLING OF GRAVEL BOTTOM Have the required amount of gravel placed next to and, if possible, around the hole. Refer to the table for the approximate amount required depending on the spa model to be installed. Once you have reached the right level of digging then roughly equalize the bottom of the hole, spread a geotextile-like fabric over the entire bottom hole surface and also on the edges.
- Page 10 SIGHT HOLE / DE-WATERING WELL CAUTION Completely emptying a spa can have serious consequences such as shifting or lifting the spa. It is therefore NOT recommended to do so without having first taken care to check in the well if there is water under the spa.
- Page 11 DELIVERY AND MANIPULATION OF THE SPA BASIN The delivery of the spa basin is usually done with a flat bed trailer. For deliveries to remote areas, the services of an independent transportation company may be used. The excavator or other machinery used to dig the hole is also used for unloading the spa basin and placing it in the hole.
-
Page 12: Preparing For Installation
PREPARING FOR INSTALLATION The installation of your spa will require the help of 3 or 4 people. You will also need the following tools and materials: Mini-excavator Carpentry level, ideally 3m long or laser level. Wheelbarrow Standard shovels and rake You can also use a shorter level attached to a small Paint can to mark the location of straight plank. - Page 13 Step SETTING UP THE SPA BASIN Manually haul or, with the help of machinery for heavier basins, move and drop the spa basin onto the gravel at the bottom of the hole. Place a long level on the top of the basin to determine if the spa is placed as level as possible.
- Page 14 BACKFILLING THE SPA BASIN Once the spa basin is properly levelled on the gravel bed, you can start filling it. Let the water level rise as the backfill height increases with the gravel around it. The weight of the water will prevent any movement of the shell on its bottom during backfilling. Continue the backfilling process, taking care to "crush"...
- Page 15 SEMI ABOVE GROUND BASIN INSTALLATION The fibreglass spa can be installed so that it is halfway out of the ground. This makes it possible to highlight a portion of the spa without it becoming too large of a visual mass. Note that this can also be a good solution for those who cannot dig to a depth of at least There are two options to do this.
- Page 16 ABOVE GROUND BASIN INSTALLATION The fibreglass spa can be installed so that it is completely above the ground. This allows, for example, integrating the spa basin into a terrace. Note that this can also be a good solution for those who cannot dig at all due to inadequate soil. There are two options to do this.
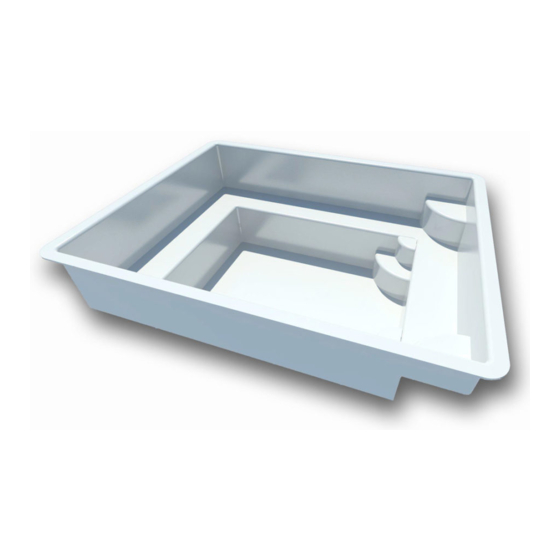
- Page 17 GENERAL VISUAL Shell Sight hole keypad Water and air hoses, light /and keypad wires, all Connected to mechanical system Gravel ½ Soil Membrane between soil and gravel Notes: The number of pipes varies depending on the spa model. Generally: 1 pump = 3 pipes, 2 pumps = 5 pipes, 5 pumps = 11 pipes. You must install the mechanical system at about the same level as the basin.
-
Page 18: Plumbing Connections
Step PLUMBING CONNECTIONS The spa water circulates in a closed circuit between the fibreglass basin and the motor system included in the technical housing. Tips and Tricks For added safety, you can insert the Connections are made using pipes with screw-on tips each with a colour code (see next page). - Page 19 PLUMBING CONNECTIONS continued…. When you connect the plumbing pipes to the basin respecting the colours... Note GREEN = waterfall supply valve (if applicable) In the pipe connection stage, also consider YELLOW = air connected to an intake in the housing connecting the spa light wires and the RED = heated and filtered water to the spa basin electronic keypad wire.
- Page 20 PLUMBING CONNECTIONS continued…. WARNING It is mandatory to start the spa and let it run at least 1 hour before completing the backfilling and landscaping. No liability will be assumed by the merchant or the manufacturer for the removal or re-installation of landscaping materials.
- Page 21 PLUMBING CONNECTIONS ( CONTINUED) If you have chosen to purchase a waterfall system when you purchase your spa, you will find a Waterfall supply valve. pre-installed valve on the waterfall's supply piping This can be in blue or near the other pipes coming out of the spa. red.
-
Page 22: Electrical Connections
ELECTRICAL CONNECTIONS Step NOTES Your dealer does not perform any electrical connections and assumes no liability for electrical work performed on your unit. It is therefore MANDATORY and the responsibility of the spa owner to schedule an appointment with an accredited, competent and conscientious master electrician for the spa's electrical connections. - Page 23 ELECTRICAL CONNECTIONS ( for specific systems) Some spa models use a filtration system called "continuous". These are spas equipped with an additional pump (1 hp - 1 speed 240/20 amp) and a sand filter for extremely high performance filtration requiring very little maintenance.
- Page 24 ELECTRICAL CONNECTIONS (continued) It is MANDATORY to connect the circuit breaker wires in the manner shown here otherwise the electric current will go to the electronic housing, but nothing will work. 120 volt (red) voltage at the spa From the house to the housing (red). Entry From the house to the housing (red).
- Page 25 ELECTRICAL CONNECTIONS (continued) Source: Gecko Alliance Electronic, in.xe System Technical Manual www.geckoalliance.com...
- Page 26 ELECTRICAL CONNECTIONS continued… Source: Gecko Alliance Electronic, in.xe System Technical Manual www.geckoalliance.com...
- Page 27 ELECTRICAL CONNECTIONS continued… Source: Gecko Alliance Electronic, in.xe System Technical Manual www.geckoalliance.com...
- Page 28 CONNECTING ACCESSORY WIRES Source: Gecko Alliance Electronic, in.xe System Technical Manual www.geckoalliance.com Blower Electronic keypad located close to the spa basin Direct connector InTouch interface ( if applicable ) Keypad Auxiliary keypad (if applicable ) In.touch system Light connector Lighting connecting cables Spa lighting Waterfall lighting (if applicable) Waterfall LED lighting...
- Page 29 It is rather optional landscaping and the choice of each owner, which gives each project its unique character. Nature Edge The spa shells of the Nature series have been designed especially with an inner edge called the "Nature Edge" allowing the insertion of decorative Paleo Modular stones. Pavement...
- Page 30 Step INSTALLING DECORATIVE ELEMENTS Waterfall When designing a waterfall, it is IMPERATIVE, if not Waterproof membrane MANADATORY, to install a waterproof membrane as shown in the diagram at right. Why? To ensure that the water from the waterfall flows into the spa instead of flowing out of the spa and causing significant water loss.
-
Page 31: Initial Start-Up
INITIAL START-UP When the spa installation is complete, i.e., it is filled and plugged in, you can perform the initial start-up procedure of the mechanical system. The mechanical/electronic system automatically turns on when the spa is plugged in and the circuit breaker is on. Therefore, never turn on the spa if it is not full of water or before taking care to ensure that the water access valves in the technical housing are in the OPEN position (see images at the bottom of the page). - Page 32 INITIAL START-UP (continued) Before turning on the spa, you must… - Fill the spa completely - Open the water access valves located in the technical housing You must also... - Remove the strainer cover on the front of the pump taking care not to lose or move the seal on the underside of the clear cover - Fill the strainer receptacle with water - Close the strainer cover...
- Page 33 INITIAL START-UP (continued) If air still remains trapped in the system... Make sure the seal is properly seated on the inside edge of the clear Canopy on top of the motor strainer. Incorrect place Correct place Also check that the plumbing fittings are properly tightened and that their seals are present and properly positioned.
- Page 34 DESIGN, MANUFACTURING AND DISTRIBUTION BY: www.aquainnovation.ca 418 871-0658 800 708-7789...
Need help?
Do you have a question about the Nature Series and is the answer not in the manual?
Questions and answers