Table of Contents
Advertisement
Quick Links
Advertisement
Table of Contents

Subscribe to Our Youtube Channel
Related Manuals for Afinia 3D H800+

Summary of Contents for Afinia 3D H800+
- Page 1 H800+ 3D Printer Version 1.5...
- Page 2 Afinia H800+ 3D Printer User’s Manual...
-
Page 3: Table Of Contents
Driver and Software Installation ...................... 10 Installing the Printer ........................10 Loading the Filament ........................11 Getting Ready to Print ......................12 Starting the Afinia 3D Program ......................12 Initializing the Printer ........................12 Preparing the Platform ........................13 Leveling the Print Platform ......................14 Platform Calibration ........................ - Page 4 Afinia H800+ 3D Printer User’s Manual Afinia 1-Year Limited Warranty Below is the one-year limited warranty included with this Afinia product. Afinia prides itself on its outstanding product line and its technical support. If for some reason, your product fails, Afinia, a division of Microboards Technology, LLC, stands behind its warranties and assures you the best service possible in a quick and timely manner.
-
Page 5: Safety Precautions
Afinia H800+ 3D Printer User’s Manual Safety Precautions Please read this section carefully before using the printer. The printer can only be used with the power adapters supplied by this company, or the • product may be damaged, with a risk of fire. To avoid burning or model deformation, do not touch the model, nozzle, or the platform by •... -
Page 6: Overview
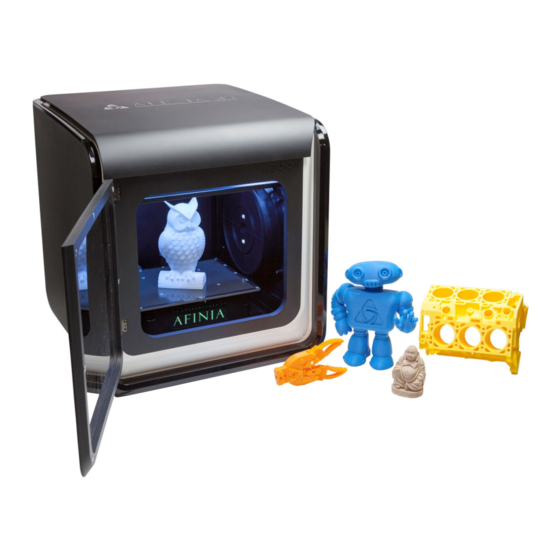
51dB - Quiet and Fast! The Afinia 3D software sends the print data from a Mac or PC to the Printer over a single USB cable. The Extruder delivers the Filament from the Spool into the Nozzle, which heats the filament... - Page 7 Afinia H800+ 3D Printer User’s Manual The Afinia H800+ with HEPA filter is packed with advanced technologies in a stylish and robust design.
-
Page 8: Unpacking The Afinia H800+ 3D Printer
Afinia H800+ 3D Printer User’s Manual Unpacking the Afinia H800+ 3D Printer The Afinia H800+ 3D Printer weighs over 40 pounds and should be team-lifted! Remove the power cord and 4 perf boards from the top foam piece. Remove top foam from the box. Lift the foam ring from around the printer. With two people, carefully lift the Printer from the box. -
Page 9: The Print Head
Afinia H800+ 3D Printer User’s Manual The Print Head The Print Head is held in place using three guide magnets in the extruder bracket. The Print Head is already installed in the Printer. You do not need to do any assembly. The Control Buttons You can do a lot with your Afinia H800+ by using the Control Buttons, so it follows your every command. -
Page 10: Installing The Afinia H800+ 3D Printer
Afinia 3D Printer setup.exe file in the PC directory on the installation disc. Note: This installs the Afinia 3D Printer software, the Afinia 3D Printer drivers, and the Afinia 3D Printer sample files into your Program files\Afinia\Afinia 3D Printer folder. -
Page 11: Loading The Filament
Afinia H800+ 3D Printer User’s Manual Loading the 500g Filament Spool A. Insert the end of filament into one end of the Filament tube, which is on the upper right side of the spool holder. B. Feed the filament through the tube until about 4 inches of filament protrudes from the tube. -
Page 12: Getting Ready To Print
Afinia H800+ 3D Printer User’s Manual Getting Ready to Print Starting the Afinia 3D Program Open the Afinia 3D software on the desktop (Windows) or in the Applications folder (Mac). Windows version Mac version Initializing the Printer Long Press the Power Button or click Initialize in the 3D Print menu. The printer will beep, the platform and print head will move to the printer’s home positions, and beep again when it is ready. -
Page 13: Preparing The Platform
Afinia H800+ 3D Printer User’s Manual Preparing the Platform The print platform needs to be prepared so the model adheres to the platform enough to be printed while still being easy to remove from the platform when done. Never print directly to the aluminum platform! There are several options: Perf Board (Glass-reinforced Epoxy Laminate) The Perf board is held in place by the 13 mounting... -
Page 14: Leveling The Print Platform
Afinia H800+ 3D Printer User’s Manual Leveling the Print Platform Before calibrating the nozzle height, check the vertical nozzle distance at each corner and center of the print platform. Open Maintenance from the 3D Print menu and click the Center button. Windows version Mac version If you know the nozzle height, enter that height in the To: box, then click the To: button. -
Page 15: Platform Calibration
Afinia H800+ 3D Printer User’s Manual Platform Calibration Along with manual leveling the platform, the Afinia software can run a Platform Calibration to adjust the printing of the raft, laying down a level foundation for your model to be printed on. This process is not intended to replace physically leveling the platform, but to work with the leveling. -
Page 16: Manual Platform Calibration
Afinia H800+ 3D Printer User’s Manual Manual Platform Calibration Select Platform Calibrate from the 3D Print menu. Click the button labeled 5 to move the nozzle to the center of the platform. Use the Up button to raise the platform. Hold the button down to move the platform steadily, or use single clicks to fine-tune the platform height. -
Page 17: Calibrating The Nozzle Height
Afinia H800+ 3D Printer User’s Manual Calibrating the Nozzle Height This section is one of the most important of the entire manual. Please read it carefully to help you understand the nozzle height setup procedure. To print successfully, the platform should be 0.2mm from the nozzle. As each printer is slightly different, this distance needs to be calibrated before starting to print. -
Page 18: Other Maintenance Options
Afinia H800+ 3D Printer User’s Manual 5. Repeat until the print surface is 0.2mm from the nozzle, about the thickness of a piece of paper folded in half. 6. Check the nozzle height at all four corners of the platform. If any of the corners is closer to the nozzle than the center, use that point to set the height. - Page 19 Afinia H800+ 3D Printer User’s Manual Status This area displays the current temperature of the nozzle and platform and if either element is currently being heated. Nozzle & Platform Position Controls The five buttons (FL, FR, Center, NL, NR) control the position of the nozzle and the platform. The To button controls the height of the platform, and is used in the manual nozzle height calibration procedure described on page 17.
-
Page 20: Printing With The H800+ 3D Printer
Loading 3D Model Click File / Open or the Open icon on the toolbar (Windows only) and select the model you want to open. The Afinia 3D Printer software only supports files, UP3, Windows Software formats. Mac Software You can open several models and print them all at the same time;... - Page 21 Surface Normals and Model Manifold requirements! Fixing STL Files The Afinia 3D Printer software includes a Fix option that will try to fix any bad surfaces in your model. Under the Edit menu in Windows you will see Fix, and under the Tools menu in Mac will be the Autofix option.
-
Page 22: View Options
Afinia H800+ 3D Printer User’s Manual View Options The mouse can be used to rotate, pan, or zoom the view of the models. Rotate Press the middle mouse button and move the mouse to rotate the view. Press Ctrl and the middle mouse button at the same time and move the mouse to pan. You can also use the arrow keys to pan the view. - Page 23 Afinia H800+ 3D Printer User’s Manual Windows 1. Click Move 1. Select the Move option 2. Input in the text box 2. Input in the text box 3. Click the Z axis button 3. Click the Z- button Windows TIP: If you hold down the Ctrl key, you can drag the model to a position. Rotating the Model Click the Rotate button on the toolbar, choose or input into the text box how many degrees you want to rotate, and then choose the axis of rotation.
-
Page 24: Placing Models Onto The Build Platform
Occasionally an stl file may appear much smaller or much larger than designed. This is due to the design software saving the units of measure as inches rather than millimeters; the Afinia 3D software uses millimeters only, so a 1 inch model would appear as 1 millimeter. -
Page 25: Print Setup Options
Afinia H800+ 3D Printer User’s Manual Print Setup Options Click the Setup option in the 3D Print menu or the Preferences button on the Print and Print Preview windows. Mac version Windows version Print Settings Z Resolution This setting decides the layer thickness of the printer. Options are 0.10mm 0.40mm thick layers. - Page 26 Afinia H800+ 3D Printer User’s Manual Fill Settings There are four ways to fill the interior of the parts, as described below. The part is 50% filled. The part is 25% filled. This Fill setting recommended This is the default Fill setting. functional engineering parts.
- Page 27 Afinia H800+ 3D Printer User’s Manual Support Settings Dense This sets how many layers of dense support material are printed directly beneath the model. More layers of dense support makes for a more stable print but takes longer to print. Angle The Support Angle setting specifies the maximum Angle at which support material will be printed.
- Page 28 Angle setting is met no matter how small the surface area. Printer Name (PC Only) Enter in a name for your printer. This makes it easier to identify when you have more than one Afinia 3D Printer connected to your PC. Other Settings Stable Support Stable support creates support that is more solid so the model is less likely to distort.
-
Page 29: Printing
Afinia H800+ 3D Printer User’s Manual Printing TIP: Two keys to successful printing on the Afinia H800+ 3D Printer are platform preparation and preheating. The best results will be achieved if: The platform has been leveled and calibrated • The nozzle height is correctly set •... - Page 30 Afinia H800+ 3D Printer User’s Manual For large surface area parts, the Fine setting will take longer to print and the corners of the raft may lift from the platform. UnSolid Model Not all STL files are going to be perfect. A perfect STL file is a fully enclosed surface, with no gaps in the surface skin, and no overlapping surfaces.
-
Page 31: Save As Project
Afinia H800+ 3D Printer User’s Manual Calculating model costs Calculate the cost of the material that will be used for your model using the Print Preview option under the 3D Print menu. The application will calculate the total weight of material used, including the raft and any support material. -
Page 32: Model Removal
Afinia H800+ 3D Printer User’s Manual Model Removal You should never attempt to remove the finished model from the print surface while it is still in the printer. Doing so may affect the platform leveling or bend the entire platform assembly so that it is no longer perpendicular to the printer head. -
Page 33: Removing Support Material
Afinia H800+ 3D Printer User’s Manual Removing Support Material You will most likely need to remove any supports printed along with your model. The support material is the same material as the model material, but printed at a lower density, making it easier to remove and identify. -
Page 34: Maintenance
Afinia H800+ 3D Printer User’s Manual Maintenance Changing the Filament Changing the filament can be done either in the software or using the control panel. 1. Remove the magnetic Spool Cover. 2. Select Maintenance from the 3D Print menu and click Withdraw. -or- Double Press the Filament button. -
Page 35: Cleaning The Nozzle
Afinia H800+ 3D Printer User’s Manual Cleaning the Nozzle The outside of the nozzle can get covered with a layer of filament during regular use. When the printer is printing, this layer may melt on the nozzle and leave discolored spots in the model or even clog the nozzle. -
Page 36: Cleaning The Extruder Gear
Afinia H800+ 3D Printer User’s Manual Cleaning the Extruder Gear The gear in the extruder may occasionally need cleaning to keep the filament feeding smoothly. 1. Long Press the Initialize button on the Control Panel to put the printer in sleep mode. 2. -
Page 37: Cleaning The Platform
Afinia H800+ 3D Printer User’s Manual Cleaning the Platform Regardless of your method of preparing the platform, a smooth surface will improve your results. If you are using the Perf Board as the print surface, you should remove any remaining •... - Page 38 Afinia H800+ 3D Printer User’s Manual Open Calibrate from the 3D Print menu. Measure the X1 and X2 length, as shown in the pictures below. IMPORTANT NOTE: Before you enter any new calibration values, the bar at the very top of the screen should read: XY: 0.00 deg / XZ: 0.00 deg.
-
Page 39: Tips & Tricks
Scaling your Model Not only can the Afinia 3D software scale your model in all three dimensions, you can use the Scale function to change the size in any one of the three dimensions independently. For instance, you can make your model taller by setting the scale factor and clicking just the Z Axis button without affecting the width or depth (see page 23). - Page 40 Fix in the Edit menu of the Afinia 3D software may repair the non-manifold problem areas, but the best solution is to correct problems in your design software. Many software packages can check for and repair non-manifold models –...
-
Page 41: Status Indicator
Afinia H800+ 3D Printer User’s Manual Status Indicator The table below explains what each Status Indicator state means. Changing Languages The Afinia software interface can use multiple languages. To change the language, open the application and enter the correct key sequence from the table below. The language will change the next time the application is launched. -
Page 42: Updating The Printer Rom
Afinia H800+ 3D Printer User’s Manual Updating the Printer ROM Note: This is a function that should only be performed if necessary. 1. With the H800+ Printer on and initialized, select Update ROM from the Tools menu. 2. Click OK when asked to confirm that you want to update the ROM. 3. - Page 43 Afinia H800+ 3D Printer User’s Manual Solution for "Winusb.dll not found" problem (Windows) If you encounter a “Winusb.dll not found” error message, please follow the steps below: Option 1: Uninstall Older Driver and Auto-Install New Driver 1. Open the Windows control panel, go to the System Properties dialog box and select the Hardware tab.
- Page 44 Afinia H800+ 3D Printer User’s Manual Option 2: Update the driver manually 1. Install the latest Afinia H800+ 3D Printer software. 2. Find the 3DPrint@FreeMC driver Device Manager dialog should be located in the USB section). 3. Right click the entry and select Update Driver.
-
Page 45: Specifications
Afinia H800+ 3D Printer User’s Manual Specifications Printer Physical Characteristics Printing Material ABS or PLA Plastic Layer Thickness 0.10 – 0.40 mm Nozzle Diameter 0.40mm Print Speed 10-100 cm Print Size 259×207×205mm 42 lbs. (19 KG) Net Printer Weight 60 lbs. (27 KG) Gross 19.5 ×... -
Page 46: Technical Support
Afinia H800+ 3D Printer User’s Manual Technical Support For technical questions or support issues, contact Afinia Technical Support: PH: 952-279-2643 support@afinia.com www.afinia.com Please have the Model and Serial Number of your Afinia H800+ 3D Printer available when contacting Technical Support. Date of Purchase: Place Purchased: Serial Number:... - Page 47 This device complies with Part 15 of the FCC Rules. Operation is subject to the following two conditions: (1) this device may not cause harmful interference, and (2) this device must accept any interference received, including interference that may cause undesired operation. Changes or modifications not expressly approved by the party responsible for compliance could void the user's authority to operate the equipment.
Need help?
Do you have a question about the H800+ and is the answer not in the manual?
Questions and answers