Table of Contents
Advertisement
BUILT-IN ELECTRIC & INDUCTION
Ceramic Cooktops:
CR4B30MB/LCR4BK
CR4B30T11B/LCR4BTB
CR5B30T7B/LCR5BTB
CR5B30T8W/LCR5BTW
CR5B36MB/LCR5B36K
CR5B36T9B/LCR5B36TB
CR5B36TXW/LCR5B36TW
BEFORE USE, PLEASE READ AND FOLLOW ALL SAFETY
RULES AND OPERATING INSTRUCTIONS IN THIS
Write Serial No. (on back of unit)
here:
COOKTOP MANUAL
Induction Cooktops:
SINC2B230B/LNC2B230B
SINC2B231W/LNC2B231W
SINC4B241B/LNC4B241B
SINC4B242W/LNC4B242W
SINC4B301B/LNC4B301B
SINC4B302W/LNC4B302W
SINC5B36B/LNC5B36B
SINC5B36W/LNC5B36W
SINC2B115/LNC2B115
MANUAL.
Summit Appliance Division
An ISO 9001:2015 registered company
770 Garrison Avenue Bronx, New York 10474
www.summitappliance.com
Felix Storch, Inc.
Advertisement
Table of Contents

Related Manuals for Summit SINC2B115/LNC2B115


Summary of Contents for Summit SINC2B115/LNC2B115
- Page 1 BEFORE USE, PLEASE READ AND FOLLOW ALL SAFETY RULES AND OPERATING INSTRUCTIONS IN THIS MANUAL. Felix Storch, Inc. Write Serial No. (on back of unit) Summit Appliance Division here: An ISO 9001:2015 registered company 770 Garrison Avenue Bronx, New York 10474 www.summitappliance.com...
-
Page 2: Table Of Contents
TABLE OF CONTENTS Important Safeguards Installation Instructions 8-13 Ceraminc Cooktop Layout 14-18 Induction Cooktop Layout 19-27 Operating your Cooktop 28-41 Choosing the Right Cookware 28-29 Using the Touch Controls 30-31 Using the Knob Control Models 31-32 Using the Extended Cooking Zone 32-33 Using the Keep Warm Zone Using the Booster Function... -
Page 3: Important Safeguards
IMPORTANT SAFEGUARDS Please read all instructions carefully before use. Your safety is important to us. Please read the information below before installing or using your cooktop. • Read these instructions carefully before installing or using this appliance. • No combustible material or products should be placed on this appliance at any time. - Page 4 • Do not allow children to play with the appliance or sit, stand, or climb on it. • Do not store items of interest to children in cabinets above the cooktop. Children climbing on the cooktop could be seriously injured. •...
- Page 5 working environments; -farm houses; -by clients in hotels, motels and other residential type environments; -bed and breakfast type environments. • Use Proper Pan Size – This appliance is equipped with one or more surface units of different size. Select utensils having flat bottoms large enough to cover the surface unit heating element.
- Page 6 • Do not cook on a broken or cracked cooktop. If the cooktop surface should break or crack, switch the appliance off immediately at the main power supply (wall switch) and contact a qualified technician. • Switch the cooktop off at the wall before cleaning or maintenance. •...
- Page 7 Cut Hazard • Take care: panel edges are sharp. • Failure to use caution could result in injury or cuts. • The razor-sharp blade of a cooktop scraper is exposed when the safety cover is retracted. Use with extreme care and always store safely and out of reach of children.
-
Page 8: Installation Instructions
INSTALLATION INSTRUCTIONS • The cooktop must be installed and connected in accordance with all local codes and regulations. • After unpacking the appliance, ensure there is no visible damage. If it has been damaged during transit, DO NOT USE. Contact your appliance seller immediately. - Page 9 Measurements in the table below are shown in inches (“): Model SINC2B115/LNC2B115 10.4+ 19.5+ SINC2B230B/LNC2B230B 11.3 20.5 SINC2B231W/LNC2B231W SINC4B241B/LNC4B241B 21.9+ 19.5+ SINC4B242W/LNC4B242W 23.2 20.5 SINC4B301B/LNC4B301B 29.3+ 19.5+ SINC4B302W/LNC4B302W 30.3 20.5 CR4B30T11B/LCR4BTB 29.3+ 19.5+ CR4B30MB/LCR4BK 30.3 20.5 CR5B30T7B/LCR5BTB CR5B30T8W/LCR5BTW SINC5B36B/LNC5B36B 34.5+ 19.5+...
- Page 10 Make sure the electric cooktop is well ventilated and the air inlet and outlet are not blocked. Ensure the electric cooktop is in good work state. As shown below: Note: The safety distance between the hotplate and the cupboard above the hotplate should be at least 760mm (30”).
- Page 11 3. The gasket must be attached along the entire length of the glass edge and should not overlap at the corners. 4. When installing the gasket, make sure that the glass does not come into contact with any sharp objects. Before Installing the Fixing Brackets •...
- Page 12 Connecting the Cooktop to the Power Supply The power supply should be connected in compliance with National Electric Codes, as well as all state, municipal, and local codes. The supply must be from an individual grounded circuit that is protected by a circuit breaker. CAUTION: The appliance has a large power rating and must be connected to electricity by a Qualified Electrician.
- Page 13 0.427 ohm. If necessary, contact your power supply company for system impedance information. NOTE: SINC2B115/LNC2B115 is supplied with a power cord and plug. You can directly plug the unit into the socket, please keep the power cord plug out after use.
-
Page 14: Ceraminc Cooktop Layout
CERAMIC COOKTOP LAYOUT NOTE: Before your first use, remove any protective film that may still be on your cooktop. Model: CR4B30T11B/LCR4BTB 1. 1800W Cooking Zone 2. 1200W Cooking Zone 3. 1200W Cooking Zone 4. 2500/1200W Cooking Zone 5. Glass plate 6. - Page 15 Model: CR4B30MB/LCR4BK 1. 1800W Cooking Zone 2. 1200W Cooking Zone 3. 1200W Cooking Zone 4. 2500/1200W Cooking Zone 5. Glass plate 6. Control panel Control Panel 1. Cooking Zone control knob 2. Residual Heat warning indicator...
- Page 16 Model: CR5B30T7B/LCR5BTB CR5B30T8W/ LCR5BTW 1. 2200/1000W Cooking Zone 2. 1200W Cooking Zone 3. 100W Warming Zone 4. 2500/1200W Cooking Zone 5. 1200W Cooking Zone 6. Glass plate 7. Control Panel 6. Control panel Control Panel 1. Cooking Zone selection button 2.
- Page 17 Model: CR5B36MB/LCR5B36K 1. 2200/1000W Cooking Zone 2. 1200W Cooking Zone 3. 100W Warming Zone 4. 3000/1600W Cooking Zone 6. 1200W Cooking Zone 6. Glass plate 7. Control Panel 6. Control panel Control Panel 1. Cooking Zone control knob 2. Residual Heat warning indicator...
- Page 18 Model: CR5B36T9B/LCR5B36TB CR5B36TXW/ LCR5B36TW 1. 2200/1000W Cooking Zone 2. 1200W Cooking Zone 3. 100W Warming Zone 4. 3000/1600W Cooking Zone 6. 1200W Cooking Zone 6. Glass plate 7. Control Panel 6. Control panel Control Panel 1. Cooking Zone selection button 2.
-
Page 19: Induction Cooktop Layout
INDUCTION COOKTOP LAYOUT Model: SINC2B230B/LNC2B230B 1. 2000W Boost 2600W Cooking Zone 2. 1500W Boost 2000W Cooking Zone 3. Glass plate 4. Control panel Control Panel 1. Cooking Zone selection button 2. Stop & Go control button 3. Timer control button 4. - Page 20 Model: SINC2B231W/LNC2B231W 1. 2000W Cooking Zone 2. 1500W Cooking Zone 3. Glass plate 4. Control panel Control Panel 1. Cooking Zone selection button 2. Stop & Go control button 3. Timer control button 4. Heating level/Timer slider control 5. Child Lock control button 6.
- Page 21 Model: SINC4B241B/LNC4B241B 1. 1500W Boost 2000W Cooking Zone 2. 2000W Boost 3000W Cooking Zone 3. 2000W Boost 3000W Cooking Zone 4. 1500W Boost 2000W Cooking Zone 5. Glass plate 6. Control panel Control Panel 1. Cooking Zone/Timer Icon 2. Booster function control button 3.
- Page 22 Model: SINC4B242W/LNC4B242W 1. 1500W Cooking Zone 2. 2000W Cooking Zone 3. 2000W Cooking Zone 4. 1500W Cooking Zone 5. Glass plate 6. Control panel Control Panel 1. Cooking Zone/Timer Icon 2. Stop & Go control button 3. Timer control button 4.
- Page 23 Model: SINC4B301B/LNC4B301B 1. 1500W Boost 2000W Cooking Zone 2. 2000W Boost 3000W Cooking Zone 3. 2000W Boost 3000W Cooking Zone 4. 1500W Boost 2000W Cooking Zone 5. Glass plate 6. Control panel Control Panel 1. Cooking Zone/Timer Icon 2. Booster function control button 3.
- Page 24 Model: SINC4B302W/LNC4B302W 1. 1500W Cooking Zone 2. 2000W Cooking Zone 3. 2000W Cooking Zone 4. 1500W Cooking Zone 5. Glass plate 6. Control panel Control Panel 1. Cooking Zone/Timer Icon 2. Stop & Go control button 3. Timer control button 4.
- Page 25 Model: SINC5B36B/LNC5B36B 1. 1500W Boost 2000W Cooking Zone 2. 2000W Boost 3000W Cooking Zone 3. 2300W Boost 3000W Cooking Zone 4. 2000W Boost 3000W Cooking Zone 5. 1500W Boost 2000W Cooking Zone 6. Glass plate 7. Control panel Control Panel 1.
- Page 26 Model: SINC5B36W/LNC5B36W 1. 1500W Cooking Zone 2. 2000W Cooking Zone 3. 2300W Cooking Zone 4. 2000W Cooking Zone 5. 1500W Cooking Zone 6. Glass plate 7. Control panel Control Panel 1. Cooking Zone selection button 2. Stop & Go control button 3.
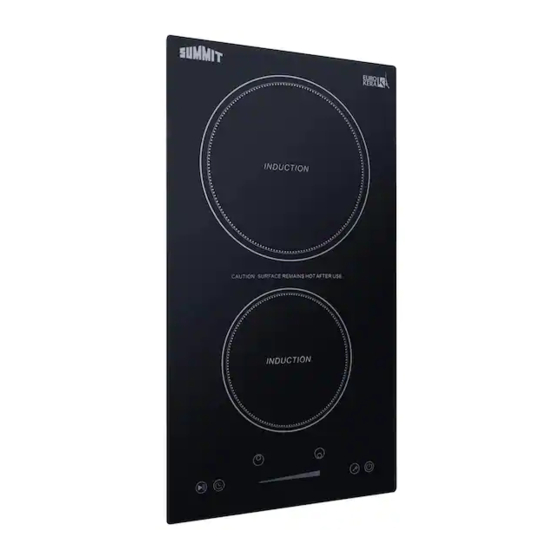
- Page 27 Model: SINC2B115/LNC2B115 1. 1800W Cooking Zone 2. 1300W Cooking Zone 3. Glass plate 4. Control panel Control Panel 1. Cooking Zone selection button 2. Stop & Go control button 3. Timer control button 4. Heating level/Timer slider control 5. Child Lock control button 6.
-
Page 28: Operating Your Cooktop
OPERATING YOUR COOKTOP Choose the Right Cookware (Induction Models) • Only use cookware with a base suitable for induction cooking. Look for the induction symbol on the packaging or on the bottom of the pan. • You can check whether your cookware is suitable by carrying out a magnet test. - Page 29 Make sure that the base of your pan is smooth, sits flat against the glass, and is the same size as the cooking zone. If you use smaller pot efficiency could be less than expected. Always center your pan on the cooking zone. Always lift pans off the hob –...
-
Page 30: Using The Touch Controls
Using the Touch Controls • The controls respond to touch, so you don’t need to apply any pressure. Use the ball of your finger, not its tip. • You will hear a beep each time a touch is registered. • Make sure the controls are always clean, dry, and that there is no object (e.g. -
Page 31: Using The Knob Control Models
Power Management Model SINC2B115/LNC2B115 includes a power management function that will limit total power to 1800W, even when both zones are in use. If you would like to increase the power level of one burner and the total output is 1800W, the cooktop will automatically reduce the power level of the other element as you adjust. -
Page 32: Using The Extended Cooking Zone
NOTE: A hot surface indicator will glow when any radiant element is turned on and will remain on until the surface is cooled to a safe temperature to touch. To Turn off the Cooktop Be sure you turn the control knob to Off when you finish cooking. It will snap into the Off position. -
Page 33: Using The Keep Warm Zone
• Adjust the power of the dual zone by adjusting the control knob to anywhere between symbol and the midpoint of the dial. • To deactivate the dual zone, turn the control knob past the midpoint to the left, toward the symbol to either use the single cooking zone or turn the cooking zone off. -
Page 34: Child Lock
2) Touch the Booster function control button , and the heating zone indicator will show “b” and flash for 5 seconds. The booster function is now active. Notes: 1. When using booster function, if the other cooking zone in vertical direction is also activated at a power level higher than 2, programmer will automatically turn power of the other zone down to 2. -
Page 35: Stop & Go Function
To Unlock the Controls 1. Make sure the electric cooktop is turned on. 2. Touch and hold the Child Lock control button for 3 seconds, the buzzer beeps once and “Lo” disappears in the timer indicator. The Child Lock is now inactive. You can now start using your electric cooktop. -
Page 36: Using The Timer
Using the Timer Note: Timer function is for touch/slider control models only. Minute display shows the number of minutes Timer control When the cooktop is turned on, you can use the timer in two different ways: • You can use it as a “minute minder” alert, which can be set for up to 99 minutes. - Page 37 NOTE: By continuously touching the timer control button, the slider works in this sequence: “Single Digit-Tens Digit -Confirm Setting-Single Digit-…” When the minute minder is set, it will begin to count down immediately and show the remaining time in the display. The buzzer will beep for 30 seconds and the timer indicator display shows “- - “...
-
Page 38: Residual Heat Warning
NOTES: • The red dot next to the power level indicator will illuminate for those zones set with a timer. • After adjusting, the setting in timer indicator will flashing for 5 seconds and then stop flashing, then the setting be confirmed. •... -
Page 39: Auto Shutdown
Auto Shutdown Another safety feature for touch/slider control cooktop is auto shutdown. This occurs whenever you forget to switch off a cooking zone. The default shutdown times as below table: Power level Default working timer (hour) Overheat Protection A temperature sensor inside the cooktop monitors its internal temperature. When an excessive temperature is detected, the cooktop will automatically turn off. - Page 40 Simmering Simmering occurs below the boiling point, at around 85˚C • (185˚F), when bubbles are rising occasionally to the surface of the cooking liquid. It is the key to delicious soups and tender stews because flavors develop without overcooking the food. You should also cook egg-based and flour thickened sauces below the boiling point.
- Page 41 Heat Settings The settings below are guidelines only. The exact setting will depend on factors including your cookware and the amount you are cooking. Experiment with the cooktop to find the settings that best suit you. Heat setting Suitability • Delicate warming for small amounts of food 1 - 2 •...
-
Page 42: Cleaning And Care
CLEANING AND MAINTENANCE CAUTION: Before any maintenance or cleaning work is carried out, DISCONNECT the appliance from ELECTRICITY supply and ensure the appliances is completely cool. Cleaning the Cooktop Surface • Clean spillages from the cooktop surface as soon as possible after use. Always ensure the surface is cool enough before cleaning. - Page 43 Notes: • When turning off the power supply of cooktop, there will be no ‘hot surface’ indication, but the cooking zone may still be hot! Take extreme care. • Heavy-duty scourers, some nylon scourers, and harsh/abrasive cleaning agents may scratch the glass. Always read the label to check if your cleaner or scourer is suitable.
-
Page 44: Troubleshooting
TROUBLESHOOTING If you encounter any issues with your cooktop, consult the table below for a quick resolution before contacting our service team: CAUSE/RESOLUTION: ISSUE: Check whether there is a power outage. There is no power Check whether the appliance is properly connected to the to the appliance electricity. -
Page 45: Limited Warranty
For more information go to www.P65Warnings.ca.gov Note: Nickel is a component in all stainless steel and some other metallic compositions. Felix Storch, Inc. Summit Appliance Division An ISO 9001:2015 registered company For parts and accessory ordering, 770 Garrison Avenue Bronx, New York 10474 www.summitappliance.com...
Need help?
Do you have a question about the SINC2B115/LNC2B115 and is the answer not in the manual?
Questions and answers