National Instruments PXI-5124 Getting Started Manual
Hide thumbs
Also See for PXI-5124:
- Calibration procedure (46 pages) ,
- Getting started manual (32 pages)

Related Manuals for National Instruments PXI-5124


Summary of Contents for National Instruments PXI-5124
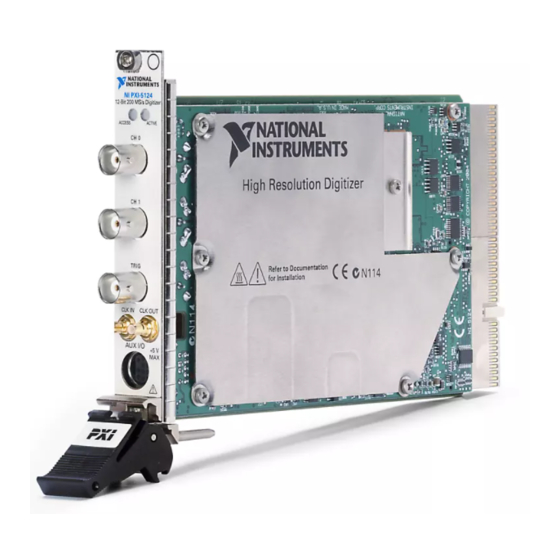
- Page 1 (217) 352-9330 | Click HERE Find the National Instruments PXI-5124 at our website:...
-
Page 2: Table Of Contents
Kit Contents........................3 Preparing the Environment....................... 3 PXI Modules........................3 PCI Modules........................4 Installing the Software......................4 Installing the PXI-5124......................4 Installing the PCI-5124......................6 Front Panel Connectors and Indicators..................8 Configuring the PXI/PCI-5124 in MAX...................9 Programming the PXI/PCI-5124.....................10 NI-SCOPE Examples...................... 11 Making a Measurement......................12... -
Page 3: Electromagnetic Compatibility Guidelines
Electromagnetic Compatibility Guidelines This product was tested and complies with the regulatory requirements and limits for electromagnetic compatibility (EMC) stated in the product specifications. These requirements and limits provide reasonable protection against harmful interference when the product is operated in the intended operational electromagnetic environment. This product is intended for use in industrial locations. -
Page 4: Kit Contents
IEC 60068-2-1 and IEC 60068-2-2.) Relative humidity range 10% to 90%, noncondensing (Tested in accordance with IEC 60068-2-56.) Maximum altitude 2,000 m (at 25 °C ambient temperature) Pollution Degree Indoor use only. NI PXI/PCI-5124 Getting Started Guide | © National Instruments | 3... -
Page 5: Pci Modules
Installing the PXI-5124 Caution To prevent damage to the PXI-5124 caused by ESD or contamination, handle the module using the edges or the metal bracket. Ensure the AC power source is connected to the chassis before installing the module. - Page 6 2. PXI Peripheral Slot 5. PXI Express Peripheral Slot 3. PXI Express Hybrid Peripheral Slot PXI-5124 modules can be placed in PXI peripheral slots or PXI Express Hybrid peripheral slots. Touch any metal part of the chassis to discharge static electricity.
-
Page 7: Installing The Pci-5124
10. Secure the module front panel to the chassis using the front-panel mounting screws. Note Tightening the top and bottom mounting screws increases mechanical stability and also electrically connects the front panel to the chassis, which can improve the signal quality and electromagnetic performance. 11. - Page 8 For SMC-based devices, spread-spectrum clocking varies the clock signal to spread the timing clock signal over a small frequency range. Disabling spread-spectrum clocking may affect the accuracy of device specifications. NI PXI/PCI-5124 Getting Started Guide | © National Instruments | 7...
-
Page 9: Front Panel Connectors And Indicators
Front Panel Connectors and Indicators Figure 5. PXI/PCI-5124 Front Panels ACCESS ACTIVE CH 0 CH 0 CH 1 CH 1 TRIG TRIG CLK IN CLK OUT CLK IN AUX I/O +5 V AUX I/O CLK OUT Table 1. PXI/PCI-5124 Front Panel Connectors Label Function Connector Type... -
Page 10: Configuring The Pxi/Pci-5124 In Max
Table 2. PXI/PCI-5124 Front Panel Indicators Label Function ACCESS Indicates the status of the PCI bus and the interface from the PXI-5124 to the controller. ACTIVE Indicates the status of the onboard acquisition hardware of the PXI-5124 Figure 6. PXI/PCI-5124 9-Pin DIN Connector Pin Assignments 1. -
Page 11: Programming The Pxi/Pci-5124
The MAX self-test performs a basic verification of hardware resources. Run the test panels on the device to verify the signal. To access the test panels, right-click the device and select Test Panels. The NI-SCOPE Soft Front Panel (SFP) launches automatically. Do one of the following to connect a signal to the device: •... -
Page 12: Ni-Scope Examples
You can see descriptions and compatible hardware models for each example, or see all the examples compatible with one particular hardware model. To locate examples, refer to the following table. NI PXI/PCI-5124 Getting Started Guide | © National Instruments | 11... -
Page 13: Making A Measurement
Users\Public\Public Documents\National Instruments • Windows XP— Documents and Settings\All Users \Shared Documents\National Instruments Making a Measurement You can make a measurement interactively using the NI-SCOPE SFP or programmatically using LabVIEW. Making a Measurement with NI-SCOPE SFP Connect CH 0 to an input signal. -
Page 14: Setting Up Pxi/Pci-5124 For Synchronization
LED. Note Apply external signals only while the PXI-5124 is powered on. Applying external signals while the device is powered off may cause damage. NI PXI/PCI-5124 Getting Started Guide | © National Instruments | 13... -
Page 15: What Should I Do If The Pxi/Pci-5124 Doesn't Appear In Max
Windows 7 Select Start»Control Panel»Device Manager. If you are using a PXI or PXI Express controller, verify that a National Instruments entry appears in the System Devices list. Reinstall NI-SCOPE and the module if error conditions appear in the list. If you are using an MXI controller, right-click PCI-to-PCI Bridge, and select Properties from the shortcut menu to verify that the bridge is enabled. -
Page 16: Thermal Shutdown Error
For more information about cooling the device, refer to the Maintain Forced-Air Cooling Note to Users included in your kit. Related Information Installing the PXI-5124 on page 4 Installing the PCI-5124 on page 6 NI PXI/PCI-5124 Getting Started Guide | © National Instruments | 15... -
Page 17: Where To Go Next
Where to Go Next Located online at ni.com/manuals Located using the NI Example Finder EXPLORE LEARN CREATE the application development about hardware features custom applications with environment (ADE) or review device an application programming for your application. specifications. interface (API). NI PXIe-5160 500 MHz Oscilloscope Getting Started with... - Page 18 United States, visit the Worldwide Offices section of ni.com/ niglobal to access the branch office websites, which provide up-to-date contact information, support phone numbers, email addresses, and current events. NI PXI/PCI-5124 Getting Started Guide | © National Instruments | 17...
- Page 19 CONTAINED HEREIN AND SHALL NOT BE LIABLE FOR ANY ERRORS. U.S. Government Customers: The data contained in this manual was developed at private expense and is subject to the applicable limited rights and restricted data rights as set forth in FAR 52.227-14, DFAR 252.227-7014, and DFAR 252.227-7015. © 2004—2016 National Instruments. All rights reserved. 376449A-01 Sep16...
Need help?
Do you have a question about the PXI-5124 and is the answer not in the manual?
Questions and answers