
Related Manuals for Sola TRISEM-2110


Summary of Contents for Sola TRISEM-2110
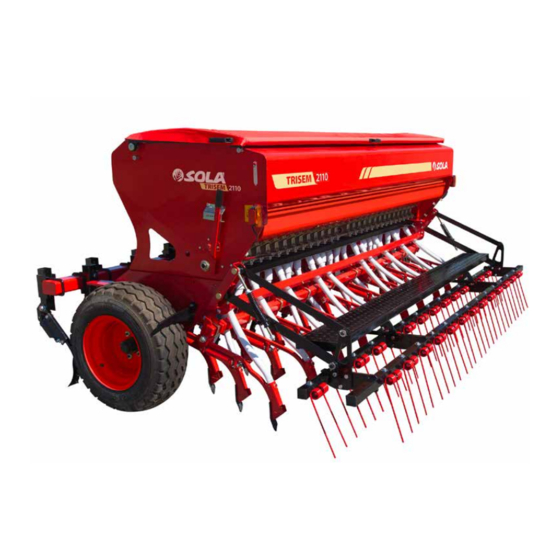
- Page 1 TRISEM-2110 TRICOMBI-2110 Mechanical seed drill STARTING MANUAL MAINTENANCE AND DOSAGE W W W. S O L AG R U P O. C O M...
- Page 2 SOLÀ seed drills and fertilizer spreaders are manufactured in a highly specialized environment and our factory has a vast customer-endorsed experience. SOLÀ machines use highly advanced technology and are guaranteed to work without malfunction in a great variety of conditions. They are provided with easy-to-use and efficient devices. SOLÀ...
-
Page 3: Table Of Contents
6.2- PARALLELOGRAMIC-SHAPED HARROW WITH FLEXIBLE TINES 6.3- TRACK MARKERS 6.4- HECTARE COUNTER 6.5- FLOATING CULTIVATOR 6.6- GEARBOX’S HYDRAULIC CONTROL 7- MAINTENANCE 7.1- LUBRICATION 7.2- TYRES PRESSURE 7.3- SCREWS 7.4- ANTIOXIDE CONTROL 7.5- PROBLEM-SOLVING 8- DOSAGE TABLES 8.1- TRISEM-2110 8.2- TRICOMBI-2110 - 3 -... -
Page 4: 1- Introduction
It is essential to read and follow the instructions and recommendations in this manual before oper- ating the seed drill TRISEM-2110 and TRICOMBI-2110. Careful reading enables maximum operator efficiency, prevents accidents and damage, and increases the seed drill’s capacity and life expectancy. - Page 5 On the machine you will find the following warning pictograms: Read the instructions carefully and observe the safety advice given in the operating manual. During the coupling manoeuvre, stay away from the rear part of the tractor. Risk of serious physical injury.
-
Page 6: Use According To Design
2.2- USE ACCORDING TO DESIGN -The Seed Drill TRI-2110 has been designed for normal use in agricultural work, especially cereal and other kind of grain seeds. If the machine is used in circumstances other than the above, the manufactu- rer will not be held responsible for any damage caused. -The user must observe all regulations concerning safety, traffic and hygiene. -
Page 7: Loading And Unloading Instructions
2.4- LOADING AND UNLOADING INSTRUCTIONS Figures 1 and 2 show how and where to place the tow ropes to perform this operation: in the machine’s three-point linkage as well as in the fasten points situated in the harrow’s support. These are dangerous tasks. They should only be performed by qualified and experienced personnel. When the seed drill is suspended, be sure that the danger zone below and surrounding the machi- ne is clear to prevent serious consequences in case it falls. -
Page 8: 3- Technical Characteristics
3- TECHNICAL CHARACTERISTICS WOR- TARE HOPPER CAPACITY (Liters) MÍN. TRISEM-2110 KING TRANSPORT SPACING TARE HIGH POWER TYRES WIDTH WIDTH (m) ROW (cm) (Kg.) HOPPER TYPE OF MACHINE (HP) NORMAL HIGH (Kg.) 300/22 3,28 13,6 1.270 1.565 1.000 10.0/75-15.3 12PR 300/25 3,28 1.270... -
Page 9: 4- Essential Sowing Concepts
4- ESSENTIAL SOWING CONCEPTS 4.1- TERRAIN The better the soil condition, the better the sowing quality. Work is more difficult on big clods or une- ven furrows. Although SOLÀ machines resist harsh conditions, if the seedbed does not satisfy appro- priate conditions then the sowing quality will suffer. -
Page 10: Seed Dosing Adjustments
In very cold places, repeated frostbite can have a honeycomb effect on the ground’s most superficial layer. In this case the plant’s very first roots can loosen and the plant will die. Slightly deeper planting is recommended and if possible, the use of rollers to compact the earth to better protect the seeds. - Page 11 It should be taken into account that a seed’s germinating power is variable and dependant on multiple factors. It can be experimentally calculated to be between 70% and 80%, which is practically equivalent to multiplying the number of grains to be sown by 1,43 or 1,25 respectively. Next, we describe a practical method to determine the number of kilos per hectare to be distributed once we know how many plants per square metre we want to obtain.
-
Page 12: 5-Starting
5-STARTING 5.1- COUPLING Seed drill TRI-2110 is fitted for fast coupling to the hydraulic lift. The oscillating coupling bar adapts to ground’s irregularities. In order to switch it off, place the machine in a raised position and unlock the two locking hooks (1, fig 5) to secure the hooked clip (2, fig 5) of the lever’s (3, fig 5) to the axis (4, fig 5). All machines are supplied with a supporting base to secure the machine during transportation and prevent accidents. -
Page 13: Dosing System
5.2- DOSING SYSTEM SOLÀ’s dosing system can be adjusted to the following working positions: - Narrow position with small housings, used for small seeds (fig. 6). - Wide position with large alternated housings, used for regular or big seeds (figs. 7 and 8). Base flap performs two roles: - It adjusts its opening to adapt to seed’s size. -
Page 14: Seed Dosing
5.3- SEED DOSING Check that the shutoff gates are open and allow the seed flow. Before filling the hopper, check that there are no external elements inside the hopper and next connect the agitator’s shaft to the gearbox’s axle. Move the lever to switch between narrow and wide position in the seed wheel A. -
Page 15: Calibration Test
Finally loosen gearbox’s knob, move the gear lever on the sector graduated from 0 to 100 and tight the knob in the number position selected previously, as indicated in the dosage tables. 5.4- CALIBRATION TEST Once the narrow or wide position is selected, and both the base flap and the gear lever are in correct position, it is essential to perform a calibration test. - Page 16 SECOND: Pull the calibration cup upwards out of their holders and place it under the seed wheels. - 16 -...
- Page 17 THIRD: Raise the seed drill using the tractor until the wheels can turn freel. Place the calibration crank in the bolt on right wheel and turn it clockwise until seeds start to fall onto the calibration cup . At this moment, stop turning, put these seeds back inside the hopper and start turning the crank again to perform the real turns of the test.
-
Page 18: Field Test
5.5- FIELD TEST If differences exist between the test and the actual dose distribution (due to a very uneven or light soil, low pressurised tyres, etc.), an experimental test can be performed. First of all, the distance (in metres) as shown in the table below should be marked on the field’s ground using a tape measure. -
Page 19: Combined Dosage
5.8 COMBINED DOSAGE On the combined machines, dosage and seed control is the same to the seed drills. The fertilizer dosage has to be done by means of the fertilizer variator placed on the left side of the machine, positioning the lever on the graded scale from 0 to 50 and fixing it on the number selected in the dosage tables. - Page 20 THIRD: place the lever in its place on the left wheels and five some clockwise turns to the driving wheel, until some seed is delivered. Collect up the fertilizer and return it to the hopper and and give the turns as follows: Machine wide Turns...
-
Page 21: Coulters Depth And Pressure Adjustment
5.9- COULTERS DEPTH AND PRESSURE ADJUSTMENT The coulters depth is set with an central adjuster spindle Previously we have explained how to adjust the pressure for each coulter individually. 5.10- TINE COULTERS ADJUSTMENT TINE COULTER and DOUBLE DISC Tine coulters are secured to their support by means of a special nut (1, fig. 23) equipped with a au- to-tighting nut. -
Page 22: 6- Optional Equipment
6- OPTIONAL EQUIPMENT 6.1- TRACK ERASERS Track erasers are very efective devices to erase tractor’s tracks. The four coulter’s height and lenght can be adjusted depending on the vehicle’s tread. 6.2- PARALLELOGRAMIC-SHAPED HARROW WITH FLEXIBLE TINES. Harrow with double-tine springs which contribute to cover back the furrows produced by the sowing tine coulters. -
Page 23: Track Markers
6.3- TRACK MARKERS Hydraulic track markers Track markers should be assembled using the supplied screws in the supports placed in both sides of the machine. They are hydraulic and should be connected to a double-acting connection so that one arm is in vertical position and the other one is in working position. Cylinders contain a throttle to slow down and smooth the track marker’s lift. - Page 24 In order to transport the machine, it is essential to fold the track markers so they stay in a vertical po- sition and pin them to the transport bracket using a lynch pin. This will prevent them from lowering during transit. WHEN PULLING THE HYDRAULIC PIPES, BE SURE THAT THEY CAN NOT BE DAMAGED WHEN RAISING OR LOWERING THE SEED DRILL.
-
Page 25: Hectare Counter
6.4- HECTARE COUNTER The screw placed in gearbox’s upper part must be removed (A-1). Next, the hectare counter must be assembled over the gearbox’s axle (A) and the special screw (B) supplied with the hectare counter must be screwed down in place A-1. To access to the hectare counter’s reset control, remove the black lid (C). -
Page 26: Floating Cultivator
6.5- FLOATING CULTIVATOR Floating cultivator is part of the optional equipment to prepare the soil before sowing. It is assembled between the tractor and the seed drill. Couple it to the tractor using an oscillant coupling bar (1). To couple it to the seed drill, use the two cou- pling arms (2) and a coupling piece (3) which joins both the machine’s and the cultivator’s three-point linkages. -
Page 27: Gearbox's Hydraulic Control
6.6- GEARBOX’S HYDRAULIC CONTROL EGearbox can be equipped optionally with a hydraulic control to be used remotely. The cylinder (1) must be assembled to gearbox’s lever (2) using a bolt (3). It must be also assembled to the side of the machine using a screwed down support (4). The cylinder is supplied with a hydraulic hose line which must be plugged to a 1/2’’... -
Page 28: 7- Maintenance
7- MAINTENANCE 7.1- LUBRICATION The following parts should be lubricated periodically: Wheels’s bushings, releasing the push-in cap. Use solid calcium grease (1) The seed dosing lever’s roller guide. Use solid calcium grease. (2) The central adjuster spindle. Use solid calcium grease (3) - 28 -... - Page 29 Check the gearbox’s oil level by using the hydraulic sight glass (4). If necessary, remove the cap (5) and refill it with oil type SAE 30. ) NEVER LUBRICATE THE SEED WHEELS. It is advisable to change the oil every 5 years, whatever the use of the machine, to change the oil use an oil type SAE 30 (approximately 0.9 liters).
-
Page 30: Tyres Pressure
7.2- TYRES PRESSURE Indicated pressures are provided by the manufacturer, at maximum load. Tyres Pressure 10.0/75-15,3 6 kg/cm In general use and especially when working on irregularly tilled terrains, it is recommended to use a slightly lower pressure to absorb the ground’s irregularities and get a higher regularity in sowing. 7.3- SCREWS After working for some hours, all screws should be checked and tightened. -
Page 31: Problem-Solving
7.5- PROBLEM-SOLVING In this chapter, user will find a guide to solve the most frequent problems that arise from a regular use of the machine. Dosing system do not dose evenly. • Check there is no external elements inside the seed wheel’s box. •... -
Page 32: 8- Dosage Tables
8- DOSAGE TABLES 8.1- TRISEM-2110 GEAR BOX - 32 -... - Page 33 GEAR BOX - 33 -...
- Page 34 GEAR BOX - 34 -...
- Page 35 GEAR BOX - 35 -...
- Page 36 GEAR BOX - 36 -...
- Page 37 GEAR BOX - 37 -...
- Page 38 TRISEM-2110 - SEED Kg/Ha OATS SEED 1000 grain operating weight (g) WIDE Distributors position Mobile bottom lever position Width between tine coulters (cm) 12,0 12,1 12,5 12,9 13,6 13,8 14,0 14,3 15,8 16,0 16,7 22,6 22,3 21,6 21,0 19,8 19,6...
-
Page 39: Tricombi-2110
8.2- TRICOMBI-2110 GEAR BOX - 39 -... - Page 40 GEAR BOX - 40 -...
- Page 41 GEAR BOX - 41 -...
- Page 42 GEAR BOX - 42 -...
- Page 43 GEAR BOX - 43 -...
- Page 44 TRICOMBI-2110 - SEED Kg/Ha SPINACH SEED 1000 grain operating weight (g) NARROW Distributors position Mobile bottom lever position Width between tine coulters (cm) 12,0 12,1 12,5 12,9 13,6 13,8 14,0 14,3 15,8 16,0 16,7 10,6 10,5 10,2 12,7 12,5 12,2 11,8 11,2 11,0 10,9 10,6 14,2 14,1 13,6 13,2 12,5 12,3 12,2 11,9 10,8 10,6 10,2 15,9 15,8 15,3 14,8 14,0 13,8 13,6 13,4 12,1 11,9 11,5 17,6 17,5 16,9 16,4 15,5 15,3 15,1 14,8 13,4 13,2 12,7...
- Page 45 TRICOMBI-2110 - FERTILIZER Kg/Ha Width between tine coulters (cm) 12,0 12,1 12,5 12,9 13,6 13,8 14,0 14,3 15,8 16,0 16,7 238 225 222 445 441 501 486 445 440 434 425 384 628 609 590 525 489 667 660 650 870 844 738 668 653 608 884 837...
- Page 46 - 46 -...
- Page 47 - 47 -...
- Page 48 MAQUINARIA AGRÍCOLA SOLÀ, S.L. Ctra. de Igualada, s/n. 08280 CALAF (Barcelona) Spain Tel. (0034) 93 868 00 60 - Fax (0034) 93 868 00 55 W W W. S O L AG R U P O. C O M...
Need help?
Do you have a question about the TRISEM-2110 and is the answer not in the manual?
Questions and answers