Advertisement
Quick Links
Advertisement

Subscribe to Our Youtube Channel
Related Manuals for Indesit SCM1

Summary of Contents for Indesit SCM1
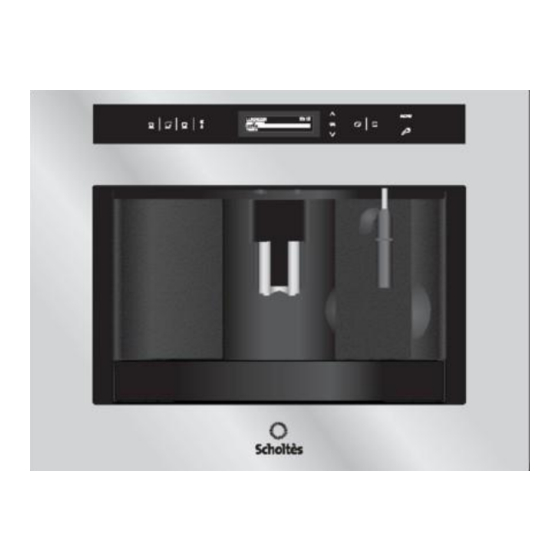
- Page 1 Scholtès automatic, built-in coffee machine SCM1...
- Page 2 Scholtès automatic, built-in coffee machine SCM2...
- Page 3 Scholtès automatic, built-in coffee machine Contents 1) Technical Specifications 2) Accessibility 3) Wiring diagram 4) Water circuit diagram 5) Test procedures 6) Troubleshooting 7) Technical info...
- Page 4 Technical Specifications...
- Page 5 Accessibility Unscrew the first … and the other Unscrew the first six screws six screws six screws securing the securing the right securing the surround on the side of the surround on the right hand side - surround..left. continued Removing the surround...
- Page 6 Accessibility Unscrew the three screws securing the surround at the top, near the brew group.. … and the two screws at the bottom. continued Removing the surround...
- Page 7 Accessibility ... and the 1 screw on the left Unscrew the two screws (be careful when putting back securing the cover on the together). right ,... continued Removing the surround...
- Page 8 Accessibility On taking off the cover, remove the faston and other connectors, as shown in the photo. Removing the surround...
- Page 9 Accessibility Unscrew the screw on the left and The cappuccino foamer pipe can then be pulled out. remove the switch and ..on the right. If this is too … unscrewing the awkward to do, we recommend … 3 screws. Removing the surround...
-
Page 10: Removing The Rear Panel
Accessibility To remove the outer casing, unscrew the 3 screws in the rear panel. continued Removing the rear panel. -
Page 11: Removing The Casing
Accessibility … and unscrew the screws shown in the photo on both the right and left. Caution: there is also a screw at the bottom of the trays. Remove the casing. Removing the casing... -
Page 12: Removing Cover
Accessibility To remove the cover, unscrew the 4 screws as shown in the photos. Removing cover... - Page 13 Accessibility Unscrew the plastic cap Unscrew the 2 screws securing the finger guard and pull it upwards to remove. Dismantling the coffee grinder...
- Page 14 Accessibility Unscrew the 3 screws securing the coffee bean hopper. Dismantling the coffee grinder...
- Page 15 Accessibility Unscrew the screws securing the knob. Dismantling the coffee grinder...
- Page 16 Accessibility Lift off the bean hopper. Dismantling the coffee grinder...
- Page 17 Accessibility Disconnect the two faston connectors from the motor and pull the grinder up and out. Dismantling the coffee grinder...
- Page 18 Accessibility Unscrew the rubber Using a screwdriver as a Detach Flow meter wedge, unhook the connector Detach flowmeter connector Dismantling the flow meter...
-
Page 19: Dismantling The Pump
Accessibility Pull out the small Remove the wire spring spring Pull out the Ulka pump tube Pull out the tube; be careful with the o-ring continued… Dismantling the pump... - Page 20 Accessibility Pull out the tube feeding into the pump Pull the pump out from its rubber support, first from the Holding the pump lug with a bottom then from 12mm spanner, unscrew the the top. valve + damper assembly Dismantling the pump...
-
Page 21: Removing The Circuit Board
Accessibility 2 at the top Unscrew the 5 screws securing the circuit board to the casing; be careful with the cable glands! 1 in the middle 2 at the bottom Power board Removing the circuit board... - Page 22 Accessibility Pull out the tubes from Unscrew the the damper and valve 2 screws indicated Steam unit Remove the Unscrew the steam vent earth screw continued… Dismantling the steam unit...
- Page 23 Accessibility Now you can extract the steam unit to replace the full sub-assembly, solenoid valve and TCO’s (TCO’s Take out the earth faston are secured with a connector from the nut on the inside). solenoid valve. Dismantling the steam unit...
- Page 24 Accessibility To remove the generator, disconnect tubes from couplers, there are 4 screws to unscrew. Caution: hold the nuts in place on the inside. continued… Dismantling generatore + meccano valve...
- Page 25 Accessibility Near the slide Near the solenoid valve Inside the tank compartment Inside the door Dismantling generatore + meccano valve...
- Page 26 Accessibility Caution: When assembling, align the meccano valve with the brew group. Position the 4 screws + 4 bolts, then give them a few turns; then, with the machine in test mode, allow the carriage to rise to the top dead center, pull out the plug then tighten the four screws to a torque value of 2/3Nm.
- Page 27 Accessibility Remove the 2 faston connectors from the motor board... … and the faston After removing the steam unit, connector you can also remove the from the positioning assembly. earth. Dismantling positioning assembly...
- Page 28 Accessibility Remove the carriage. Remove the brew group. Unscrew the 2 screws. (When reassembling, add LOCTITE Type 243 to the thread and tighten to a torque of 2–2.5 Nm) Dismantling positioning assembly...
- Page 29 Accessibility Unscrew the self-tightening screw. You can now pull out the positioning unit. Dismantling positioning assembly...
-
Page 30: Wiring Diagram
Wiring diagram THEORETICAL DIAGRAM... - Page 31 Wiring diagram MICRO KEY PRACTICAL TOP UNIT DIAGRAM BOTTOM UNIT COFFEE GROUNDS DRAWER ACCESS DOOR IFD PRESENCE PIPETTE PRESENCE MICRO KEY...
- Page 32 SCM2 water circuit diagram...
- Page 33 SCM1 water circuit diagram...
- Page 34 SCM1 test procedure ICON AND ASSOCIATED LOAD ACTIVATION MODEL TEST PROCEDURE LOAD ICON PUMP Length With the machine on stand-by (off MOTOR UP + but with the main on/off switch set Key Lock LIGHT to I), open the service door and...
- Page 35 SCM1 test procedure ICON AND ASSOCIATED NOTES DISPLAY MODEL TEST PROCEDURE Icon Display Unit 1 cup BUTTON 1 2 cups BUTTON 2 With the machine on stand- by (off but with the main BUTTON 3 Cappuccino on/off switch set to I), open...
- Page 36 SCM2 test procedure ICON AND ASSOCIATED LOAD ACTIVATION MODEL TEST PROCEDURE LOAD ICON PUMP Long/short With the machine on stand-by MOTOR UP + Key Lock (off but with the main on/off LIGHT switch set to I), open the service Menu HEATER door and press and hold the 1 CUP, STRENGTH and MENU...
- Page 37 SCM2 test procedure ICON AND ASSOCIATED DISPLAY NOTES MODEL TEST PROCEDURE Icon Display Unit 1 cup BUTTON 1 With the machine on stand- 2 cups BUTTON 2 by (off but with the main BUTTON 4 Steam on/off switch set to I), open the service door and press Long/short BUTTON 9...
-
Page 38: Troubleshooting
Troubleshooting Before doing anything or replacing any components, make sure you have all service documentation for the model to be repaired (specifications, test procedures, technical reports and information). Possible complaints you may receive from customers are listed below. The first thing to do is check if there are reasonable grounds to the complaint. - Page 39 Troubleshooting 1) Complaints may be caused by incorrect use of the appliance, and generally refer to: - The coffee is not hot. - The coffee is not very creamy, and doesn’t taste nice (see table on next page)
- Page 40 Troubleshooting What to ask Problems Possible Remedies complaints causes customer - The cups - Heat the cups with hot water. haven’t been (Especially on cold days) warmed. - Heat the brew group by selecting - The brew “RINSE” group is cold. The coffee is not hot.
- Page 41 Troubleshooting What to Problems ask the Possible causes Remedies complaints customer Check grinder settings. Turn the grinder setting knob to position 4/5 (factory setting) with the grinder running; brew 2/3 coffees and When did check how they are delivered. If The coffee grind is too nothing has changed, turn the knob The coffee...
- Page 42 Troubleshooting What to ask Problems Possible causes Remedies complaints customer Check grinder settings. Turn the When did the grinder setting knob to position 7 with problem the grinder running; brew 2/3 coffees occur? and check how they are delivered. If Right from The coffee is too it is still too finely ground, take the...
- Page 43 Troubleshooting ) When a fault is encountered, the machine may generate the following messages: - General alarm - Coffee too finely ground, adjust grinder. - Fill the coffee bean hopper. - Fill the tank. - Descale (see table on next page)
- Page 44 Troubleshooting Error When? Possible causes Remedies message The message NTC, temperature Check the sensor connection on the appeared as sensor. PCB; check the resistance in ohms: soon as the if it is 0 (short circuit) or infinite machine was (open circuit) replace the switched on.
- Page 45 Troubleshooting Error Possible When? Remedies message causes The upper Check if the two micro-switches are working After and lower properly, and if necessary replace them. switching on, micro- General there was a switches alarm funny noise are not when the brew closed.
- Page 46 Troubleshooting Error When? Possible causes Remedies message The message Friction noise due Dismantle the top part of the grinder persists even to stones or other unit and take out the stone or excess when there are objects in the coffee grains inside. Check the grinder beans in the grinding wheels.
- Page 47 Troubleshooting Error message When? Remedies The flow meter measures the amount of water used and when a preset limit is exceeded the machine generates an alert. Descale Four different water hardness levels can be set. The reactive strip supplied with the machine When the machine is a quick way of testing water hardness so indicates that...
-
Page 48: Technical Information
Technical Information Setting the grinder Turn the ring shaft clockwise until Unscrew the screw on the knob the end of stroke position. Take and pull it out. Unscrew the two out the moving grinder. screws and remove the safety guard. continued on following page... - Page 49 Technical Information Setting the grinder Check that the elastic ring is in the Remove the retaining ring. right position. continued on following page...
- Page 50 Technical Information Setting the grinder Turn the ring shaft anticlockwise Turn the ring nut CLOCKWISE for until the end of stroke position then finer grinding. Turn the ring nut pull it out. ANTICLOCKWISE for coarser grinding. Turn in 1 or 2 clicks at a time.
- Page 51 Technical Information Setting the grinder Insert the shaft, aligning the scale on Insert the retaining ring. the ring nut with the rib indicated. (Make sure you insert it correctly.) continued on following page...
- Page 52 Technical Information Setting the grinder Turn the ring shaft CLOCKWISE until the end of stroke position then insert the grinder. Then turn it ANTICLOCKWISE until the end of stroke position.
Need help?
Do you have a question about the SCM1 and is the answer not in the manual?
Questions and answers