
Related Manuals for Motorola MD7080 Series


Summary of Contents for Motorola MD7080 Series
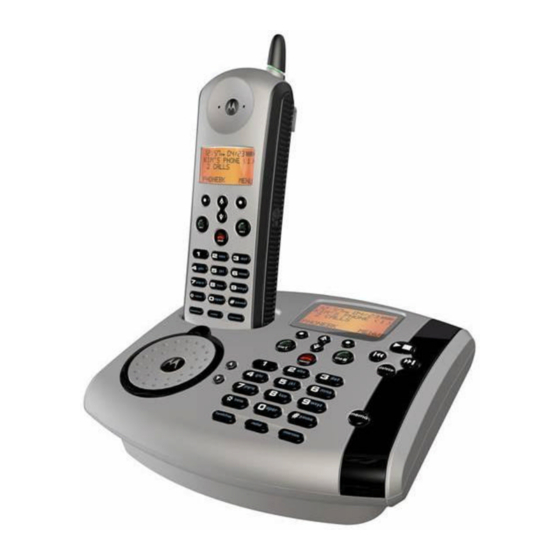
- Page 1 MD7080 Series User Guide Digital 5.8GHz Expandable Cordless 2 -Line Telephone System with Base Speaker Phone, Keypad, and Answering Machine...
-
Page 2: Welcome
Welcome Congratulations on your purchase of a Motorola product! Your Motorola handset at a glance:... - Page 3 Base Station Controls Soft Keys The left and right soft keys perform the function displayed. For example, pressing the left soft key while PHONEBK is displayed, opens your list of phone numbers and names.
- Page 4 Product registration is an important step toward enjoying your new Motorola product. Registering helps us facilitate warranty service, and permits us to contact you should your Motorola product require an update or other service. Registration is not required for warranty coverage.
- Page 5 Motorola may make improvements or changes in the product(s) described in this manual at any time. MOTOROLA, the Stylized M Logo, and PhoneWrap are registered in the U.S. Patent and Trademark Office. All other product or service names are the property of their...
-
Page 6: Table Of Contents
Table of Contents Welcome ........2 Important Safety Instructions . - Page 7 Redialing a Number ......35 Finding a Lost or Misplaced Handset ... . 35 Using the Phonebook .
-
Page 8: Important Safety Instructions
Motorola Limited Warranty ..... 57 Contents Important Safety Instructions Follow these safety precautions when using your cordless phone to reduce the risk of fire, electric shock... - Page 9 damaged. • The product exhibits a distinct change in performance. Installation Guidelines 1. Read and understand all instructions and save them for future reference. 2. Follow all warnings and instructions marked on the product. 3. Do not install this product near a bath tub, sink or shower.
-
Page 10: Fcc Information
FCC Information This equipment complies with Parts 15 and 68 of the FCC rules and the requirements adopted by the Administrative Council for Terminal Attachments (ACTA). A plug and jack used to connect this equipment to the premises wiring and telephone network must comply with applicable FCC Part 68 rules and requirements adopted by the ACTA. - Page 11 If your home has specially wired alarm equipment connected to the telephone line, ensure the installation of this cordless phone does not disable your alarm equipment. If you have questions about what will disable alarm equipment, consult your telephone company or a qualified installer. Notice must be given to the telephone company upon permanent disconnection of your telephone from your line.
- Page 12 Interference Information This device complies with Part 15 of the FCC Rules. Operation is subject to the following two conditions: • This device may not cause harmful interference. • This device must accept any interference received, including interference that may cause undesired operation.
- Page 13 The FCC requires this product to be serviced only by Motorola or its authorized service agents. CAUTION / WARNING: Changes or modifications not expressly approved by Motorola could void not only the user's authority to operate the equipment, but also the limited warranty.
-
Page 14: Getting Started
Getting Started Before you can use your telephone to make or answer calls, you must charge the battery. This section provides the step-by-step instructions you will need. Battery Safety Instructions • Do not burn, disassemble, mutilate, or puncture the battery. The battery contains toxic materials that could be released, resulting in injury. -
Page 15: Charging The Battery
Charging the Battery 1 Remove the battery door. 2 Insert the battery into the battery compartment. 3 Plug the battery connector into the receptacle in the battery compartment and replace the battery door. 4 Plug the power cord into the back of the base and into an outlet. -
Page 16: Installing Backup Batteries
5 Rest the handset in the base so the charging LED lights. 6 For the initial charge, charge the battery for at least 16 hours. Note: Every time a battery is plugged in, the phone must be charged in the base for at least 10 seconds for the phone to properly restart. - Page 17 2 Insert four AA alkaline batteries as directed on the compartment. 3 To replace the compartment cover, insert the tabs of the cover into the slots on the base station and press down until the cover clicks into place. The base display has a battery meter to show status of the backup batteries.
-
Page 18: Using The Phone
Using the Phone The display, soft keys, and navigation keys are used to select the various features and functions of the phone. This section describes how to use these components so you can set up your preferences. For step-by-step instructions on setting personal preferences, see “Setting Up.”... -
Page 19: Using The Soft Keys
The menu display: In a menu display, points to the currently selected item, and indicates there are more items above and below the currently selected item. Using the Soft Keys Two soft keys are used to select the functions shown above them on the display. -
Page 20: Using The Navigation Key
Using the Navigation Key The navigation key is used to scroll up and down through menu items, lists of settings, caller ID and redial lists, and the phonebook. -
Page 21: Installation
Installation You can install the phone on a desktop or mount it to a wall. This section provides the step-by-step instructions you will need to install the phone. Installing the Phone on a Desk Once the battery is fully charged, plug the phone cord into the back of the phone and then into the phone jack on the wall. -
Page 22: Installing The Phone On The Wall
Installing the Phone on the Wall The MD7080 can be mounted on a wall instead of placed on a flat surface. It works best with a wall mount bracket, which is available at most electronic stores. 1 Press the release tab and then carefully slide the wall mount from the base. - Page 23 3 Plug the power cord into the back of the base and into an electrical outlet. 4 Plug one end of the telephone line cord into the jack on the back of the base. 5 Line up the tabs on the wall mount bracket with the holes on the back of the wall mount.
-
Page 24: Setting Up
Setting Up Once your handset has been fully charged, you can set your own preferences. Personalizing Your Phone You can personalize each handset by setting unique ring tones, adjusting the ringer volume for day and night, and naming each handset so you can distinguish one from another. -
Page 25: Setting The Ring Tone
Setting the Ring Tone If you subscribe to a caller ID service, you can set a specific ring tone for numbers stored in your handset’s phonebook and another for all other incoming calls. 1 Select MENU. 2 Scroll to Ringer and select SELECT. 3 Scroll down to Ring Tone, which sets the ring tone for incoming calls. - Page 26 4 Select CHANGE to scroll through the options (ON, OFF, or LINKED to RINGER). When your choice displays, select SELECT. Note: For the LINKED to RINGER option, key beeps are on when the ringer is on, and off when the ringer is off.
-
Page 27: Naming A Handset Or Base
Naming a Handset or Base When you register a handset, it is assigned a default name of Handset(x), where x can be 1, 2, 3, 4, 5, 6, 7, or 8. You can change the name to something more useful, for example a location (Kitchen) or someone’s name (Evan). - Page 28 The following table shows how many times to press each button on the handset to enter letters and special characters. The first letter of the entry is an uppercase letter. To change the entry from uppercase to lowercase, press *. A flashing square indicates that you are in the uppercase text entry mode.
-
Page 29: Setting The Handset Date And Time
Setting the Handset Date and Time To set the date and time on the answering machine, see “Using the Answering Machine.” 1 Select MENU. 2 Scroll to Date/Time and select SELECT. 3 Enter the time. (2 digits are required for both hour and minutes, so use a leading 0 for 1-digit values.) 4 If using a 12-hour clock, select AM/PM to switch... -
Page 30: Setting The Language
Setting the Language 1 Select MENU. 2 Scroll to Language and select SELECT. 3 Scroll until points to the language you want. 4 Select DONE. 5 Select EXIT to return to the standby screen, or scroll to a different menu option. Setting Touch Tone or Pulse Dialing Your handset uses touch tone dialing by default. -
Page 31: Using The Phone
Using the Phone Making a Call Press Line1 or Line2 (or pick up corded handset). When you hear the dial tone, dial the number. Enter the phone number, then press Line1 or Line2 (or pick up corded handset). This lets you see the phone number on the display before the number is dialed. -
Page 32: Inserting Pauses In A Number
Inserting Pauses in a Number When you call a number featuring a pause, the phone waits 3 seconds before transmitting the next digits in the dialing sequence. This is useful, for example, when you have to dial 9 to get a dial tone or for accessing a voicemail system. -
Page 33: Using Automated Dialing
Using Automated Dialing You can retrieve numeric information (like a PIN or credit card number) from the phonebook during a phone call. This feature is useful when using automated response system. For example, if you frequently access your bank account information over the phone, you can store your account number and PIN in the phonebook, and then access them during the call instead of entering them manually each time. -
Page 34: Using The Speakerphone
Using the Speakerphone To make a call using the speakerphone, press HANDSFREE and dial the number. For optimal Handset speakerphone sound quality, make sure the belt clip is on. This raises the handset up so it is not lying flat (the speakerphone is on the back of the handset). -
Page 35: Redialing A Number
When a call is on hold, you can use the intercom features (see the “Using the Intercom” section). Redialing a Number To redial the last number dialed, press ON and then press REDIAL. To redial one of the last 5 numbers you dialed: 1 Press REDIAL 2 Scroll until points to the number you want... -
Page 36: Using The Phonebook
Using the Phonebook Storing numbers in the phonebook makes it easy to dial numbers you call frequently. You can enter numbers directly into the phonebook or add them from the caller ID or redial list. Each handset has its own phonebook, which can hold 50 names and numbers. - Page 37 The following table shows how many times to press each button on the handset to enter letters and special characters. The first letter of the entry is an uppercase letter. To change the entry from uppercase to lowercase, press *. A flashing square indicates that you are in the uppercase text entry mode.
-
Page 38: Storing A Recently Called Number
Storing a Recently Called Number 1 Press REDIAL. The display shows the last five numbers you dialed, with the most recent number at the top. 2 Scroll until points to the number you want to store. 3 Press STORE. 4 Enter the name (up to 12 characters). The flashing underline shows the input cursor position. -
Page 39: Editing A Phonebook Entry
3 Scroll down until the Number field is displayed. If changes need to be made, select DELETE to erase characters to the left of the input cursor. 4 Scroll down. 5 To set the tones of incoming calls for this number, select CHANGE. -
Page 40: Deleting A Phonebook Entry
8 Select DONE. Deleting a Phonebook Entry 1 Select PHONEBK. 2 Scroll down until points to the phonebook entry you want to delete. 3 Select OPTIONS. 4 Scroll down to DELETE and select SELECT. Sorting the Phonebook Phonebook entries are stored in the order in which they were saved by default. -
Page 41: Calling A Number From The Phonebook
Calling a Number from the Phonebook 1 Select PHONEBK. 2 Scroll down until points to the phonebook entry you want to call. To search numerically, press the numbers of the phonebook entry that you want to dial. 3 Press ON or HANDSFREE. To speed dial, select PHONEBK, enter the location number, and then press ON. -
Page 42: Using Caller Id
Using Caller ID If you subscribe to caller ID service, the caller’s name and/or number are displayed when you receive an incoming call. If information on the caller is not available, or if you do not subscribe to caller ID service, INCOMING CALL is displayed. -
Page 43: Multihandset Functions
Multihandset Functions You can expand your phone system by adding Motorola MD Series expansion handsets (up to 8). Expansion handsets do not require connection to a phone line. You can place the handset and its charging base anywhere a standard electrical outlet is available. -
Page 44: Enabling Auto-Answer
If you have multiple handsets, a list of handsets is displayed. 2 Scroll to and select the handset you want to page. 3 Select PAGE. The other phone is paged. To answer a page, press OK. If your page is not answered after two minutes, or if the person you are paging selects EXIT or presses OFF, NO ANSWER is displayed on your handset and paging stops. -
Page 45: Transferring Calls To Other Handsets
Transferring Calls to Other Handsets 1 Select HOLD. 2 Press INTERCOM. If you only have one additional handset, pressing INTERCOM automatically pages the handset. Continue to step 5. 3 Scroll to and select the handset to which you want to transfer the call. 4 Select PAGE. -
Page 46: Monitoring A Room
Monitoring a Room Room monitoring allows you to place a handset in a room and listen to the sounds in that room from another handset. 1 Place a handset in the room to be monitored. 2 On that handset, select MENU. 3 Scroll to MONITOR ROOM and select SELECT. -
Page 47: Using The Answering Machine
Using the Answering Machine The answering machine stores up to 30 minutes of messages and/or memos. You can listen to your messages from the base station, from the handset, or remotely. You can also set your phone to automatically forward answering machine messages to another phone number. -
Page 48: Turning The Answering Machine On Or Off
Turning the Answering Machine On or Off 1 Select MENU and then scroll to and select ANS MACH SETUP. 2 Scroll to and select Mailbox1 or Mailbox2. 3 Scroll to and select ANSWER ON/OFF. 4 Scroll to and select ON or OFF and then select DONE. Setting the Answering Machine Date and Time At the Answering Machine keypad, 1 Select MENU. -
Page 49: Setting Up Your Outgoing Message
Setting Up Your Outgoing Message You can record a personal outgoing message (OGM) that plays when you receive a call but cannot answer. If you do not record a personal message, a prerecorded greeting will play. Recording an Outgoing Message To record an outgoing message: 1 Select MENU and then scroll to and select ANS MACH SETUP. -
Page 50: Setting The Number Of Rings Before The Answering
5 Select YES. To erase an outgoing message from the base, press ANNCE to play the message. As the message p lays, press DEL. Setting the Number of Rings Before the Answering Machine Picks Up You can specify how many times you want your phone to ring before the answering machine picks up the call. -
Page 51: Setting Voice Prompts
Setting Voice Prompts You can set your voice mail prompts to either English or Spanish (if you have a Canadian model, you can set your voice mail prompts to either English or French). 1 Select MENU and then scroll to and select ANS MACH SETUP. -
Page 52: Checking Messages From A Handset
Checking Messages from a Handset 1 Select MENU, then scroll to and select MESSAGES. 2 Scroll to and select Mailbox1 or Mailbox2. 3 Scroll to and select the function you want. The functions are: 1: REVIEW 2: PLAY/STOP 3: SKIP 4: ANSWER ON/OFF 5: MEMO 7: REPEAT MENU... - Page 53 Note: To access the messages for Mailbox 1 call the Line 1 phone number. To access the messages for Mailbox 2 call the Line 2 phone number.
-
Page 54: Message Forwarding
Message Forwarding Your Motorola phone can be set to automatically forward answering machine messages to another phone number. To set up the phone number: 1 Select MENU and then scroll to and select ANS MACH SETUP. 2 Scroll to and select Mailbox1 or Mailbox2. -
Page 55: Screening Calls
Screening Calls You can screen a call by allowing the answering machine to pick up and listening to the message as it is being recorded. 1 When RECORDING INCOMING MESSAGE is displayed, select SCREEN. 2 To answer the call, press Line1 or Line2. To stop listening to the incoming message, press OFF. - Page 56 Phone Wiring for 2 lines If your telephone outlet is wired for 2 lines then connect a single 4- conductor TELCO line between the telephone outlet and the “L1 + L2” jack on back of the base. If you are connected 2 different lines, then connect a line 1 wiring to the “L1 + L2 “...
- Page 57 Consumer Products, Accessories, and Software Purchased in the United States or Canada What Does this Warranty Cover? Subject to the exclusions contained below, Motorola, Inc. warrants its cordless telephones ("Products"), Motorola branded or certified accessories sold for use with these Products ("Accessories"), and Motorola software contained...
- Page 58 Product or Accessory to abnormal usage or conditions; or (d) other acts which are not the fault of Motorola, are excluded from coverage. Use of Non-Motorola Products and Accessories. Defects or damage that result from the use of Non-...
- Page 59 This warranty extends to the first end-user purchaser, only. What will Motorola Do? Motorola, at its option, will at no charge repair, replace or refund the purchase price of any Products, Accessories or Software that does not conform to this warranty. We may use functionally equivalent reconditioned/refurbished/preowned or new Products, Accessories or parts.
- Page 60 EXCLUSIVE REMEDY OF THE CONSUMER, AND IS PROVIDED IN LIEU OF ALL OTHER WARRANTIES, EXPRESS OF IMPLIED. IN NO EVENT SHALL MOTOROLA BE LIABLE, WHETHER IN CONTRACT OR TORT (INCLUDING NEGLIGENCE) FOR DAMAGES IN EXCESS OF THE PURCHASE PRICE OF THE...
- Page 61 Products associated with such Motorola software. No other use, including without limitation disassembly of such Motorola software or exercise of the exclusive rights reserved for Motorola, is permitted.
- Page 62 Visit our website at: www.motorola.com 514779-001 08/04 MGBI...
Need help?
Do you have a question about the MD7080 Series and is the answer not in the manual?
Questions and answers