Advertisement
Quick Links
Advertisement

Related Manuals for CRU QX118


Summary of Contents for CRU QX118
- Page 1 QX118 Receiving Frame Quick Start Guide...
- Page 2 A9-6320-00-1 Rev. 1.1 ® ©2020 CRU Data Security Group, LLC. ALL RIGHTS RESERVED. CRU and SHIPS™ (collectively, the “Trademarks”) are trademarks owned by CDSG and are protected under trademark law. Product Warranty: CDSG warrants this product to be free of significant defects in material and workmanship for a period of three (3) years from the original date of purchase.
-
Page 3: Safety Information
QX118 Receiving Frame Quick Start Guide 1. Safety Information Please read the following before handling this product. 1. Do not drop the product, submit it to impact, or pierce it. 2. The circuit boards within this product are susceptible to static electricity. Proper grounding is strongly recommended to prevent electrical damage to the product or other connected devices, including the computer host. - Page 4 Turn off your computer. Disconnect the power cord, and remove the computer cover. Slide the QX118 receiving frame into a vacant 9mm or 9.5mm optical drive bay. If necessary, secure the QX118 to the drive bay with M2 screws of your own. IMPORTANT If you are installing the QX118 into a 9.5mm optical drive bay, please...
- Page 5 If necessary, install a host bus adapter card (HBA) with at least one (1) OCuLink port into your computer. Refer to the HBA's user manual for installation instructions. Connect an OCuLink SFF-8611 cable (sold separately) to your HBA. Connect the other end of the OCuLink cable to the OCuLink port on the rear of the QX118.
- Page 6 “Fast startup” must be disabled in Windows 10 and Windows 8.1 to ensure that data from the QX118 is read properly. Here are the instructions for how to do so with Windows 10. Right click on the Start Button and select Power Options.
- Page 7 QX118 Receiving Frame Quick Start Guide On the left column of the new window, select Choose what the power buttons do. Select Change settings that are currently unavailable. Uncheck Turn on fast startup (recommended).
- Page 8 QX118 Receiving Frame Quick Start Guide Click the Save changes button.
-
Page 9: Operation
QX118 to release the module slot door. Then move the door out of the way. If you have the Lock Version: Firmly place the included key into the square keyhole on the right side of the QX118 to release the module slot door. Then move the door out of the way. - Page 10 Orient a SHIPS Module or SHIPS Rugged Module so that its pins are downward and facing the QX118. Insert it into the open slot on the QX118 receiving frame. Close the module slot door. It will snap into place. The module will automatically power on when the computer is turned on.
- Page 11 If you have the Lock Version: Firmly place the included key into the square keyhole on the right side of the QX118 to release the module slot door. Then move the door out of the way. Remove the module from the receiving frame.
-
Page 12: Product Support
QX118 Receiving Frame Quick Start Guide 4. Product Support Your investment in CRU products is backed up by our free technical support for the lifetime of the product. Contact us through our website, cru-inc.com/support or call us at 1-800-260-9800 or +1-360-816-1800. -
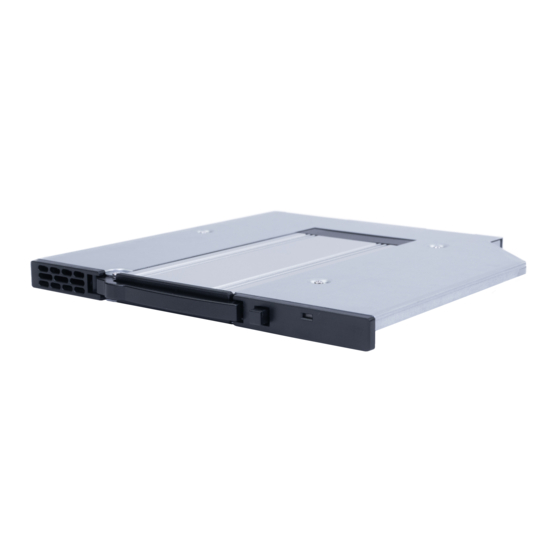
Page 13: Appendix A. Identifying Parts
QX118 Receiving Frame Quick Start Guide Appendix A. Identifying Parts Figure A.1. Front Module Status LED Keylock Module Slot Door Figure A.2. Rear OCuLink Connector Power Connector...
Need help?
Do you have a question about the QX118 and is the answer not in the manual?
Questions and answers