Table of Contents
Advertisement
Quick Links
www.vissonic.com
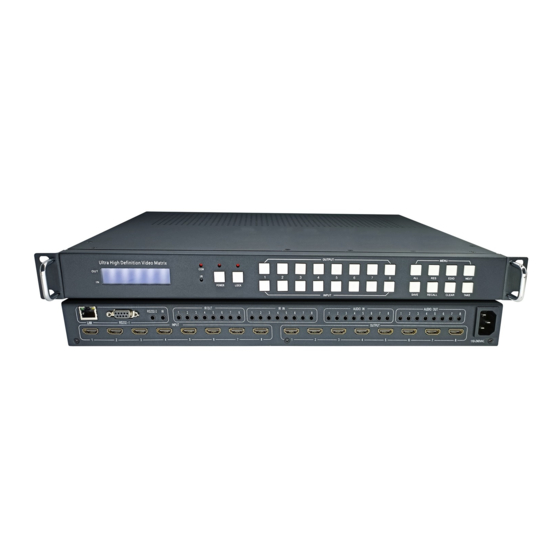
VIS-UHD0808-VW
8x8 Seamless 4K UHD Matrix and Video Wall
Processor
User Manual
Version 3.0
Warning
Do not expose this device to Rain, Moisture, and Dripping
Only use accessories specified by the manufacture
Unplug this device during Lightning Storms
Product specifications may be subject to technical upgrades without further notice
- 1 - VISSONIC ELECTRONICS LIMITED
Advertisement
Table of Contents

Related Manuals for vissonic VIS-UHD0808-VW


Summary of Contents for vissonic VIS-UHD0808-VW
- Page 1 Do not expose this device to Rain, Moisture, and Dripping Only use accessories specified by the manufacture Unplug this device during Lightning Storms Product specifications may be subject to technical upgrades without further notice - 1 - VISSONIC ELECTRONICS LIMITED...
-
Page 2: Table Of Contents
14 Appendix G: Connect via network route /switch..................23 15 Appendix H: Troubleshoot with Network control..................24 16 Appendix I: Advanced routing switch......................25 17 Appendix J: Change List ( VS V2 version )....................27 - 2 - VISSONIC ELECTRONICS LIMITED... -
Page 3: Introduction
Press button RECALL + OUTPUT n to recall routing scene n as current routing Press button RES + OUTPUT n + NEXT + TAKE, to change output resolution of OUTPUT n Resolution options: 3840x2160@60, 3840x2160@50, 3840x2160@30, 3840x2160@25, 1920x1200@60,1920x1080@60, 1920x1080@50, 1600x1200@60, 1400x1050@60, 1366x768@60,1360x768@60,1280x1024@60, 1280x768@60,1280x720@60, 1280x720@50, 1024x768@60 - 3 - VISSONIC ELECTRONICS LIMITED... -
Page 4: Rear Panel
For example, if input HDMI m is routed to output HDMI n1 and n2 ports, then IR IN n1 and n2 ports will be routed to IR OUT m port. Please refer bellow illustration. Relationship between video and IR routing IR extender connectors (not as accessories) - 4 - VISSONIC ELECTRONICS LIMITED... -
Page 5: Rs232/Lan Control
Port RS232-1 is DB9 female connector, Pins layout as bellow. User need use the corresponding cable, directly/straight RS232 cable Tx( Matrix → PC) Rx( Matrix ←PC ) Baud rate 9600 RS232-2 and IR-EXT ports are reserved for future development Ethernet control and connection Note:Factory default network setting: - 5 - VISSONIC ELECTRONICS LIMITED... -
Page 6: Pc Tool User Guide
5.1.1 Password modification 1. Click drop-down list to select account: Administrator or User 2. Input current password, then click the ‘modify’ button to authenticate 3. Input new password twice, then click the ‘modify’ button - 6 - VISSONIC ELECTRONICS LIMITED... -
Page 7: Connect With Pc Tool
Or connect via network route/switch ( please refer to Appendix G ) Click Connected button to setup link and connect 4. When connect with PC Tool, User sometimes may encounter connection failure, please refer to Appendix H, Troubleshoot with Network control to fix - 7 - VISSONIC ELECTRONICS LIMITED... -
Page 8: Matrix Switch Page
Save EDID : After reading EDID successfully , Click ‘Save’ button to save This EDID for one input port is act as the Manual EDID, which can be selected or deselected by the front panel - 8 - VISSONIC ELECTRONICS LIMITED... -
Page 9: Signal Setting Page
D. UHD-HDCP-2.2 3. Output Format User can set output resolution here 3840x2160@60 3840x2160@50 3840x2160@30 3840x2160@25, 1920x1200@60 1920x1080@60 1920x1080@50 1600x1200@60 1400x1050@60 10) 1366x768@60 11) 1360x768@60 12) 1280x1024@60 13) 1280x768@60 14) 1280x720@60 15) 1280x720@50 16) 1024x768@60 - 9 - VISSONIC ELECTRONICS LIMITED... -
Page 10: Finetune
Output Select: Set the output port that connect to the display, need set according to the TV wall connect status; It means which output port connect to the display; Output Format: Set the output resolution; - 10 - VISSONIC ELECTRONICS LIMITED... - Page 11 Click to select the screen, then drag, select the screens to splice, right-click, and click Screen Stitching to splicing; If user want to cancel one TV WALL, first select the wall which is splicing, right click, then select Cancel Stitching. - 11 - VISSONIC ELECTRONICS LIMITED...
-
Page 12: Bezel Adjust
5.6.2 Bezel adjust There are two options to set bezel Type A with pixels setting, maximum number is 255, see below: Type B with millimeter setting, see below: - 12 - VISSONIC ELECTRONICS LIMITED... -
Page 13: One More Tv Wall
Above is one 2x2 wall, for example. If want screen 5 to separately display another video source, user can select Screen 5 - Cancel Stitching, then select the same or another video source for screen 5 to display. This separate screen is a full display screen - 13 - VISSONIC ELECTRONICS LIMITED... -
Page 14: Save Scene/ Load Scene
Directly Input the IP address in the web browser, then press ‘Enter’ key Input the username: admin Input the password: admin Login and then you can control the matrix switch function use the website; Please note, on website control, user only can control basic operation. - 14 - VISSONIC ELECTRONICS LIMITED... -
Page 15: Electrical Parameters
Max Consumption 100W, 110-240VAC Matrix Mechanical dimensions Size(mm) 430(L)X300(W)X44 (H) Weight Operating temperature 0 to 40°C Storage temperature -20 to 70°C Permissible humidity 10%-50% 7. Package Contents Item Quantity unit User Manual AC Power Cord - 15 - VISSONIC ELECTRONICS LIMITED... -
Page 16: Appendix A: Query Ip Info Via Uart
Method A: After connected to the device via UART, Click the ‘Find via UART’ button at ‘Matrix Switch’ page to read the IP information. Method B: After connected to the device via UART, Click the ‘Find via UART’ button at ‘Network Setting’ page to read the IP information. - 16 - VISSONIC ELECTRONICS LIMITED... -
Page 17: Appendix B: Query Ip Address Info Via Network
Method A: Switch to ‘Matrix Swtich ’ page, then click ‘Search Device’ button to query IP address information. Method B: After switching to ‘Network Setting’ page, click ‘Search Device’ button to search devices, then click one device in the result list to load its IP address information. - 17 - VISSONIC ELECTRONICS LIMITED... -
Page 18: Appendix C: Set Ip Info Via Uart
Modify IP address type to Static IP or Auto IP(DHCP). If IP address type modified to Static IP, then input IP address, subnet mask and gateway information. Click ‘Save Config’ button to save. Click ‘Find via UART’ button again to read IP information to make sure the modification is successful. - 18 - VISSONIC ELECTRONICS LIMITED... -
Page 19: Appendix D: Set Ip Info Via Network
Step D:Click the ‘Save Config’ button to save data Setp E:When the software shows a message of ‘Success’, click ‘Search Device’ button to load configuration again to make sure your modification is saved successfully. - 19 - VISSONIC ELECTRONICS LIMITED... -
Page 20: Appendix E: Set Ip Address On Windows 7 Or Xp
12 Appendix E: Set IP address on Windows 7 or XP 1. Windows 7: Open ‘Network and Sharing Center’: Modify static IP address:(e.g. 192.168.0.1) : 2. Windows XP: Open ‘Network Connections: - 20 - VISSONIC ELECTRONICS LIMITED... - Page 21 Serial port baud rate is 9600 (the user cannot change the baud rate, otherwise it will lead to the network control failed). Configuration via UART only support modify IP address or IP address type. If you want to modify other configuration, please configure it via Network - 21 - VISSONIC ELECTRONICS LIMITED...
-
Page 22: Appendix F: Direct Connect Via Ethernet Cable
After connected successfully, the button right to ‘Status’ will be ‘Connected’ (If you click it now, it will disconnect from the device) Note: The default IP address is 192.168.0.247,and the default subnet mask is 255.255.255.0 - 22 - VISSONIC ELECTRONICS LIMITED... -
Page 23: Appendix G: Connect Via Network Route /Switch
If the device can be found but not able to connected successfully, please make sure the IP address of the PC and the device are in a same network segment.(e.g. when subnet mask is 255.255.255.0, then 192.168.0.1 and 192.168.0.2 are in a same network segment) - 23 - VISSONIC ELECTRONICS LIMITED... -
Page 24: Appendix H: Troubleshoot With Network Control
‘Find Via UART’ button to read the device’s IP address. If the IP address of the device is 255.255.255.255 by this way, it means that the network device (the device connected to) does not support HDCP function. - 24 - VISSONIC ELECTRONICS LIMITED... -
Page 25: Appendix I: Advanced Routing Switch
Click the output port that need configure (Also we can press ‘Ctrl’ or ‘Shift’ first ,then click to select more output ports) Press ‘Ctrl’ or ‘Shift’ first, then click to select input ports Click “ -->” button to add the input ports selected in step 2 . - 25 - VISSONIC ELECTRONICS LIMITED... - Page 26 Click ‘Start’ button to start automatically periodically switch. Automatically periodically switch is ongoing… Click ‘Stop’ button to stop automatically periodically switch if needed. If ‘Send cmd only one loop’ is checked, it will stop after one loop is finished. - 26 - VISSONIC ELECTRONICS LIMITED...
-
Page 27: Appendix J: Change List ( Vs V2 Version )
Add another mode (Type B) to configure Bezel setting with TV wall Add separately Lock function with front buttons control Move Advanced routing switch section to Appendix I Change front POWER button action feature - 27 - VISSONIC ELECTRONICS LIMITED...
Need help?
Do you have a question about the VIS-UHD0808-VW and is the answer not in the manual?
Questions and answers