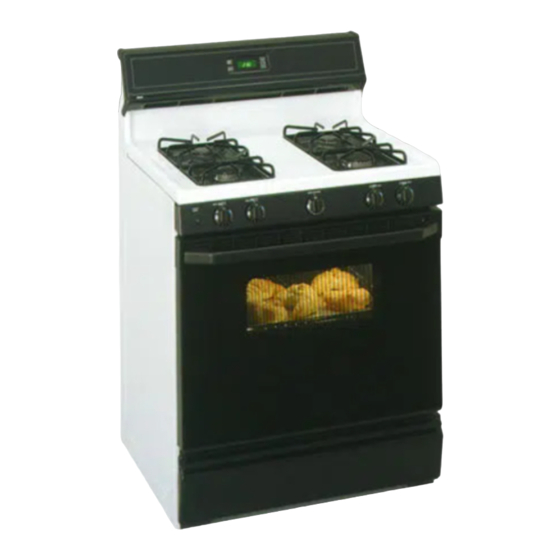
RCA LGB126 Use And Care & Installation
Hide thumbs
Also See for LGB126:
- Use and care & installation (48 pages) ,
- Use and care & installation (46 pages)
Advertisement
Quick Links
Contents
Aluminum Foil
Anti-Tip Device
Appliance Registration
Before You
Call for Service
Thermostat Adjustment—
Do It Yourself
Care and Cleaning
Clock/Timer
Consumer Services
Important Phone Numbers 47
Features
Installation Instructions 27–44
Air Adjustment
Flooring
Leveling
LP Conversion
Model and Serial Numbers
Oven
Use and Care & Installation
of Your Gas Range
5, 15, 17–19
Baking
2, 3, 28, 37
Broiling/Broiling Guide 19, 20
2
Control Settings
Door Removal
45, 46
Light; Bulb Replacement 12, 24
Oven Bottom
16
Oven Vents
21–26
Roasting/Roasting Guide 17, 18
8
Shelves
47
Power Outage
Safety Instructions
6, 7
Surface Cooking
Burners
36
Control Settings
29
Cooktop Comparison
37
Cookware Tips
38–44
Flame Size
2
Lighting Instructions
12–20
Warranty
Models
14, 15
LGB116
LGB126
12
LGB146
25
LGB156
23
13, 26
13, 17
12
3–5
9–11
9–11
10
9
11
11
9, 10
Back Cover
Advertisement

Related Manuals for RCA LGB126


Summary of Contents for RCA LGB126
- Page 1 Models Aluminum Foil 5, 15, 17–19 Baking 14, 15 LGB116 2, 3, 28, 37 Broiling/Broiling Guide 19, 20 Anti-Tip Device LGB126 Appliance Registration Control Settings LGB146 Before You Door Removal Call for Service 45, 46 Light; Bulb Replacement 12, 24 LGB156 Thermostat Adjustment—...
- Page 2 It lists causes of minor operating To obtain service, see the Consumer Services page in problems that you can correct yourself. the back of this guide. To obtain replacement parts, contact GE/RCA Service Centers. WARNING We’re proud of our service and want you to be •...
- Page 3 IMPORTANT SAFETY INSTRUCTIONS Read all instructions before using this appliance. • Be sure all packing materials are removed from IMPORTANT SAFETY NOTICE the range before operating it to prevent fire or • The California Safe Drinking Water and Toxic smoke damage should the packing material ignite. Enforcement Act requires the Governor of California •...
- Page 4 IMPORTANT SAFETY INSTRUCTIONS (continued) • CAUTION: ITEMS OF INTEREST TO Surface Cooking CHILDREN SHOULD NOT BE STORED IN • Always use the LITE position (on electric CABINETS ABOVE A RANGE OR ON THE ignition models) or the HI position (on standing BACKSPLASH OF A RANGE—CHILDREN pilot models) when igniting the top burners and CLIMBING ON THE RANGE TO REACH...
- Page 5 • If a combination of oils or fats will be used • Do not use the oven for a storage area. in frying, stir together before heating or as fats Items stored in the oven can ignite. melt slowly. • Place the oven shelves in the desired position •...
- Page 6 FEATURES OF YOUR RANGE Features and appearance vary. Sealed Burners Standard Twin Burners Burner Cap Drip Pan Drip Pan (on some (on some models) models) Burner Head Burner Your range is equipped with one of the two types of surface burners shown above.
-
Page 7: Table Of Contents
Feature Index Explained (Not all models have all features. Appearance of features varies.) on page 1 Clock and Timer (on some models) 2 Oven Vent 4, 5, 13, 26 3 Surface Burners, Drip Pans (on some models) and Grates 4, 5, 9–11, 21, 26 4 Surface Burner Control Knobs 4, 10, 11, 24 5 Oven Control Knob... -
Page 8: Clock And Timer (On Some Models)
CLOCK AND TIMER (on some models) Follow the directions below if your range has the CLOCK clock and timer shown at the right. You have the choice of having the timer show the SET TIME time counting down or the time of day. In either case, TIMER the timer will signal at the end of the timer period to SET TIME... - Page 9 HOW DOES THIS COOKTOP COMPARE TO YOUR OLD ONE? Your new cooktop has gas burners. If you are used The best types of cookware to use, plus heat-up and to cooking with induction or other electric surface cool-down times, depend upon the type of burner or units, you will notice some differences when you use surface unit you have.
- Page 10 SURFACE COOKING (continued) Lighting Instructions for Standing Pilot Models Surface Burner Controls The surface burners on Knobs that turn the surface burners on and off are these ranges have standing marked as to which burners they control. The two pilots that must be lit knobs on the left control the left front and left rear initially.
- Page 11 How to Select Flame Size Watch the flame, not the knob, as you reduce heat. Any flame larger than the bottom of the cookware is The flame size on a gas burner should match the wasted and only serves to cookware you are using.
- Page 12 USING YOUR OVEN Before Using Your Oven Be sure you understand how to set the controls properly. Practice removing and replacing the shelves while the oven is cool. Read the information and tips on the following pages. Keep this guide handy where you can refer to it, especially during the first weeks of using your new range.
-
Page 13: Oven Vent
Oven Shelves The shelves are To remove a shelf designed with stop- from the oven, pull it Bump locks so when placed toward you, tilt the front end upward and pull the correctly on the shelf supports, they will stop shelf out. - Page 14 BAKING Your oven temperature is controlled very accurately If you think an adjustment is necessary, see the Adjust using an oven control system. It is recommended that the Oven Thermostat section. It gives easy Do It you operate the oven for a number of weeks to Yourself instructions on how to adjust the thermostat.
- Page 15 Baking Guides When using prepared baking mixes, follow package recipe or instructions for best baking results. Cookies Aluminum Foil When baking cookies, Never entirely cover flat cookie sheets a shelf with aluminum (without sides) foil. This will disturb produce better-looking the heat circulation and cookies.
- Page 16 ADJUST THE OVEN THERMOSTAT— DO IT YOURSELF! You may feel that your new oven cooks differently To Adjust the Thermostat: than the one it replaced. We recommend that you use your new oven for a few weeks to become more familiar with it, following the times given in your recipes as a guide.
- Page 17 ROASTING Roasting is cooking by dry heat. Tender meat or Roasting is really a baking procedure used for meats. poultry can be roasted uncovered in your oven. Therefore the oven controls are set for Baking. Roasting temperatures, which should be low and (You may hear a slight clicking sound indicating the steady, keep spattering to a minimum.
- Page 18 ROASTING (continued) Questions and Answers Q. Is it necessary to check for doneness with a Q. Do I need to preheat my oven each time I cook meat thermometer? a roast or poultry? A. It is not necessary to preheat your oven. A.
- Page 19 BROILING Broiling is cooking food by direct heat from above the Both the oven and broiler compartment doors food. Most fish and tender cuts of meat can be broiled. should be closed during broiling. Follow these directions to keep spattering and smoking Turn most foods once during cooking (the exception to a minimum.
- Page 20 BROILING GUIDE The oven and broiler compartment doors must be • If desired, marinate meats or chicken before broiling. closed during broiling. Or brush with barbecue sauce last 5 to 10 minutes only. • Always use the broiler pan and grid that comes with •...
- Page 21 CARE AND CLEANING Proper care and cleaning are important so your range BE SURE ELECTRICAL POWER IS will give you efficient and satisfactory service. Follow DISCONNECTED BEFORE CLEANING ANY these directions carefully in caring for it to help assure PART OF YOUR RANGE. safe and proper maintenance.
- Page 22 CARE AND CLEANING (continued) CAUTION: DO NOT OPERATE THE BURNER WITHOUT ALL BURNER PARTS AND DRIP PANS (IF SO EQUIPPED) IN PLACE. Standard Twin Burners (on some models) Grate You should clean the surface burners routinely, especially after bad spillovers, which could clog these holes.
- Page 23 Burner Grates Lift out when cool. Grates should be washed regularly and, of course, after spillovers. Wash them in hot, soapy water and rinse with clean water. After cleaning, dry them thoroughly by putting them in a warm oven for a few minutes. Don’t put the grates Although they’re durable, the grates will gradually back on the range while they are wet.
-
Page 24: Broiler Drawer
CARE AND CLEANING (continued) Oven Light Bulb (on some models) The light bulb is located in the upper left corner of the oven. Before replacing your oven light bulb, disconnect the electrical power to the range at the main fuse or circuit breaker panel or unplug the range from the electrical outlet. -
Page 25: Lift-Off Oven Door
Lift-Off Oven Door The oven door is removable but it is heavy. You may TO CLEAN THE DOOR: need help removing and replacing the door. (Do not immerse door in water.) To remove the door, Inside of door: open it a few inches to •... - Page 26 CARE AND CLEANING (continued) Oven Shelves Clean the shelves with an abrasive cleanser or steel wool. After cleaning, rinse the shelves with clean water and dry with a clean cloth. Lift-up Cooktop (on models with standard twin burners) Clean the area under the cooktop often. Built-up soil, especially grease, may catch on fire.
- Page 27 Range Height: alteration, service or maintenance can ″ 40″ 44″ ⁄ LGB116 LGB126 LGB146 LGB156 cause injury or property damage. Refer to this guide. For assistance or additional information, consult a qualified installer, service agency, manufacturer (dealer) or the gas supplier.
- Page 28 INSTALLATION INSTRUCTIONS (continued) IMPORTANT SAFETY INSTRUCTIONS • If cabinets are placed above the range, allow a minimum clearance of 30″ between the cooking Installation of this range must conform with surface and the bottom of unprotected cabinets. local codes, or in the absence of local codes, with the National Fuel Gas Code, ANSI •...
- Page 29 TOOLS YOU WILL NEED GENERAL • Phillips and flat-blade screwdrivers • See Dimensions and Clearances in this section for all rough-in and spacing dimensions. These • Pencil and ruler dimensions must be met for safe use of your range. • Two pipe wrenches (one for backup) The location of the electrical outlet and pipe opening ″...
- Page 30 INSTALLATION INSTRUCTIONS (continued) PROVIDE ADEQUATE GAS SUPPLY Gas Pipe and Electric Outlet Locations Your range is designed to operate at a pressure for Models Equipped with Sealed Burners of 4″ of water column on natural gas or, if designed for LP gas (propane or butane), 10″ of water This area allows for flush range column.
- Page 31 Flexible Connector Hookup for Models Flexible Connector and Rigid Pipe Hookups for Equipped with Sealed Burners Models Equipped with Standard Twin Burners Flexible Rigid Pipe Connector Pressure Hookup Gas Flow into Range Pressure Regulator Hookup Regulator 90° Union Elbow Adapter Nipple 90°...
- Page 32 INSTALLATION INSTRUCTIONS (continued) CONNECT THE RANGE TO GAS ELECTRICAL CONNECTIONS (on some models) (continued) 1. Install a manual gas line shut-off valve in the Electrical Requirements gas line in an easily accessed location outside of 120-volt, 60 Hertz, properly grounded branch the range.
- Page 33 Usage Situations where Appliance Usage Situations where Appliance Power Power Cord will be Disconnected Infrequently. Cord will be Disconnected Frequently. An adapter may be used only on a 15-amp Do not use an adapter plug in these situations circuit. Do not use an adapter on a 20-amp because disconnecting of the power cord circuit.
- Page 34 INSTALLATION INSTRUCTIONS (continued) SEAL THE OPENINGS Adjust the Surface Burner Pilots If Necessary Seal any openings in the wall behind the range 1. Raise the cooktop. and in the floor under the range when hookups are completed. LIGHT THE PILOTS (for models equipped with standing pilots) The range should be installed in its permanent 2.
- Page 35 Quality of Flames Stand-By Pilot Flame The combustion quality of burner flames needs to be determined visually. (A) Yellow flames— Call for service Heater Pilot Flame 4. Turn the OVEN CONTROL knob to a setting above 200°F. The pilot flame will increase in size (B) Yellow tips on and impinge on the temperature-response element.
- Page 36 INSTALLATION INSTRUCTIONS (continued) ADJUSTING THE AIR ADJUSTMENT To determine if the bottom burner flames are burning properly, first remove the oven bottom. Oven Bottom With the oven bottom removed, properly adjusted flames should have approximately 1″ blue cones and, if range is supplied with natural gas, should burn with no yellow tipping.
-
Page 37: Anti-Tip Device
LEVELING THE RANGE Anti-Tip Device 1. Remove the storage drawer, broiler drawer or Slotted kick panel. Head Screw Wallplate 2. Use a 3/16″ open-end 20° or socket wrench to back Approx. out both rear leveling legs approximately two turns. ″ ″... - Page 38 CONVERTING TO LP GAS (Sealed Burner models only) or Converting Back to Natural Gas from LP HOW TO CONVERT A SEALED BURNER RANGE If It Is This Regulator: FOR USE WITH LP GAS OR NATURAL GAS 1. Use an adjustable wrench to remove the This range leaves the factory set for use with natural nut from the pressure regulator.
- Page 39 CONVERTING TO LP GAS (Sealed Burner models only) or Converting Back to Natural Gas from LP CONVERTING SURFACE BURNERS Orifice Spuds for Converting to Natural Gas: Natural gas orifice spuds have a 3-digit number and the letter “N” on the top. Each orifice spud Grate will also have 1, 2 or 3 grooves on top denoting the location on the range where it is to be...
- Page 40 CONVERTING TO LP GAS (Sealed Burner models only) or Converting Back to Natural Gas from LP CONVERT THE OVEN BURNER ORIFICES ADJUST LOW FLAME SETTING 1. Turn all top burners to LOW. Oven Burner 2. Remove all four knobs. 1. Remove oven door, storage drawer or broiler drawer and oven bottom.
- Page 41 CONVERTING TO LP GAS (Standard Twin Burner models only) or Converting Back to Natural Gas from LP HOW TO CONVERT A STANDARD TWIN If It Is This Regulator: BURNER RANGE FOR USE WITH LP GAS OR Gas Flow into NATURAL GAS Range This range leaves the factory set for use with natural Do not remove...
- Page 42 CONVERTING TO LP GAS (Standard Twin Burner models only) or Converting Back to Natural Gas from LP CONVERTING SURFACE BURNERS ADJUST OVEN THERMOSTAT 1. Lift cooktop. (for Models Equipped with Standing Pilots) 2. Lift burner assemblies straight up and set 1.
- Page 43 CONVERTING TO LP GAS (Standard Twin Burner models only) or Converting Back to Natural Gas from LP CONVERT THE OVEN BURNER ORIFICES CONVERT AIR ADJUSTMENT SHUTTER For LP gas, loosen the Oven Burner Phillips head screw and 1. Remove oven door, storage drawer or broiler rotate the shutter to the drawer and oven bottom.
- Page 44 CONVERTING TO LP GAS (Standard Twin Burner models only) or Converting Back to Natural Gas from LP ADJUST LOW FLAME SETTING CHECK QUALITY OF FLAMES The combustion quality of burner flames needs 1. Turn all top burners to LOW. to be determined visually. 2.
- Page 45 QUESTIONS? BEFORE YOU CALL FOR SERVICE… PROBLEM POSSIBLE CAUSE TOP BURNERS DO NOT • Make sure electrical plug is plugged into a live power outlet. LIGHT OR DO NOT • Burner holes on the side or around the top of burner may be clogged. Remove BURN EVENLY burners (on models with standard twin burners) or burner heads (on models with sealed burners) or burner caps on spill-proof models, and clean them with...
- Page 46 BEFORE YOU CALL FOR SERVICE… (continued) PROBLEM POSSIBLE CAUSE OVEN WILL NOT WORK • Plug on the range is not completely inserted in the electrical outlet. • Pilot(s) is (are) not lit (on standing pilot models). See the Lighting Instructions for Standing Pilot Models in Using Your Oven.
- Page 47 We’ll Be There With the purchase of your new RCA appliance, receive the assurance that if you ever need information or assistance, we’ll be there. All you have to do is call—toll-free! In-Home Repair Service 800-GE-CARES (800-432-2737) Our consumer service professionals will provide expert repair service on your RCA appliance, scheduled at a time that’s convenient for you.
- Page 48 FULL ONE-YEAR WARRANTY FOR SERVICE For one year from date of original purchase, we We at RCA strive to provide the highest quality products and service. Therefore we have designated will provide, free of charge, parts and service labor in your home to repair or replace any part of the GE CONSUMER SERVICE, a leader in the service Range that fails because of a manufacturing defect.
Need help?
Do you have a question about the LGB126 and is the answer not in the manual?
Questions and answers