Table of Contents
Advertisement
Available languages
Available languages
ATTACH YOUR RECEIPT HERE
Serial Number
Questions, problems, missing parts? Before returning to your retailer, call our customer
service department at 1-877-447-4768, 8:30 a.m. – 4:30 p.m. CST, Monday – Friday, or
log on to customerservice@ghpgroupinc.com
70-10-022
Purchase Date
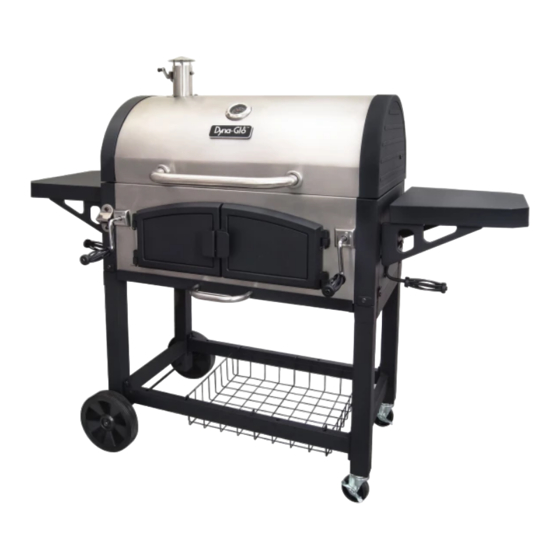
DUAL CHAMBER
CHARCOAL GRILL
1
MODEL #DGN576SNC-D
Français p. 20
Español p. 39
Rev. 11/16/12
Advertisement
Chapters
Table of Contents

Related Manuals for Dyna-Glo DGN576SNC-D


Summary of Contents for Dyna-Glo DGN576SNC-D
- Page 1 DUAL CHAMBER CHARCOAL GRILL MODEL #DGN576SNC-D Français p. 20 Español p. 39 ATTACH YOUR RECEIPT HERE Purchase Date Serial Number Questions, problems, missing parts? Before returning to your retailer, call our customer service department at 1-877-447-4768, 8:30 a.m. – 4:30 p.m. CST, Monday – Friday, or log on to customerservice@ghpgroupinc.com...
-
Page 2: Table Of Contents
TABLE OF CONTENTS Safety Information ....................... 2 Package Contents ....................... 4 Hardware Contents......................5 Preparation .......................... 5 Assembly Instructions......................6 Operating Instructions ....................... 15 Care and Maintenance ...................... 17 Warranty ..........................17 Replacement Parts List ..................... 18 SAFETY INFORMATION Please read and understand this entire manual before attempting to assemble, operate or install the product. - Page 3 SAFETY INFORMATION • Use caution when lifting and moving the unit to avoid back strain or back injury. Do not move the unit while it is in use. • DO NOT operate the unit near or under flammable or combustible materials such as decks, porches or carports.
-
Page 4: Package Contents
PACKAGE CONTENTS PART DESCRIPTION QUANTITY PART DESCRIPTION QUANTITY Side Shelf Storage Basket Lid and Firebox Assembly Axle Lid Handle Assembly Wheel Smoke Stack Assembly Left Leg Assembly Charcoal Access Door-Left Charcoal Access Door-Right Crank Handle Grate Damper Handle-Right Warming Rack Damper Handle-Left Damper Side Shelf Support-Right... -
Page 5: Hardware Contents
HARDWARE CONTENTS (shown actual size) PREPARATION Before beginning assembly of product, make sure all parts are present. Compare parts with package contents list and hardware contents list. If any part is missing or damaged, do not attempt to assemble the product. Estimated Assembly Time: 50 minutes with two people Tools Required for Assembly (not included): Phillips screwdriver, adjustable wrench. -
Page 6: Assembly Instructions
ASSEMBLY INSTRUCTIONS 1. Insert axle (P) into left leg assembly (R). Attach one wheel (Q) to each side of axle (P) using one wheel axle sleeve (GG), one M8 washer (DD), and one M8 nut (EE). Hardware Used Wheel axle sleeve M8 Washer M8 Nut... - Page 7 ASSEMBLY INSTRUCTIONS 4. Attach two cart braces (L) to right leg assembly (M) using two M6x12 bolts (AA) on each side. Hardware Used M6x12 Bolt 5. Attach storage basket (O) to cart braces (L). NOTE: Make sure four hooks on storage basket (O) are fully inserted into holes on cart braces (L).
- Page 8 ASSEMBLY INSTRUCTIONS 7. Secure lid and firebox assembly (B) on top of left leg assembly (R) and right leg assembly (M) using six M6x20 bolts (BB). Hardware Used M6x20 Bolt 8. Attach damper (H) to inside of lid and firebox assembly (B) using four M5 shoulder bolts (CC) and four M5 lock nuts (II).
- Page 9 ASSEMBLY INSTRUCTIONS 10. With shelf upside down, attach side shelf support – left rear/right front (W) and side shelf support – left front/right rear (I) to side shelf (A) using four M6x12 bolts (AA) on each side. Repeat for remaining shelf (A). Hardware Used M6x12 Bolt 11.
- Page 10 ASSEMBLY INSTRUCTIONS 13. Attach ash tray handle (K) to ash tray (J) using two M6x12 bolts (AA). Hardware Used M6x12 Bolt 14. Insert ash tray (J) into lid and firebox assembly (B). 15. Attach smoke stack assembly (D) to lid and firebox assembly (B) using three M6x12 bolts (AA).
- Page 11 ASSEMBLY INSTRUCTIONS 16. Attach temperature gauge (Z) and temperature gauge nut bezel (A1) to lid and firebox assembly (B) using pre-assembled nut . 17. Attach lid handle assembly (C) to lid and firebox assembly (B) using two M6x12 bolts (AA). Hardware Used M6x12 Bolt 18.
- Page 12 ASSEMBLY INSTRUCTIONS 19. Attach two charcoal trays (X) to inside of lid and firebox assembly (B) using four M6x12 bolts (AA) each. Hardware Used M6x12 Bolt 20. Insert the divider panel (Y) into the inside of the lid and firebox assembly (B). 21.
- Page 13 ASSEMBLY INSTRUCTIONS 22. Attach one M6x30 bolt (JJ) on each side of lid and firebox assembly (B). DO NOT fully tighten. Hardware Used M6x30 Bolt 23. Insert one end of warming rack (U) onto M6x30 bolt (JJ) and into the hole on lid and firebox assembly (B).
- Page 14 OPERATING INSTRUCTIONS Removing divider panel from grill 1.Remove four grates (T) in lid and firebox assembly (B). 2. Remove warming rack supports (U), from the firebox, by pressing both bars in towards the center of the grill. Swing the warming rack (U) up, to make clearance for the divider panel (Y).
-
Page 15: Operating Instructions
OPERATING INSTRUCTIONS DANGER • CARBON MONOXIDE HAZARD. Burning charcoal inside can kill you. It gives off carbon monoxide, which has no odor. NEVER burn charcoal inside homes, vehicles or tents. This grill has an adjustable charcoal tray. By turning the crank handle, the charcoal tray can be raised or lowered to desired height. - Page 16 OPERATING INSTRUCTIONS Rust can appear on the inside of your grill. Maintaining a light coating of vegetable oil on interior surfaces will aid in the protection of your grill. Exterior surfaces of the grill may need occasional touch up. We recommend the use of commercially available black high temperature spray paint. NEVER PAINT THE INTERIOR OF THE UNIT! Operating The Front Door, Dampers, And Smoke Stack WARNING: These metal parts could be very hot while grilling.
-
Page 17: Care And Maintenance
This warranty gives you specific legal rights and you may also have other legal rights which may vary from state to state. Manufactured by: GHP Group Inc. 8280 Austin Avenue Morton Grove, IL, USA 60053-3207 Item Name: Dual Chamber Charcoal Grill Model #: DGN576SNC-D... -
Page 18: Replacement Parts List
REPLACEMENT PARTS LIST For replacement parts, call our customer service department at 1-877-447-4768, 8:30 a.m. – 4:30 p.m. CST, Monday – Friday. PART DESCRIPTION PART # Hardware pack 404-03025-00 Owner’s/instruction manual 70-10-022 Smoke stack-stainless steel 404-01002-05 Lid outer 404-03003-03 DynaGlo badge 213-02002 Temperature gauge –... - Page 19 REPLACEMENT PARTS LIST PART DESCRIPTION PART # End cap--right 404-01002-08 Charcoal access door latch 403-03017-00 Charcoal access door hinge for firebox – with hardware 404-03016-00 Divider panel 404-03006-01 Temperature gauge nut bezel 213-02006 Charcoal access door frame only – right 404-03014-01 Charcoal access door insert with hardware –...
- Page 20 GRIL à CHARBON DE BOIS à DOUBLE CHAMBRE COMBUSTIBLE MODELE #DGN576SNC-D JOIGNEZ VOTRE REÇU ICI Numéro de série_____________________________ Date d’achat _____________________ Des questions, des problèmes, des pièces manquantes? Avant de retourner l’article au détaillant, appelez notre service à la clientèle au 1-877-447-4768, 08:30-16 heures 30, HNC, du lundi - vendredi ou par e-mail à...
-
Page 21: Consignes De Sécurité
TABLE DES MATIÈRES Consignes de sécurité ........................ 21 Contenu de l’emballage ......................23 Quincaillerie incluse ........................24 Préparation ..........................24 Instructions pour l’assemblage ....................25 Mode d’emploi ..........................33 Entretien ............................36 Garantie ............................36 Liste des pièces de rechange ....................37 CONSIGNES DE SÉCURITÉ... - Page 22 CONSIGNES DE SÉCURITÉ • Soyez prudent lorsque vous le levage et le déplacement de l'appareil pour éviter les maux de dos ou de blessures au dos. Ne déplacez pas l'appareil lorsqu'il est en cours d'utilisation. • Ne pas faire fonctionner l'appareil à proximité de matériaux inflammables ou combustibles ou sous tel que les terrasses, les vérandas ou abris d'auto.
-
Page 23: Contenu De L'emballage
CONTENU DE L’EMBALLAGE PIÈCE DESCRIPTION QTÉ PIÈCE DESCRIPTION QTÉ Tablette latérale Panier de rangement Axe de roue Couvercle et boîtier Poignée du couvercle Roue Cheminée Pattes gauches Porte du compartiment à charbon Accès charbon de porte-droit Manivelle Grille Poignée du registre de tirage-droite Grille de réchauffement Poignée du registre de tirage- gauche Registre de tirage... -
Page 24: Quincaillerie Incluse
HARDWARE CONTENTS (shown actual size) Boulon à Vis M6 épaulement M5 Rondelle de Ecrou M8 de 12 mm Vis M6 de 20 mm Qté : 8 Qté : 2 Qté : 31 Qté : 2 Qté : 14 contre-écrou Qté : 8 Charnière Pin Qté... -
Page 25: Instructions Pour L'assemblage
INSTRUCTIONS POUR L’ASSEMBLAGE 1. Insérez l’axe de roue (P) dans les pattes gauches (R). Fixez une roue (Q) à chaque extrémité de l’axe de roue (P) avec une gaine d’axe de roue (GG), une rondelle M8 (DD) et un écrou M8 (EE). Quincaillerie utilisée Gaine d’axe de roue... - Page 26 INSTRUCTIONS POUR L’ASSEMBLAGE 4. Fixez les deux barres de soutien (L) aux pattes droites (M) avec deux boulons M6x12 (AA) de chaque côté. Quincaillerie utilisée Vis M6 de 12 mm 5. Fixez le panier de rangement (O) aux barres de soutien (L).
- Page 27 INSTRUCTIONS POUR L’ASSEMBLAGE 7. Fixez le couvercle et le boîtier du barbecue (B) sur les pattes gauches (R) et les pattes droites (M) avec six boulons M6x20 (BB). Quincaillerie utilisée Vis M6 de 20 mm 8. Fixez le registre de tirage (H) à l’intérieur du boîtier du barbecue sous le couvercle (B) avec quatre boulons à...
- Page 28 INSTRUCTIONS POUR L’ASSEMBLAGE 10. Placez la tablette à l’envers et fixez le support latéral gauche/arrière, droit/avant (W) et le support latéral gauche/avant ,droit/arrière (I) à la tablette (A) avec quatre boulons M6x12 (AA) de chaque côté. Faites la même chose avec l’autre tablette.
- Page 29 INSTRUCTIONS POUR L’ASSEMBLAGE 13. Fixez la poignée du cendrier (K) au cendrier (J) avec deux boulons M6x12 (AA). Quincaillerie utilisée Vis M6 de 12 mm 14. Mettez le cendrier (J) sous le boîtier du barbecue (B). 15. Fixez la cheminée (D) sur le couvercle du barbecue (B) avec trois boulons M6x12 (AA).
- Page 30 INSTRUCTIONS POUR L’ASSEMBLAGE 16. Fixez l’indicateur de température (X) au couvercle (B) avec un écrou. 17. Fixez la poignée du couvercle (C) au couvercle (B) avec deux boulons M6x12 (AA). Quincaillerie utilisée Vis M6 de 12 mm 18. Insérez la manivelle (F) dans le boîtier du barbecue (B).
- Page 31 INSTRUCTIONS POUR L’ASSEMBLAGE 19. Fixez 2 bacs à charbon (X) à l’ensemble intérieur du couvercle et du foyer (B) avec l’aide de 4 boulons M6x12. Quincaillerie utilisée Vis M6 de 12 mm 20. Insérez la cloison de séparation (Y) à l’intérieur du couvercle et de l’ensemble du foyer (B).
- Page 32 INSTRUCTIONS POUR L’ASSEMBLAGE 22. Insérez un boulon M6x30 (JJ) dans les parties latérales du couvercle (B), NE VISSEZ pas complètement. Quincaillerie utilisée Vis M6 de 30 mm 23. Insérez une extrémité de la grille de réchauffement (U) dans le boulon du couvercle M6x30 (JJ) et dans le trou du boîtier (B).
-
Page 33: Mode D'emploi
MODE D’EMPLOI Retirer la cloison de séparation du grill 1. Retirez les quatres grilles (T) de l’ensemble du couvercle et du foyer (B). 2. Retirez les supports de grille de réchaud (U) du foyer en appuyant sur les deux traverses tout en les tirant vers le centre du gril. - Page 34 MODE D’EMPLOI DANGER • DANGER MONOXYDE DE CARBONE. Faire brûler du charbon à l’intérieur peut vous tuer. Les émissions de monoxyde de carbone qui s’y dégage n’ont pas d’odeur. Ne faites JAMAIS brûler du charbon dans une maison, un véhicule ou une tente. Il y a un plateau à...
- Page 35 MODE D’EMPLOI Des traces de rouille peuvent apparaître à l’intérieur du barbecue. Une fine couche d’huile végétale à l’intérieur du barbecue protègera votre barbecue. Il faudra peut-être apporter des retouches sur les surfaces extérieures du barbecue. Nous vous recommandons d’utiliser de la peinture haute température en vaporisateur.
-
Page 36: Entretien
également d'un État à État. Fabriqué par: GHP Group Inc 8280 Austin Avenue Morton Grove, IL, USA 60053-3207 Nom d'article : GRIL à CHARBON DE BOIS à DOUBLE CHAMBRE COMBUSTIBLE Modele #: DGN576SNC-D... -
Page 37: Liste Des Pièces De Rechange
Kit de quincaillerie 404-03025-00 Mode d’emploi / Manuel du propriétaire 70-10-022 Cheminée en acier inoxydable 404-01002-05 Extérieur du couvercle 404-03003-03 Badge Dyna-Glo 213-02002 Jauge de température – avec écrou 213-02005 Butoir du couvercle 403-01002-07 Goupille du couvercle avec goupille fendue 404-03002-03 Poignée de couvercle avec la quincaillerie... - Page 38 LISTE DES PIÈCES DE RECHANGE RéF DESCRIPTION NO DE PIÈCE Bouchon – droit 404-01002-08 Loquet de la porte d’accès au corps du gril à charbon 403-03017-00 Charnière de porte d’accès du foyer – avec sa quincaillerie 404-03016-00 Cloison de séparation 404-03006-01 Collerette d’écrou de la jauge de température 213-02006...
- Page 39 HORNO PARRILLA DE CAMARA DOBLE MODELO #DGN576SNC-D ADJUNTE SU RECIBO AQUÍ Número de serie _______________________ Fecha de compra __________________ ¿Preguntas, problemas, piezas faltantes? Antes de volver a la tienda, llame a nuestro Departamento de Servicio al Cliente al 1-877-447-4768, de 8:30 am - 4:30 pm, hora central, de lunes - viernes o envíe un correo electrónico a customerservice@ghpgroupinc.com.
-
Page 40: Informacion De Seguridad
INDICE Informacion de seguridad ......................40 Contenido del paquete ....................... 42 Aditamentos ..........................43 Preparacion ..........................43 Instrucciones de ensamblaje ....................... 44 Instrucciones de funcionamiento ....................52 Cuidado y mantenimiento ......................55 Garantla ............................55 Lista de piezas de repuesto ....................... 56 INFORMACION DE SEGURIDAD Lea y comprenda completamente este manual antes de intentar ensamblar, usar o instalar el producto. - Page 41 INFORMACION DE SEGURIDAD • Tenga cuidado al levantar o mover el aparato para evitar lesiones en la espalda tensión o hacia atrás. No mueva la unidad mientras esté en uso. • NO utilice el aparato cerca de materiales inflamables o combustibles o bajo Tales como terrazas, porches o cocheras.
-
Page 42: Contenido Del Paquete
CONTENIDO DEL PAQUETE PIEZA DESCRIPCIÓN CANT. PIEZA DESCRIPCIÓN CANT. Repisa Auxiliar Canasta de Almacenamiento Ensamble de Tapa y de Combustión Ensamble de la Manija de la Tapa Rueda Ensamble de la Chimenea Ensamble de la Pata Izquierda Charcoal puertas de acceso-Izquierda Charcoal puertas de acceso-Derecha Manivela Parrilla... -
Page 43: Aditamentos
CONTENIDO DE HARDWARE (muestra en tamaño real) M5 Tornillo de Perno hombro Arandela de M6 x 12 Perno Tuerca M6 x 20 Qté : 8 Qté : 31 Qté : 2 Qté : 2 Qté : 14 Tuerca Qté : 8 Pasador Perno Qté... -
Page 44: Instrucciones De Ensamblaje
INSTRUCCIONES DE ENSAMBLAJE 1. Inserte el eje (P) dentro del ensamble de la pata izquierda (R). Acople una rueda (Q) a cada lado del eje (P) utilizando un pasador del eje de la rueda (GG), una arandela M8 (DD), y una tuerca M8 (EE). - Page 45 INSTRUCCIONES DE ENSAMBLAJE 4. Acople los dos estribos del carrito (L) al ensamble de la pata derecha (M) utilizando dos tornillos M6x12 (AA) en cada lado. Aditamentos utilizados Perno M6 x 12 5. Acople la canasta de almacenamiento (O) a los estribos del carrito (L).
- Page 46 INSTRUCCIONES DE ENSAMBLAJE 7. Asegure el ensamble de la tapa y de la cámara de combustión (B) sobre el ensamble de las patas izquierda (R) y derecha (M) utilizando seis tornillos M6x20 (BB). Aditamentos utilizados Perno M6 x 20 8. Acople el amortiguador (H) a la parte interna del ensamble de la tapa y de la cámara de combustión (B) utilizando cuatro tornillos con cuello M5 (CC) y cuatro tuercas de fijación...
- Page 47 INSTRUCCIONES DE ENSAMBLAJE 10. Con la repisa boca-abajo, acople el soporte de la repisa auxiliar – trasero izquierdo/ delantero derecho (W) y el soporte de la repisa auxiliar – delantero izquierdo/trasero derecho (I) a la repisa auxiliar (A) utilizando cuatro tornillos M6x12 (AA) en cada lado.
- Page 48 INSTRUCCIONES DE ENSAMBLAJE 13. Acople la manija de la bandeja de ceniza (K) a la bandeja de ceniza (J) utilizando dos tornillos M6x12 (AA). Aditamentos utilizados Perno M6 x 12 14. Inserte la bandeja de ceniza (J) en el ensamble de la tapa y de la cámara de combustión (B).
- Page 49 INSTRUCCIONES DE ENSAMBLAJE 16. Acople el medidor de temperatura (X) al ensamble de la tapa y de la cámara de combustión (B) utilizando tuercas pre- ensambladas. 17. Acople el ensamble de la manija de la tapa (C) al ensamble de la tapa y de la cámara de combustión (B) utilizando dos tornillos M6x12 (AA).
- Page 50 INSTRUCCIONES DE ENSAMBLAJE 19. Colocar dos bandejas de carbon (X) a la parte interior de la tapa del fogon (B) usando cuatro M6x12 valvulas (AA) para cada una. Aditamentos utilizados Perno M6 x 12 20. Insertar el panel divisorio (Y) al interior de la tapa y asamblaje del fogon (B).
- Page 51 INSTRUCCIONES DE ENSAMBLAJE 22. Acople un tornillo M6x30 (JJ) en cada lado del ensamble de la tapa y de la cámara de combustión (B). NO lo apriete completamente. Aditamentos utilizados Perno M6 x 20 23. Inserte uno de los extremos de la parrilla de calentamiento (U) dentro del tornillo M6x30 (JJ) y del hueco del ensamble de la tapa y de la cámara de combustión (B).Repita el proceso con el otro...
-
Page 52: Instrucciones De Funcionamiento
INSTRUCCIONES DE FUNCIONAMIENTO Removiendo el panel divisorio de la parrilla 1. Remover las cuatro rejillas (T) de la tapa y el fogon. 2. Remover los soporte de los estantes (U) del fogon apretando ambas barras hacia el centro de la parrilla. Dar vuelta el estante (U), para hacer lugar para el panel divisorio. - Page 53 INSTRUCCIONES DE FUNCIONAMIENTO PELIGRO • PELIGRO CON EL MONÓXIDO DE CARBONO. La combustión de carbón en recintos cerrados puede causarle la muerte. Dicha combustión produce monóxido de carbono, el cual no tiene olor. NUNCA queme carbón dentro de viviendas, vehículos o tiendas de campaña. Esta parrilla cuenta con una bandeja de carbón ajustable.
- Page 54 INSTRUCCIONES DE FUNCIONAMIENTO 4. Cubra las superficies internas con aceite vegetal de cocina. 5. Encienda las briquetas y gradúe la bandeja del carbón a media altura, girando la manivela correspondiente. 6. Mantenga la combustión durante unas dos horas, con la tapa cerrada y todos los amortiguadores abiertos a 1/4.
-
Page 55: Cuidado Y Mantenimiento
Esta garantía le otorga derechos legales específicos y usted también puede tener otros derechos legales que pueden variar de estado a estado. Fabricado por: GHP Group Inc. 8280 Austin Avenue Morton Grove, IL, EE.UU. 60053-3207 Nombre del Producto: HORNO PARRILLA DE CAMARA DOBLE Modelo #: DGN576SNC-D... -
Page 56: Lista De Piezas De Repuesto
LISTA DE PIEZAS DE REPUESTO Para obtener piezas de repuesto, llame a nuestro Departamento de Servicio al Cliente al 1-877-447-4768, de 8:30 am - 4:30 pm, hora central, de lunes - viernes. REF. DESCRIPCIóN PIEZA # Equipo metalico Mochila de herramientas 404-03025-00 Manual de Instrucciones del dueño 70-10-022... - Page 57 LISTA DE PIEZAS DE REPUESTO REF. DESCRIPCIóN PIEZA # Tapa de cierre - derecha 404-01002-08 Pestillo de la puerta de acceso 403-03017-00 Bisagra de la puerta de acceso del carbon para el horno – con herramientas 404-03016-00 Panel divisorio 404-03006-01 Bisel de tuerca del indicador de temperatura 213-02006 Marco de la puerta de acceso del carbon solo - derecha...
Need help?
Do you have a question about the DGN576SNC-D and is the answer not in the manual?
Questions and answers