Table of Contents
Advertisement
Quick Links
Advertisement
Table of Contents

Related Manuals for Cheerlux C9 Series


Summary of Contents for Cheerlux C9 Series
- Page 1 US E R ’ S MA NUA L HD P R OJ E C T OR...
- Page 2 SAFETY PRECAUTIONS Read these safety instructions before using your device and store them for possible future reference. If the cord is damaged, have it repaired by the manufacturer, it’s service or a similarly qualified person in order to avoid any hazard. ...
-
Page 3: Table Of Contents
CONTENTS ► VISUAL INSTRUCTIONS..................03 • Top View........................03 • Bottom View........................ 04 • Side View........................05 • Rear View........................06 • Remote Control......................06 ► Projection Distance and Size................07 ► How to Use........................08 Before Starting......................08 Power Plug........................08 Power Button......................... 09 Keystone and Focus.................... -
Page 4: Visual Instructions
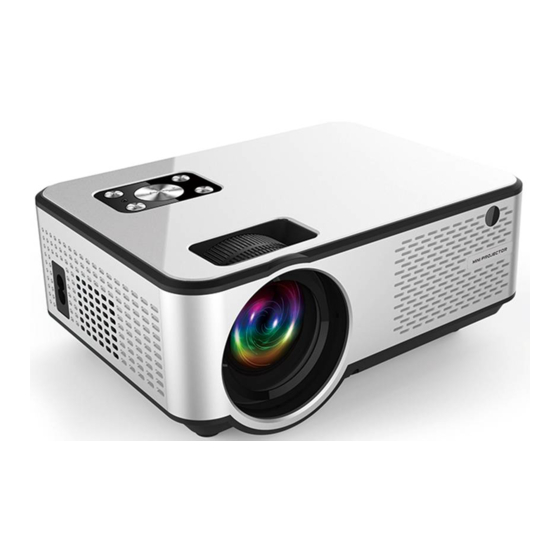
► VISUAL INSTRUCTIONS • Top View Control Panel Keystone Correction Manual Focus • Control Pane Manual Source Indicator Light Return Power The content of this manual are subject to change without notice - 3 -... -
Page 5: Bottom View
• Bottom View For Support Base For Tripod Stand Speaker Remark: The adjustable support base can assure the max projection angle by 15°, The best display effect will be obtained by projection angle ranges of 0° - 8°. • Front View IR Receiver Lens The content of this manual are subject to change without notice... -
Page 6: Side View
• Side View A. Left Side Power Socket B. Right Side ❸ ❶ ❷ ❹ ❺ ❻ AV Port ❶ HDMI 1 Port ❹ USB 1 Port ❷ HDMI 2 Port ❺ Headphone Jack(3.5mm) USB 2 Port ❸ ❻ The content of this manual are subject to change without notice - 5 -... -
Page 7: Rear View
• Rear View IR Receiver Analog TV Port (Optional Function) VGA Port Ventilation Window, Be able to take away to clean • Remote Control Power Mute Backward Forward Home / Play Arrow Keys Enter Menu Source Return Voice - Voice + Note: While using the remote control, point it toward IR... -
Page 8: Projection Distance And Size
► Projection Distance and Size 120˝ 100˝ 72˝ 50˝ ( Aspect Ratio: 16 : 9, Default ) Please follow the data in chart below, to adjust the image size and the distance. ( Between the lens and screen ) 50 inch 72 inch 100 inch 120 inch... -
Page 9: How To Use
► How to Use ① Before starting up the projector. Follow figure below to adjust trapezoid correction. Keep the projector vertical with projector screen and keep it on the same level. . ` ② Connect the power plug as following picture, connect with the electricity, The indicator light will turn to red. -
Page 10: Power Button
Press the “ power ” button ( ) on the control panel or remote control to turn ③ on the projector. A. On the control panel B. On the remote control ④ Keystone and Focus Keystone Correction Manual Focus A. If the projected image is in a trapezoidal shape, it can be resolved by Keystone correction. -
Page 11: Multimedia Connection
Note: If the Keystone correction fail to resolve image shape, please reduce the vertical height of the projector in relation to the center of the screen. B. the projected image may be blurry or difficult to see, this is due to lack of Focus adjustment with the lens, please follow the processes below to adjust the Focus. - Page 12 B. HDMI Connection Support most device with HDMI slot. Press "Source" on the remote control, then choose the right signal source “ HDMI “. The content of this manual are subject to change without notice - 11 -...
- Page 13 C. AV Connection Use AV cable for connecting as follows, choose the “AV” source input. D. Audio Out Connection Connect the loud speaker as follows: The content of this manual are subject to change without notice - 12 -...
- Page 14 E. VGA Connection Choose the "PC-RGB" source to connect computer with VGA cable, There is no sound coming out, need to connect with amplifier. Set up your laptop if still not sharing the screen. The content of this manual are subject to change without notice - 13 -...
- Page 15 F. MHL Function Support Android Phone ( MHL-enabled devices ), iPhone. G. Use Lighting Digital AV Adapter. Support iPhone, iPad, Choose Input Source “HDMI”. The content of this manual are subject to change without notice - 14 -...
-
Page 16: Accessories List
► ACCESSORIES LIST While unpacking the package, please check and confirm all the accessories are accounted for. Note: Pictures only for your reference, different countries got different power plug, please contact your supplier for more details. The content of this manual are subject to change without notice - 15 -... -
Page 17: Multimedia File Specification
► Multimedia File Specification Image Format Support File Extension JEPG, PNG, BMP, MPO .jpg / .png / .bmp Audio Format Support File Extension MPEG1, MPEG2, LPCM, MP3 .avi / .ts / .dat / .vob / .wav / .mkv / .mp3 / .mp4 / .m4a Doesn’t Support : Dolby AC3 / AAC, DTS, WMA, DivX, VC1, etc Video Format ( Bit Rate up to 30~40 Mbs ) -
Page 18: Warranty Card
► WARRANTY CARD Thank you for purchasing our product ! Please read our warranty policy listed below: ① Projector by product Manual under normal working conditions for the use of, we provide you with a one-year warranty service. (Projector lamp is 6 months warranty) . - Page 19 Thank you for your choosing !