Table of Contents
Advertisement
Quick Links
Advertisement
Table of Contents

Subscribe to Our Youtube Channel
Related Manuals for Cheerlux CL312 Series


Summary of Contents for Cheerlux CL312 Series
- Page 1 Home Theatre LED Projector Model No.: CL312/CL317 Series User's Manual...
-
Page 2: Table Of Contents
CONTENTS Warning………………………………………………………………………………3 Safely Precautions…………………………………………………………………4 Caution……………………………………………………….………...……….……5 Appearance Instruction……………………………………………………...…..6 Top view…………………………………………………………..………………...6 Bottom view ……………………………………………………………..……..…..6 Front view ………………………………………………………………………….7 Back view …………………………………………………………………..…..…..7 Sides view ……………………………………………………………..…..……….8 Installation of projector…………………………………………………..…...……9 Full setting…………………………………………………………….…………… 9 Standard setting (front projection)……………………………………………….10 Installation of method…………………………………………………….………..11 Signal connection instruction…………………………………………….………12 Operation………………………………………………………………..……...…… 13 Open operation…………………………………………………………….….……13 Close opera Panel key-press instruct…………………………………………... -
Page 3: Warning
W ARNING ▲ ARNING Please remember the model Number MODEL NUMBER: SERIES NUMBER: and series number if you need. And please check all accessories when you drop the carton package When you use this projector, please read this manual carefully Warning: Do not stare directly into the light of the lens during operation. -
Page 4: Safely Precautions
Safety precautions ▲ Warning: when using this projector ,please read this manual carefully. If wrong operation, it will cause electric shock or fire. so when use and repair this projector ,please comply with the following points 1,Read manual Because use this projector, please read full manual carefully and operate according to this manual Instruction. -
Page 5: Caution
Caution ▲ ▲ ▲ ▲ About the installation In order to improve the projector service life, It should not place in a wet, dusty condition. Do not put the projector under the sunshine directly Projector working temperature:0.c~+60℃ Projector store temperature: -20.c~+70℃ Do not block the ventilation-window of projector If the projector interior temperature is too hot, the machine will be shut off automatically. -
Page 6: Appearance Instruction
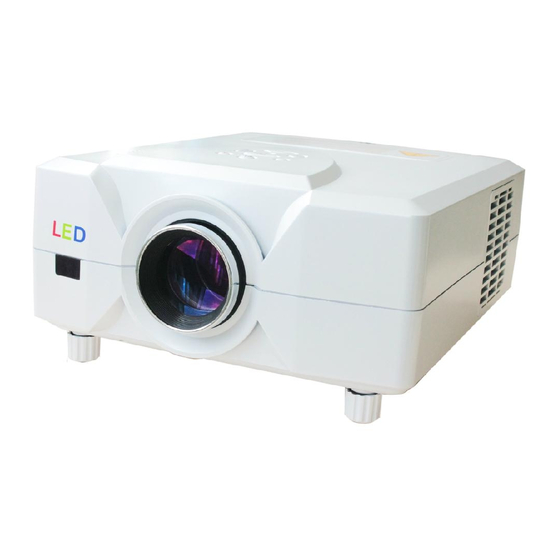
Appearance instruction ▲ ▲ ▲ ▲ Top view ② ② ② ② ① ① ① ① Panel key-press Speaker Bulb ③ ③ ③ ③ compartment cover ▲ ▲ ▲ ▲ Bottom view ② ② ② ② ③ ③ ③ ③ Holes for ceiling mount;... -
Page 7: Front View
▲ ▲ ▲ ▲ Front view ② ② ② ② Remote sensor; Lens; Adjustable supporting feet ① ① ① ① ③ ③ ③ ③ Note: 1) When use the remote control, please point this receiver directly; 2) Adjust the lens focus to improve the image quality; Adjustable supporting feet can support the projection angle to 15℃, but for the best image quality, you would better adjust the angle less than 8℃... -
Page 8: Sides View
▲ ▲ ▲ ▲ Left side view 1. Air outlet ① ① ① ① ▲ ▲ ▲ ▲ Right side view ③ ③ ③ ③ ① ① ① ① Air inlet Keystone Signal interface ② ② ② ② Note: This air inlet is very important, do not block it, otherwise, it will burn the projector. ②... -
Page 9: Installation Of Projector
Installation ▲ ▲ ▲ ▲ FULL SETTING Please use the setup instruction below: In order to get good image quality, do not let the sunlight shine the screen directly .If you use the projector in the day time. Projector Installation... -
Page 10: Standard Setting -Front Projection
▲ ▲ ▲ ▲ Standard setting -Front projection Please refer to the following sheet , adjust your picture size and distance (from the lens to screen ) Size 16:9 50" 2.38m 2.61m 72" 3.41m 3.74m 100" 4.73m 5.15m The data maybe have 3% error, due to the image size according to the distance between projector and screen. -
Page 11: Installation Of Method
Projector installation ▲Installation method: Contact a professional service Technical staff to mount this projector to a ceiling. Follow the Instructions below for the correct projector positions: Warning: 1) To avoid damaging beyond repair or bodily injury, secure projector mounts firmly to the ceiling or a stable surface. -
Page 12: Signal Connection Instruction
Projector Installation ▲ ▲ ▲ ▲ Signal connection instruction CL312A/CL317A(CL312D/CL317D) will have the TV(digital TV) input more. Notice: Before opening the projector, please complete the connection of the external devices (With PC, DVD, etc.) If any device has the power open, may result in equipment damaged. -
Page 13: Operation
Basic Operation ▲ ▲ ▲ ▲ Open operation Notice: If the projector is the new one please read projector “install chapter” placed the projector connect the signal wire and the power wire, the operation as follow: Before opening the projector, please complete the connection of the external devices (With PC, DVD, etc.) 1, Before use the remote. -
Page 14: Close Opera Panel Key-Press Instruct
▲ ▲ ▲ ▲ Close operation 1. During use the projector, press power key can let the projector switch to turn-off. In the meantime, the fan stops and the projector is completely switched off. If the projector is not to be used for a long time, please proceed to the fol- lowing procedure. -
Page 15: Remote Control Instruction
The remote control keys instruction: : : : ▲ ▲ ▲ ▲ Warning: Do not expose the remote con- trol to shocks, liquid or high humidity. Do not expose it to direct sunlight or other intense light source when you operate. -
Page 16: Image Trapezoid Adjustment
Image trapezoid adjustment ▲ ▲ ▲ ▲ The new projector, using it first time, commonly will ap- peared with image faintness and the image is trapezoid, it is course that not adjust well of the lens focus and the trapezoid. Following the step to adjust focus ▲... -
Page 17: Menu Setting Method
Menu setting ▲ ▲ ▲ ▲ System function operation Menu basic operation MENU key to display the main menu or return to superior menu, CH + / - key to move up and down options, V + / - keys to select or enter the option to move around. Source choice When the selected signal path without signal input screen displays "NO SYNC": Press “Source”... -
Page 18: Tv Menu
▲Analog TV Menu Function Channel Auto Turning Analog Manual Turning Program Edit Favorite, Skip, Delete, Move, Re- name In the other mode, TV is automatically hide Notice: Only CL312A/CL317A model has TV input. -
Page 19: Picture Menu
Picture Menu ▲ ▲ ▲ ▲ Picture Mode Standard You can adjust the picture display mode, according to personal preference settings, including standard, vivid, movies and user mode ▲Color Temperature Medium User normal, cold color temperature, warm temperature ▲Aspect Ratio 16:9 Includes eight screen zoom and 16:9 display ▲Noise Reduction Middle Image background noise reduction... -
Page 20: Option Men
▲ ▲ ▲ ▲ Option Menu You can adjust the OSD language, transparency, menu display time. Memory recall: the machine can be set back to factory settings ▲ ▲ ▲ ▲ Audio Menu When playing, press V + / - adjust the volume directly. ▲Sound Mode Standard Select the sound playing mold Balance... -
Page 21: Usb Port
▲USB Reader posts and support format Document Support document format Category Picture JPEG,BMP,PNG JPG/BMP/PNG Video MPEG1, MPEG2, .Avi/.mpg/.dar/.vob/.div/.mov/.mkv/.rm/.rmvb/.mp4/.mj MPEG4,H264,RM,RMVB,MOV, peg/.ts/.trp/.wmv/.asf/.flv MJPEG,VC1,DIVX,FLV Audio WMA ,MP3,M4A(AAC) .wna/.mp3/.n4a Parameter Resolution Compression Options Support Range File JPEG 15360X8640 Progressive JPEG Support 1024x768 Baseline(*standard) Support Baseline has been opti- Support mized... -
Page 22: Usb Support
Parameter Support the exten- Internal Code Resolution Baud Rate File Type sion MPEG1 .DAT/.MPG/.MPEG 1920X1080@30P 20Mbps MPEG2 .MPG 1920X1080@30P MAX to 20Mbps MPEG4 .AVI/.MP4 DIVX.XVID 1920X1080@30P MAX to 20Mbps RM/RMVB .RM/.RMVB RV8.RV9.RV10 1280X720@30P MAX to 10Mbps H264 .MKV/.MOV H.264 1920X1080@30P MAX to 20Mbps MUPEG... -
Page 23: Maintenance
Maintenance ▲ ▲ ▲ ▲ Maintenance filter The filter should be cleaned at least once a month (more often in dusty enviroments), or the projector will overheat .the step as follow 1、Remove the screws and the grille like indicated below 2、Clear the dusty on the filter. -
Page 24: Trouble Shooting
Trouble Shooting ▲ ▲ ▲ ▲ TROUBLE SHOOTING Please refer to this chapter when you encounter a problem list prior to contacting your dealer. Symptom Possible Solution(s) No power 1、Is the power cord properly connected? 2、Is the fuse broken?(If you don’t where is the fuse, please refer to the Appearance instruction chapter. -
Page 25: Specification
Specification... -
Page 26: Accessory
Accessory and purchasable parts When you open the carton of projector, please check the full acces- sories. ▲ ▲ ▲ ▲ Accessory list: ……………………………………………………… Projector 1unit ……………………………………….……… Remote control …………………………………………………... Power cable ……………………………………………..… AV signal cable ………………………………………...…… VGA signal cable ………………………………………….………...
Need help?
Do you have a question about the CL312 Series and is the answer not in the manual?
Questions and answers