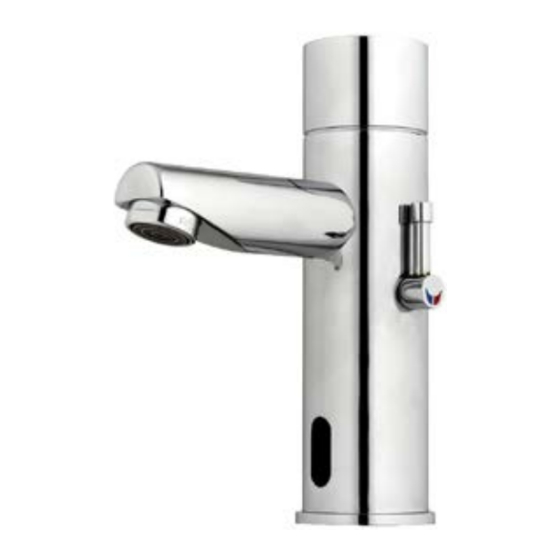
Summary of Contents for Porcelanosa noken BELA 100200091 N168199963
- Page 1 100200091_N168199963 (BATTERIES) 100200093_N168199964 (TRANSF) BELA Carretera CV-20 km.2 · 12540 Vila-real · Castellón · Spain Tel: +34 964 50 64 50 - Fax: +34 964 50 67 93 e-mail: noken@noken.com · www.noken.com...
- Page 2 Antes de la instalación y la puesta en funcionamiento ¡Cuidado! Los tubos de alimentación tienen que ser enjuagados escrupulosamente antes de instalar el dispositivo de manera que no haya virutas, residuos de soldadura o cáñamo u otras impurezas al interior de los tubos. A través de los tubos no perfectamente enjuagados o de la red hídrica general pueden entrar en el dispositivo unos cuerpos extraños que pueden dañar guarniciones/juntas tóricas.
- Page 3 - Atornillen los racores con junta tórica manualmente hasta percibir un contacto mecánico. - Hand-tighten O-ring seal connectors until feeling a mechanical rest. - Visser les raccords avec la tenue OR à la main, jusq’ á percevoir une battue mechanique. - No empotren el tubo en la pared.
- Page 4 - Lea atentamente estas instrucciones antes de comenzar la instalación. - Compruebe el producto por si faltasen piezas o estuviesen dañadas. - Cualquier alteración que se realice a la grifería invalidará la garantía. - Le recomendamos la instalación por parte de personal cualificado. - En nuevas construcciones se deben llenar los sifones de inodoros, lavabos y bidés de agua para evitar que la grifería se oxide por efecto de la subida de gases corrosivos.
- Page 5 100200091_N168199963 (A) 100200093_N168199964 (B) 100201340_N268830085 100201327_N268830086 100201328_N268830087 100201298_N268830088 100201299_N268830092 100201350_N268830093 100201351_N268830090 100201333_N268830089 100201329_N268830091...
- Page 6 100200091_N168199963 100200093_N168199964 TRANSFORMER OPTIONAL...
- Page 7 100200091_N168199963 4” 1/2 2” 3/4 1” 3/4 1” 15/16 100200093_N168199964 4” 1/2 2” 3/4 1” 3/4 1” 15/16...
- Page 8 Remove the hexagonal nut, the disk and the gasket. Do not remove the GASKET O-ring from the base of the faucet. DISC Place the faucet with O-ring into the hole in deck or lavatory. Make sure the O-ring is located between the deck or lavatory and the bottom of the faucet.
-
Page 9: Battery Version
Connect the exible pipe to the water supply. For models with temperature control connect the red exible pipe to the hot water supply and the blue exible pipe to the cold water supply. Turn on the central water supply and check for leaks. - Page 10 ABOUT In order to avoid entering into the adjusting mode, wait 10 seconds before operating the faucet. If the range is unsatisfactory, refer to the section titled “settings adjustment. SECONDS NOTE: This model includes a special aerator that allows you to adjust the water stream direction on site in order to prevent water splashing if needed.
- Page 11 Filter cleaning instructions 2. Disconnect the exible pipe/s. 4. Reassemble the parts. 5. Make sure that there is no water leakage. DO NOT use steel wool or cleansing agents containing alcohol, acid, abrasives, or the like. Use of any prohibited cleaning or maintenance products or substances could damage the surface of the faucet.
- Page 12 Power supply V battery or V transformer bar ( PSI) Recommended water With water pressure of more than bars, use a pressure reducing pressure valve for reduction. Preset sensor range mm Adjustable. Minimum sensor range Maximum sensor range Security time seconds Hot water temperature ˚C...
- Page 13 DETECTION DELAY OUT TIME RANGE TEMPORARY OFF DELAY IN TIME FUNCTION SECURITY TIME RESET HYGIENE FLUSH ADJUSTING THE SETTINGS WITH THE REMOTE CONTROL (To be orderet separately) If necessary, the sensor settings can be adjusted as following: Shut o the water supply. In order to adjust the sensor with the remote control, hold the remote control straight in front of the sensor in a distance of about 6-8”...
- Page 14 GRIFERÍAS Y ACCESORIOS En primer lugar, agradecerle la adquisición de productos Noken. Todos los productos Noken están fabricados con la confianza de dar un servicio fiable durante muchos años. Al igual que las griferías de otros fabricantes nuestros productos también exigen un cuidado apropiado y un mantenimiento que asegure a su baño una imagen impecable.
-
Page 15: Entretien
ROBINETTERIES ET ACCESSOIRES Tout d’abord, nous tenons à vous remercier pour avoir choisi un produit Noken. Tous nous produits sont fabriqués dans le but de donner un service fiable durant de nombreuses années. Pour assurer une image impeccable de votre salle de bains, nos robinetteries, comme celles d’autres fabricants, nécessitent un soin et un entretien approprié. - Page 16 NOKEN. Some states do not allow limitations on how long an implied warranty lasts, or on special, incidental, or consequential damages. As a result, some of these limitations may not apply to you. To obtain warranty service, contact Porcelanosa in writing: info@porcelanosa-usa.com. Please visit our website for additional information on Porcelanosa and its products and services.
- Page 17 Por consiguiente, algunas de estas limitaciones pueden no aplicarse a usted. Para obtener el servicio de garantía, póngase en contacto con Porcelanosa escribiendo a: Info@porcelanosa-usa.com. Visite nuestra página web para obtener información adicional sobre Porcelanosa y sus productos y servicios.
-
Page 18: Garantie Commerciale
En conséquence, certaines de ces limitations peuvent ne pas s’appliquer à votre cas. Pour obtenir un service de garantie, contactez Porcelanosa par écrit : info@porcelanosa-usa.com. Veuillez visiter notre site web pour plus d’informations... - Page 20 FDP_30-1-0515_100200091_100200093-0216-0 www.noken.com...


Need help?
Do you have a question about the noken BELA 100200091 N168199963 and is the answer not in the manual?
Questions and answers