Advertisement
Quick Links
Advertisement

Subscribe to Our Youtube Channel
Related Manuals for Lockly ACCESS TOUCH


Summary of Contents for Lockly ACCESS TOUCH
- Page 1 ACCESS TOUCH 3D FINGERPRINT SCANNER FOR DEADBOLTS INSTALLATION GUIDE...
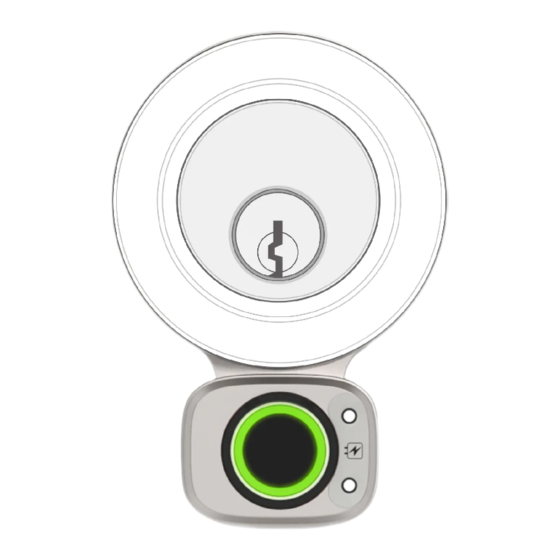
- Page 2 Go to Lockly.com/installation to watch a video version of this installation guide.
- Page 3 Welcome! This guide will walk you through step-by-step how to install and get your Lockly up and running. Installation generally takes less than 30 minutes. If you have any questions please reference our online support at: Lockly.com/support or call (669) 500-8835 for help.
-
Page 4: Required Tools
If any resistance or binding exist, adjust or modify strike plate for smooth, resistance free operation. Failure to do so will impede the performance of the Lockly Access Touch. - Page 5 Step 1 REMOVE EXISTING DEADBOLT Remove the existing lock installed on your door and retain the deadbolt.
-
Page 6: Mounting Ring
Step 1 REMOVE EXISTING DEADBOLT continued There are primarily 3 different styles of deadbolts (shown below) found on most doors. Depending on which type yours is, you may need to do a slight modification on your door hole (trim by wood file or utility knife) to ensure the cable of the fingerprint sensor is not pinched between the door and the lock. - Page 7 Step 2 INSTALLING FINGERPRINT SENSOR Depending on the style and shape of your existing deadbolt, select either the square or round , provided mounting plate. Round Mounting Plate With the mounting plate facing out, Front/Exterior route the cable on the fingerprint sensor through the deadbolt hole as shown.
- Page 8 Step 2 INSTALLING FINGERPRINT SENSOR continued Guide the cable through the door Remove protective paper from adhesive hole under the existing deadbolt. strips. Insert the Positioning Sleeve Open area positioned at the bottom Door Exterior Existing Deadbolt CABLE UNDER DEADBOLT BODY * If you trimmed or filed your door hole, the cable IMPORTANT: should be seating on the trimmed or filed area.
- Page 9 Step 3 INSTALLING THE EXTERIOR ASSEMBLY If necessary, remove key from deadbolt Make sure the deadbolt is extended Check to make sure the deadbolt remains Reinstall deadbolt ensuring torque blade fully extended. If needed, use a screwdriver and lock are in the correct orientation. or pliers to fully extend.
- Page 10 Step 4 INSTALLING THE INTERIOR ASSEMBLY Attached the temporary positioning Identify and select the appropriate guide tool to the selected adapter spindle/torque blade adapter that to form the adapter assembly. You will matches your lock. use the adapter in the succeeding steps. Black ---- Left Swing Door Gold ---- Right Swing Doors Adapter Assembly...
- Page 11 Step 4 INSTALLING THE INTERIOR ASSEMBLY continued Secure the rubber gasket to the interior Attach the adapter assembly to the mounting plate. Route the sensor cable torque blade or spindle. Ensure assembly through the notched rectangular hole mated with the torque blade or spindle located at the bottom of the mounting and it is level with the lock and the mount- plate...
- Page 12 Step 4 INSTALLING THE INTERIOR ASSEMBLY continued Insert and hand tighten backplate screws. Adjust alignment as needed and tighten with a screwdriver until mounting plate is secure. *Use the existing screws of your deabolt. Make sure the screw head will not pass through the mounting plate holes.
- Page 13 Step 4 INSTALLING THE INTERIOR ASSEMBLY continued Using the key for your deadbolt, test Remove positioning tool and return locking and unlocking to ensure smooth adapter to torque blade or spindle operation. If there is binding or resistance, loosen the back plate mounting screws NOTE: Positioning tool must be removed.
- Page 14 Step 4 INSTALLING THE INTERIOR ASSEMBLY continued Plug the cable coming through mounting plate into the interior assembly as shown. Tuck cable under eyelet hook and route to the right on interior assembly Plug into , match red side of plug with red on socket - insert tightly.
- Page 15 Step 4 INSTALLING THE INTERIOR ASSEMBLY continued Merge the interior assembly to the mounting plate ensuring the spindle torque/blade adapter seats properly to the thumb lever receiver. You may need to wiggle the thumb lever back and forth slightly in the process to align the two parts.
-
Page 16: Installing Batteries
Step 5 INSTALLING BATTERIES With door open and deadbolt fully extended, place ribbon inside compartment and insert 8 batteries (note correct -/+ polarity). After all batteries are installed, PRESS and HOLD the program button for 10S. The lock will automatically start self-check (release program button once check starts). The self-check process determines right or left swinging door and is very important to ensure correct installation. - Page 17 Step 5 INSTALLING BATTERIES continued Once self-check completes ensure the lock operates smoothly by manually locking and unlocking the door using the thumb turn on the interior assembly. The deadbolt should operate smoothly without any interference or binding. If necessary, repeat steps 3 &...
- Page 18 DOWNLOAD LOCKLY APP Congratulations! You have completed the Lockly Access Touch installation. To complete its setup, download the Lockly App from the App Store or on Google Play and follow on-screen instructions for adding a new lock. Scan or visit Lockly.com/app...
- Page 19 FCC Warning: This device complies with Part 15 of the FCC Rules. Operation is subject to the following two conditions: (1) This device may not cause harmful interference, and (2) this device must acceptany interference received, including interference that may cause undesired operation. NOTE 1: This equipment has been tested and found to comply with the limits for a Class B digital device, pursuant to part 15 of the FCC Rules.
- Page 20 Adapter Assembly I I I Parts List (Not Included) Labeled As Description Lock Exterior LOCK SERIAL PGDXXXXXXXXXXXXXXXX Deadbolt ACTIVATION CODE Screws XXXXXXXX SCAN & SAVE Keys Lockly Access Touch can be fitted for both right swing doors and left swing doors.
- Page 21 Connect with us @meetlockly | #Lockly @meetlockly | #Lockly @meetlockly | #Lockly Reference installation parts overview foldout. @meetlockly | #Lockly @meetlockly | #Lockly...
-
Page 22: We're Here To Help
Bluetooth SIG, Inc. , and ® any use of such marks by Lockly is under license. Other trademarks and trade names are those of their respective owners. Google, Android, Google Play and Google Home are trademarks of Google LLC. , Amazon, Alexa and all related logos are trademarks of Amazon.com, Inc., or its affiliates.
Need help?
Do you have a question about the ACCESS TOUCH and is the answer not in the manual?
Questions and answers