
Related Manuals for Tone King Imperial MK II


Summary of Contents for Tone King Imperial MK II
- Page 1 Tone King “Imperial MK II” User’s Manual Tone King Amplifiers www.toneking.com mail@toneking.com Note from the Builder...
- Page 2 Thank you for choosing the Imperial MK II guitar amplifier. The Imperial was the very first production model built by Tone King. It was introduced in 1993, and has been a favorite of guitarists for over 20 years now. The MK II update incorporates all that I’ve learned as an amp designer over these past 20 years, without changing the essential character of the amp.
- Page 3 Safety Instructions Please keep this instruction manual for future reference and for the duration of owning this Tone King Amplifier. Please carefully read and understand the instructions inside this user’s manual before attempting to operate your new amp. This instruction manual includes essential safety information regarding the use and maintenance of the amplifier.
- Page 4 8. Heat – Amplifier should be situated away from heat sources such as radiators, heatregisters, stoves, or other amplifier (including amplifiers) that produce heat. 9. Power Sources – This product should be operated only from the type of power sourceindicated on the rating label. If you are not sure of the type of power supply to your home, consult your product dealer or local power company.
- Page 5 Accessories – Do not place this product on an unstable cart, stand, tripod, bracket,or table. The product may fall, causing serious injury to a child or adult, and serious damage to the product. Use only with a cart, stand, tripod, bracket, or table recommended by the manufacturer, or sold with the product.
-
Page 6: Table Of Contents
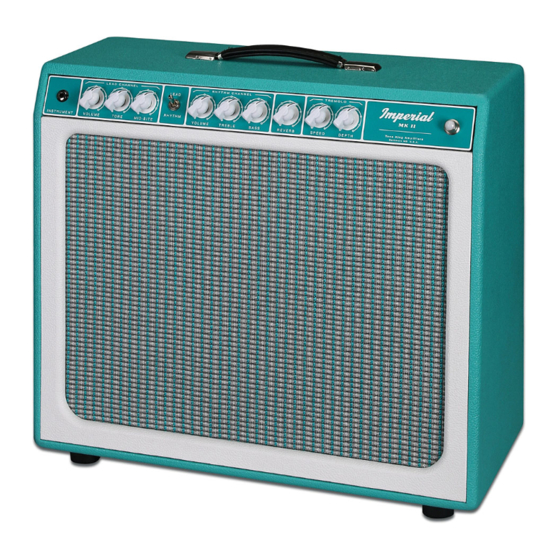
Contents 1. Front Panel Controls Two Preamp Channels – Lead and Rhythm Rhythm Channel Lead Channel Reverb Tremolo (Rate & Depth) 2. Back Panel Controls AC Power Fuse Power Switch, Standby Switch Footswitch Speaker Jack Attenuation Controls 3. Ironman/II Attenuator 9 Purpose of the Attenuator Attenuator Controls How to Use the Attenuator... - Page 7 Tube Quality 6. Warranty 17 7. CE Declaration 18...
-
Page 8: Front Panel Controls
The Lead channel starts out with a Tweed style preamp, which drives a proprietary tone-shaping circuit built around the Mid-Bite control, a unique Tone King feature. This proprietary circuit transforms the basic tweed tone to more of a crunchy rock tone... -
Page 9: Reverb
as you turn up the mid-bite control. This is accomplished by simultaneously tightening up the bass, rolling off the very high frequencies, increasing the gain, and developing a pronounced upper midrange peak. The Mid-Bite control is the key to dialing in your own particular sound on the lead channel, so you may want to experiment and observe its effect as you rotate it from 1 to 9. -
Page 10: Tremolo (Rate & Depth)
This circuit achieves the tremolo effect by varying the bias of the output tubes. This type of tremolo was used in all Tone King amps going back to 1993. However, the Imperial MK II uses a modified form of this circuit which virtually eliminates the “thumping”... -
Page 11: Fuse
16 ohms. Ironman/II Compensated Power Attenuator The Imperial MK II contains the new Ironman-II precision compensated power attenuator. The Ironman-II’s new architecture goes a step beyond the original Ironman design. It includes circuitry which helps compensate for the way your ear perceives sound at very low volume, and also for the way the speaker performs at very low power. -
Page 12: Ironman/Ii Attenuator
3 . Ironman/II Attenuator Purpose of the Attenuator The Imperial is designed so that, when driven into overdrive and distortion, most of the distortion is generated in the output tubes (and the phase inverter). Output stage distortion has a different sound and feel than distortion generated in the preamplifier, and this is big part of why the Imperial sounds the way it does. -
Page 13: How To Use The Attenuator
On the Attenuation dial, 0db is the loudest setting. In this setting, the attenuator is fully bypassed, and the speaker is connected directly to the output of the amplifier. The –36db setting is the quietest setting. In this setting, most of the power generated by the output tubes is absorbed by the attenuator, and only a few dozen milliwatts of power are sent to the speaker. -
Page 14: Rhythm Channel Bypass Switch
Normal. The Max setting will give you a bit more presence and a brighter sound. The Normal setting will give you a little more compression, and a smoother top-end. The purpose of this switch is to help you match the sound of the amp to the acoustic properties of your room. -
Page 15: Floor Reflections
There are many types of problems that can happen in a small room. Here are a few suggestions for how to deal with them: Floor Reflections If you have the amp sitting on a hardwood, tile, or concrete floor in a small room, it may sound harsh in the upper midrange, because of reflections off the floor in front of the amp. -
Page 16: The Attenuator Can Help
The Attenuator Can Help So far, we’ve discussed using the attenuator to control the volume in the case where we’re driving the amp into overdrive and distortion. However, it can also help greatly with clean tones in a problematic room as well. Usually, in a good sounding room, you would set the attenuation knob to 0db or bypass the attenuator when dialing in a clean tone. -
Page 17: Installing Tubes
Adding Sag / More Compression: If you’d like a little less output power, and a little looser feel, you might try changing the rectifier tube to a 5Y3. My preference is an old NOS RCA 5Y3 – these sound better than current production 5Y3s. Installing Tubes When installing tubes, you may find it helpful to lay the amp on its face (speaker pointing toward the ground), on a table, and shine a light directly into the back of the... - Page 18 AMPLIFIERS: Tone King offers a limited lifetime warranty to the original purchaser that a Tone King amplifier will be free from defects in material and workmanship. A dated sales receipt will establish coverage under this warranty, PLEASE KEEP YOUR PROOF OF PURCHASE TO USE YOUR WARRANTY.
- Page 19 Tone King product, even if a Tone King dealer has been advised of the possibility of such damages, or any other claim by any other party. Some states do not allow the exclusion or limitation of consequential damages, so the above limitation and exclusion may not apply to you.
Need help?
Do you have a question about the Imperial MK II and is the answer not in the manual?
Questions and answers