Advertisement
Quick Links
Advertisement

Subscribe to Our Youtube Channel
Related Manuals for SOLE R240


Summary of Contents for SOLE R240
- Page 1 SOLE R240 SOLE R240 USER MANUAL Page 1...
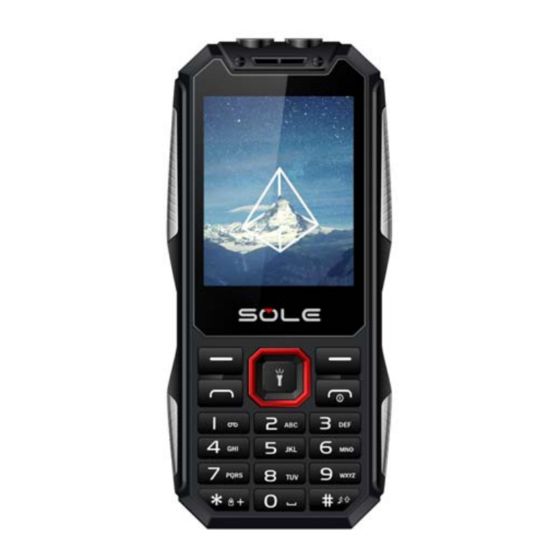
- Page 2 SOLE R240 Know Your Phone OK KEY Enter into the main menu, Long press to on/off the torch. Enter main menu in idle mode. Left soft key Press left soft key, then press * to lock/unlock the key pad Dial key Dial and receive a call.
- Page 3 SOLE R240 Press to access four functions in idle mode Up —— Camera, Down —— Audio player Navigation keys Right —— Calendar, Left —— Write message # key Press to switch input modes when writing message. Batteries The battery is included in the package. It is not fully charged out of factory but it may still be able to power on your phone. Please completely use up the power of the battery and then charge it for at least 12 hours with your phone turned off. You battery will reach its optimal state after three cycles of charge and discharge. Installing and uninstalling the battery To install the battery, remove the back cover from the phone by pressing firmly on the cover and slide it down. Align the golden contacts of the battery to the contacts in the phone, and then gently snap down the battery into place. Re‐assemble the back cover. To uninstall the battery, flip the battery out from the bottom of the battery. Charging the battery Plug the charger into the socket on the side of your phone. Connect the charger to an AC wall socket. The blinking of the battery level icon indicates the battery is being ...
- Page 4 SOLE R240 Please comply with the local regulations of disposing the battery (such as recycling). Do not dispose it as household waste. Battery level indicator When the phone is on, the battery level indicator is located at the upper right corner of the screen. Connecting to the Network SIM card Please insert available Subscriber Identity Module (SIM) card into your phone before using it. SIM card is supplied by your network carrier. All the information related to network connection is recorded on the SIM card, so are the contact information such as names, phone numbers and SMS that you set to store on the SIM. You can take out the SIM card from the phone and insert it into another GSM phone to use it. Most new phones will recognize the SIM card automatically. Do not touch the golden contacts of the SIM card and place it away from electricity and magnetism to avoid damage. You will not be able to use the phone if the SIM card is damaged. Note: Before inserting and taking out the SIM card, always make sure that the phone is switched off and disconnected from any external power source; otherwise both the phone and the SIM card may be damaged. Installing and uninstalling the SIM card The SIM card usually comes attached to a special card. The metal contacts of SIM card is easily damaged by scratching, so take it out carefully before assembling it into Page 4...
- Page 5 SOLE R240 the phone. Switch off the phone; remove the back cover, battery and other external power source. Fit the SIM card into the SIM card slot. Align the angled corner of the SIM card with the slot. Slide in the SIM card, make sure it is in place, install the battery, and restore the back cover. Likewise, to remove the SIM card, switch off the phone, remove the battery and then take out the SIM card. Unlock the SIM card PIN code Your Personal Identification Number (PIN/PIN2) code protects the SIM card against unauthorized use. Your PIN/PIN2 code is usually supplied with the SIM card. If this security function is enabled, you need to enter the PIN/PIN2 code every time you turn on the phone. You can also disable this function. To unlock the SIM card, press and hold the power button to turn on the phone. Enter the PIN/PIN2 code. After three consecutive incorrect PIN/PIN2 code entries, the code is blocked, and you need the PUK code to unblock it. PUK code This code is required to change a locked PIN code. If the code is not supplied with the SIM card, contact your service provider. After ten consecutive incorrect PUK code entries, the SIM card cannot be used any more. Please contact your service provider to buy a new SIM card. You cannot edit PUK code. If it is lost, Please contact your service provider. Connecting to the network After the SIM card is unlocked, you phone will automatically search for the registered network or other local available network. Once connected, the name of the network carrier will appear on the top of the screen. You phone is now in Standby mode, ready for making and receiving calls. Page 5...
- Page 6 SOLE R240 Basic Operations Switch Phone ON/OFF To switch ON/OFF your phone, press and hold the End key for a few seconds. Unlock the phone If you do not use the phone for a while, the screen is replaced with a locked screen. 1. Press any key to activate the screen. 2. Press Unlock key, and then press * key. Make a call You can make a call in the following ways: Enter the desired number in standby mode and press the Call key to make the call. Go to Menu > Phonebook and then select and dial the desired number. Just press the Call key to dial the contacts listed in Call logs. You can also dial a contact from the messages. Notable Features Secure your Phone > > > > > ...
- Page 7 SOLE R240 [Animation effect]: Set the power on/off animation [Wallpaper settings] Set wallpaper [Idle display setting] Set the idle [Contrast] adjust the screen's backlight brightness [Backlight] Set the backlight time screen [Keypad backlight time] Set the backlight time key 【Security】 [PIN] Select open or modify the phone's PIN code [Modify PIN2] PIN2 choose to modify the phone code [Phone locked]: Set the phone locked [Change phone password]: Modify the password of phone [Date security] set access to enter the password to view functionality. (Including: call logs / message / camera / phonebook / my files / ebook / calendar / Mass storage /audio player/video player) [Auto keypad lock] Set the auto keypad lock [Lock screen by end‐key] press the end key to select whether the off‐screen function Using Bluetooth From the home screen, press menu key enter main menu. In tools, select Bluetooth and enable it. In available devices are listed. To search for a new device, select SEARCH FOR ...
- Page 8 SOLE R240 The colors and specifications shown/mentioned in the user manual may differ from the actual product. Images shown are for representation purpose only. Other product logos and company names mentioned herein may be trademarks or trade names of their respective owners. EKO keeps the right to make modifications to any of the content in this user guide without public announcement in advance. The content of this manual may vary from the actual content displayed in the mobile phone. In such a case, the latter shall govern. Upon first use of the device it will send information related to model, mobile number, IMEI numbers, Operator, Circle through an SMS. This One time SMS will be charged as per Operator tariff. All rights reserved. Reproduction, transfer, distribution or storage of part or all of the contents in this document in any form without the prior written permission of EKO is strictly prohibited. FCC Warning: Any Changes or modifications not expressly approved by the party responsible for compliance could void the user's authority to operate the equipment. This device complies with part 15 of the FCC Rules. Operation is subject to the following two conditions: (1) This device may not cause harmful interference, and (2) this device must accept any interference received, including interference that may cause undesired operation. Note: This equipment has been tested and found to comply with the limits for a Class B digital device, pursuant to part 15 of the FCC Rules. These limits are designed to provide reasonable protection against harmful interference in a residential installation. This equipment generates, uses and can radiate radio frequency energy and, if not installed and Page 8...
- Page 9 SOLE R240 used in accordance with the instructions, may cause harmful interference to radio communications. However, there is no guarantee that interference will not occur in a particular installation. If this equipment does cause harmful interference to radio or television reception, which can be determined by turning the equipment off and on, the user is encouraged to try to correct the interference by one or more of the following measures: — Reorient or relocate the receiving antenna. — Increase the separation between the equipment and receiver. — Connect the equipment into an outlet on a circuit different from that to which the receiver is connected. — Consult the dealer or an experienced radio/TV technician for help. SAR tests are conducted using standard operating positions accepted by the FCC with the device transmitting at its highest certified power level in all tested frequency bands, although the SAR is determined at the highest certified power level, the actual SAR level of the device while operating can be well below the maximum value, in general, the closer you are to a wireless base station antenna, the lower the power output. Before a new device is a available for sale to the public, it must be tested and certified to the FCC that it does not exceed the exposure limit established by the FCC, Tests for each device are performed in positions and locations as required by the FCC. Page 9...
- Page 10 SOLE R240 For body worn operation, this device has been tested and meets the FCC RF exposure guidelines when used with an accessory designated for this product or when used with an accessory that contains no metal and that positions the handset a minimum of 5 mm from the body. Non‐compliance with the above restrictions may result in violation of RF exposure guidelines. Page 10...
Need help?
Do you have a question about the R240 and is the answer not in the manual?
Questions and answers