
Subscribe to Our Youtube Channel
Related Manuals for Superwind 350 12V

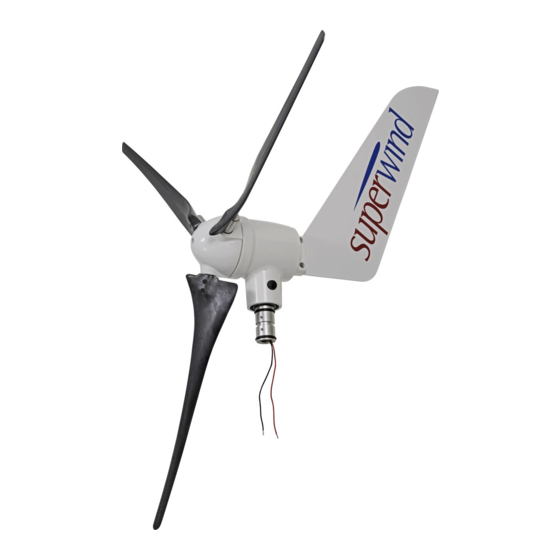
Summary of Contents for Superwind 350 12V
- Page 1 Superwind 350 12V & 24V Manual North, Central, and South America regions 01-2017 www.superwind.com...
- Page 2 Page intentionally left blank V 01-2017 www.superwind.com...
-
Page 3: Overview
(batteries, wiring, loads etc) if the integration is not well planned and more importantly, installed correcty – as directed in this full version manual. Should you have any questions regarding the installation or use of a Superwind 350 after reading this manual, PLEASE contact your closest Superwind installer, distributor or superwind (the manufacturer) directly. -
Page 4: Table Of Contents
6.3.4.1. Charging batteries ............22 6.3.4.2. SCR Marine charge regulator ( ). 24 with diversion load control 6.3.4.3. Diversion load resistor .............25 6.3.5. Fuses....................25 6.3.6. Stop switch ..................25 6.4. Grounding .....................26 SUPERWIND 350 GENERATOR ASSEMBLY 7.1. Precautions during mounting ................27 V 01-2017 www.superwind.com... - Page 5 Operation ......................48 13.4 Troubleshooting ....................49 Abbreviations used in this manual ................50 ATTACHMENT A – SUPERWIND STOP-SWITCH MOUNTING GUIDELINES....51 ATTACHMENT B – SUPERWIND CHARGE CONTROLLER 12V (MARINE) SYSTEM ..59 ATTACHMENT C – SUPERWIND CHARGE CONTROLLER 24V (MARINE) SYSTEM ..69 V 01-2017 www.superwind.com...
-
Page 6: General Information And References
We also wish to remind you that wind turbines work best when installed where there is sufficient wind, so please research your planned wind turbine site or vessel installation to help predict how a Superwind 350 might help with you power needs. -
Page 7: Range Of Application
In many integration sites, energy supplies from sun and wind complement each other. That is why the Superwind is used in wind / solar and in combination with other charging systems to optimize the availability of power (at minimized battery capacity). -
Page 8: Warranty
WARRANTY Warranty superwind GmbH warrants this product to be in good working order during the warranty period. In the event that the product is found to be defective within the warranty period, repair service will be provided free of charge by superwind GmbH or an authorized service partner. -
Page 9: Expenses And Responsibilities
Claims that occur during transportation must be filed by the consignee (the buyer) as shipping terms are FOB-EX-WORKS (our distribution point as contracted). BUYER IS RESPONSIBLE FOR ALL SHIPPING EXPENSES INCLUDING CUSTOMS DUTIES AND VAT (IMPORT DUTIES). V 01-2017 www.superwind.com... -
Page 10: Safety Instructions
Please carefully study this manual before starting assembly and installation. The information provided is to ensure your safety during mounting, operation, and in case of trouble. If you have any additional questions please contact your dealer, a Superwind service partner, or the manufacturer. -
Page 11: Dangers When Mounting
Never install batteries in locations where the danger of sparks exist. Provide sufficient ventilation for batteries at all times. The diversion load (power resistor) of the Superwind 350 charge regulator (SCR type) can become very hot. This device requires adequate space and ventilation to prevent the resistor from overheating. - Page 12 Never approach a spinning rotor. Never try to stop a spinning rotor by hand. Never install the wind generator in areas where it can be easily reached or approached by anyone while walking or working around the turbine structure. V 01-2017 www.superwind.com...
-
Page 13: Specifications
SPECIFICATIONS Operational Free Space Required The area where the Superwind turbine will be installed must be considered carefully. Operational space for the turbine itself, as well as the working area (including the mast and support) must be free from obstructions such as nearby trees, walls or buildings, sailing equipment, etc. -
Page 14: Technical Data
(extreme wind speed)..220 N (49.5 lbf) Functional description / Special features The Superwind, like all wind turbines, uses part of the kinetic energy of the wind and converts it into electricity. The power is approximately proportional to the cube of the wind speed - i.e. - Page 15 At superwind, we focus on power production and not just turning blades. As such, keep in mind that the wind speed required to start charging the battery depends on the battery state of charge (load) and other basic electrical system factors.
-
Page 16: Preparations For Assembly
Socket cap screw with rubber ring M6 x 8 (TUFLOK) Hexagon socket button head screw M6 x 12 Hexagon socket button head screw M6 x 6 Allen key 6 mm Allen key 5 mm Allen key 4 mm Operation’s manual V 01-2017 www.superwind.com... -
Page 17: Tools
Use caution when unpacking, both to avoid injury and damage to the blades. Tools A set of allen keys is included to assist with the installation of your Superwind. The following is a list of additional recommended tools: screw drivers... -
Page 18: Electrical Components And Connections
Graphic No. 6.2.1.1) The SCR Marine charge regulator has been especially designed for use with the Superwind 350 wind generator. It allows the user to fully charge batteries, while also protecting battery banks from overcharging via a diversion load control, as well as temperature compensation. - Page 19 The SCR Marine Charge Controller is suitable for charging lead acid batteries, gel batteries and AGM batteries (AGM = Absorbed Glass Mat) and some Lithium Ion batteries (NOTE: consult your Superwind Customer Service Contact and the battery manufacturer for important specific details before trying to charge Lithium Ion Batteries!).
-
Page 20: Diversion Load Resistor
Do not reverse the polarity of the wires. If you want to use a different charge regulator than what is recommended for use with your Superwind 350 (the SCR Marine charge controller: 12v or 24v), make sure that it is a suitable shunt-regulator based device with full time diversion load control. -
Page 21: Wag Wire Size Chart For 12 Volt Version
Plan and install your system correctly! For applications on board a boat or in marine (i.e. salt water) environments, wiring with tinned braids is recommended, in order to prevent corrosion. If the wire is to be buried (installed underground), a V 01-2017 www.superwind.com... -
Page 22: 6.3.2 Strain Relief
Strain Relief Bar located within the Yaw Shaft. This ensures that the internal junction point at the slip rings of your Superwind will not be damaged. The Yaw Shaft strain relief bar is V 01-2017... -
Page 23: Polarity
When selecting batteries, pay particular attention to the correct rated voltage (12 V or 24 V). The rated voltage of your Superwind is specified on the yaw serial number label. (See Section 1 on Page No. 5). - Page 24 Follow the instructions of the battery manufacturer and wear protective clothing and suitable eye protection. Act with extreme caution while handling battery acid. Wear protective clothing and suitable eye protection. V 01-2017 www.superwind.com...
-
Page 25: Scr Marine Charge Regulator ( With Diversion Load Control )
The 12 volt or 24 volt SCR Marine charge regulator has been especially designed for use with the Superwind 350 wind generator, allowing the user to fully charge batteries while also protecting battery bank from overcharging via a diversion load control, as well as temperature compensation. -
Page 26: Diversion Load Resistor
When using Superwind on a boat or a sailing yacht, installation stop switch strongly recommended to V 01-2017 www.superwind.com... -
Page 27: Grounding
If you are in doubt, consult an experienced electrician or an electrical systems technician. When installing the Superwind on a yacht we recommend connecting the mast or support to the ship´s grounding system whenever possible. -
Page 28: Superwind 350 Generator Assembly
SUPERWIND 350 GENERATOR ASSEMBLY Precautions during the mounting Before starting the installation of your wind generator, please keep in mind the potential dangers and proceed with caution. Only use a mast and a support construction capable of safely withstanding the loads (and weight) of your wind generator. -
Page 29: Mast Mounting
Mast mounting Before your Superwind can be installed on the mast or support, the electric cables must be led through the mast tube and connected to the generator with correct polarity (Section 6.3.3 on page 22). The following applies to any type of mast or support:... -
Page 30: Mast Tube Specifications
7.2.1 Mast Tube Specifications The yaw shaft of your Superwind fits into the following mast materials with the appropriate integration bushing: Common North American Mast Materials Table No. 7.2.1.1 Mast Type Inner Diameter Outer Diameter Wall Thickness Stainless Steel Pipe 52.46 mm... - Page 31 If everything is correct and the screw heads do not protrude, they will not obstruct the insertion into the mast tube (the face of the screw will be flush with the OD of the bushing). Graphic No. 7.2.2.2 (Shown with EU style bushing with adapter bands) V 01-2017 www.superwind.com...
-
Page 32: Mounting Of The Wind Vane
Insert the yaw shaft of the Superwind with the plastic bushing to the limit stop (collar), and align the tap holes with the drilled holes of the mast. Screw down the two hexagon socket button head screws (M6 x 12) for axial fixation. The screws now extend into the groove of the yaw shaft, but will not touch it. -
Page 33: Rotor Assembly
Superwind rotor blades are manufactured as sets of three, balanced by weight and axial runout. These 3 blades can be fixed to the hub in any order. However, V 01-2017 www.superwind.com... - Page 34 Superwind 350 blades sets as this could cause the rotor to become out of balance. This means that if a single Superwind 350 blade is damaged, the entire blade set needs to be replaced - not just one blade.
-
Page 35: Mounting The Hub To The Generator Shaft
DISCONNECT THE BATTERIES BEFOREHAND! Once the rotor hub blade assembly has been completed, align the center to the generator (paying close attention to the alignment with the keyed generator shaft) and connect the hub to the generator. V 01-2017 www.superwind.com... - Page 36 (the generator shaft should now be flush inside the rotor assembly). Now tighten the screw at 18 Nm (13.3 ft. lbs.). Graphic No. 7.4.2.2. To avoid damage inside the generator, do not push the generator shaft into the generator housing. This could void the Warranty! V 01-2017 www.superwind.com...
-
Page 37: Commissioning
COMMISSIONING Before initial operation verify correct installation of your new Superwind using the below check list. DONE Look Verification Chart also Table No. 8.1 Section: Mast Assembled and erected in accordance with the respective manuals. Bolts, joints, anchors and braces checked. Mast vertically adjusted. -
Page 38: Operation
OPERATION Safety instructions Do not run your Superwind unless you have confirmed that no persons can touch the spinning rotor. Do not run your Superwind without an electrical load. (e.g. no load connected at all or battery fully charged without charge regulator connected). -
Page 39: Power Control
Power control As described earlier in Section 4.3.b (Page 14) the Superwind is equipped with a unique aerodynamic, feathering rotor control system. This over-speed control also helps ensure known electrical output in high wind speeds, adding to the unit’s autonomous operation and safety. -
Page 40: Annual Power Production
Therefore, the actual annual power produced is a function of the wind conditions at your site, in combination with what is being powered and/or the battery bank being charged. The diagram below shows the annual power production versus Rayleigh distributed annual mean wind speeds. V 01-2017 www.superwind.com... -
Page 41: Inspections, Maintenance
10.1.1 Rotor blades Check the rotor blades for damage (e.g. cracks, broken edges, unusual discolouring etc.). If you see any damage, your Superwind must be put out of operation and the complete rotor blade set NEEDS to be replaced at once. -
Page 42: 10.1.4 Slip Rings
The carbon brush does not need to be replaced until it reaches a length of 7mm or less. Before you screw on the caps again, also check the O-ring seals. Nacelle is the streamlined enclosure that shelters the Superwind 350 hub and generator. V 01-2017 www.superwind.com... -
Page 43: 10.1.5 Corrosion Protection
Check the battery fluid level and add distilled water when necessary. Refer to the instructions of the battery manufacturer. 10.2 Maintenance There is no special maintenance required however the periodic inspections noted previously must be performed every 12 months. V 01-2017 www.superwind.com... -
Page 44: Troubleshooting
TROUBLESHOOTING If problems occur after installation of your new Superwind, most can be solved using the below troubleshooting list. At all times be aware of electrical and mechanical hazards: Do not approach a spinning rotor. Never try to stop the rotor by hand. -
Page 45: No Power Output
Battery is not fully charged Table 11.4 Possible source Test Solution of errors Battery is too old or Fill up with distilled water, replace Check fluid level defective defective battery Fuse is blown Check the fuse(s) Replace the fuse V 01-2017 www.superwind.com... -
Page 46: Checking The Open Circuit Voltage
To avoid injury, dismantle the rotor blades beforehand. Now turn the hub by hand. Count the revolutions within a certain period (e.g. 30 revs within 10 seconds = 180 rpm). Watch the voltage. The voltage and the speed should correspond to the following diagram: V 01-2017 www.superwind.com... -
Page 47: Repairs, Spare Parts
12.1 Repairs If your Superwind should be defective, you may replace all parts accessible from the outside by yourself (e.g. rotor blades, carbon brushes, damping rings). In case of any other defects, please consult your dealer, an authorized service partner, or the manufacturer. -
Page 48: Frequently Asked Questions
& response agencies, aquaculture, and agriculture industries throughout the world. Is my boat large enough for a Superwind 350? It is recommended that a Superwind 350 be mounted on a boat 30’ long or larger. 13.2 Installation... -
Page 49: Operation
What size wire do I run to the Superwind and the charge controller? The Superwind manual specifies wire sizing for various distances (the wire run). The proper wire size is important to optimize charging and eliminate the risk of fire. Refer to page 20 -21 for wiring specifications. -
Page 50: Troubleshooting
Again, two of the screws with no wire attached are actually forming a jumper within the switch; ensure they are tight. How can I test to ensure the Superwind unit is producing power? A clamp-on DC amp meter is an inexpensive tool that can be used to test the power output from the unit. -
Page 51: Abbreviations Used In This Manual
OD ......Outside Diameter PWM......Pulse Width Modulation Revs ......Revolutions rpm ......Revolutions per minute Sch ......Schedule SCR ......Superwind Charge Regulator SOC......State of charge V ........ Volt (s) VDC ......Volt Direct Current W ....... Watt (s) V 01-2017 www.superwind.com... -
Page 52: Attachment A - Superwind Stop-Switch Mounting Guidelines
ATTACHMENT A Stop-Switch Mounting Guidelines V 01-2017 www.superwind.com... - Page 53 STOP-SWITCH Mounting Guidelines Manual 01-2017 V 01-2017 www.superwind.com...
- Page 54 INSTALLATION PLEASE DO NOT PROCEED UNTIL YOU HAVE READ ALL INSTRUCTIONS SAFETY INFORMATION © 2016 superwind GmbH. Superwind is a Registered Trade Mark of superwind GmbH, Germany MANUAL VERSION 01-2017 V 01-2017 www.superwind.com...
- Page 55 In stop-position, the switch connects the wires (+) and (-) of your Superwind 350 to short- circuit its generator to effect substantial reduction of the rotor speed. In stop-position, the switch also disconnects the shorted generator from the battery circuit.
- Page 56 Any electrical work may be accomplished only by authorize and skilled persons! During any connection work, the related electrical circuit must be disconnected from the battery terminals! V 01-2017 www.superwind.com...
- Page 57 (see Wiring Diagrams in Graphic No. 1.4.2). For optimum brake efficiency, the wires between the Superwind generator and the stop- switch should be as short as possible. For appropriate conductor cross-section, see owner’s manual.
- Page 58 A recommended charge regulator is installed between the battery bank and the wind turbine. The Stop-Switch is placed between the Superwind and the charge regulator with the mandatory 40 Amp fuses for a 12 volt system or 20 Amp fuses for a 24 volt set. See details on Graphic No.
- Page 59 12 V 24 V Charging Voltage 14.2 V 28.4 V (default) Max. current for dump loads 40 A 20 A © 2016 superwind GmbH. Superwind is a Registered Trade Mark of superwind GmbH, Germany MANUAL VERSION 01-2017 V 01-2017 www.superwind.com...
-
Page 60: Attachment B - Superwind Charge Controller 12V (Marine) System
ATTACHMENT B Superwind Charge Regulator 12V (Marine) V 01-2017 www.superwind.com... - Page 61 Charge Regulator 12V (Marine) Instructions Manual 01-2017 V 01-2017 www.superwind.com...
- Page 62 INSTALLATION PLEASE DO NOT PROCEED UNTIL YOU HAVE READ ALL INSTRUCTIONS SAFETY INFORMATION © 2016 superwind GmbH. Superwind is a Registered Trade Mark of superwind GmbH, Germany MANUAL VERSION 01-2017 V 01-2017 www.superwind.com...
- Page 63 Intended use and range of application The SCR 12V (Marine) is designed to sense and limit the output voltage of a Superwind 350 12V wind generator and thus to prevent batteries from becoming overcharged. It is suitable for lead acid batteries, gel batteries, and AGM (Absorbed Glass Mat) batteries, and has two battery charging outputs isolated by Schottky blocking diodes.
- Page 64 In the absence of applicable national legislation, this warranty will be the purchaser ́ s sole and exclusive remedy, and superwind GmbH shall not be liable for any incidental or consequential damages for breach of any expressed or implied warranty of this product.
- Page 65 Please carefully study this manual before starting assembly and installation. The information provided is to ensure your safety during mounting, operation, and in case of trouble. If you have any additional questions please contact your dealer, a Superwind service partner, or the manufacturer.
- Page 66 Description of functions The SCR 12V (Marine) has been especially designed for the Superwind 350 12V wind generator and guarantees optimum charging of the batteries. The secondary function of the SCR 12V (Marine) is to electronically keep the wind generator under load. When the batteries have reached their maximum charging voltage, the SCR 12V (Marine) PWM circuit automatically diverts the wind turbine’s surplus power the the power resistor.
- Page 67 Mount the regulator and the power resistor to a dry, plain, and non-flammable surface. Use appropriate mounting holes. For connecting the cables to the charge regulator, use the yellow solderless terminals. The solderless terminals provided are suitable for cable cross-sections from 2.5 mm 6.0 mm (AWG 13 to AWG 10). V 01-2017 www.superwind.com...
- Page 68 Connect the wind generator to the terminals labeled ‘Gen +‘ and ‘Gen –‘ (Graphic No. 4.1) on the charge regulator. Never interchange the polarity of the cables. Interchanged polarity would destroy the charge regulator and void the warranty. Marking of the connecting cables at the Superwind 350: POSITIVE (+): NEGATIVE (-): BLACK...
- Page 69 Schottky blocking diodes. In order to avoid accidentally short-circuiting, first connect the cables to the charge regulator and then to the battery © 2016 superwind GmbH. Superwind is a Registered Trade Mark of superwind GmbH, Germany MANUAL VERSION 01-2017 V 01-2017 www.superwind.com...
-
Page 70: Attachment C - Superwind Charge Controller 24V (Marine) System
ATTACHMENT C Superwind Charge Regulator 24V (Marine) V 01-2017 www.superwind.com... - Page 71 Charge Regulator 24V (Marine) Instructions Manual V 01-2017 www.superwind.com...
- Page 72 INSTALLATION PLEASE DO NOT PROCEED UNTIL YOU HAVE READ ALL INSTRUCTIONS SAFETY INFORMATION © 2016 superwind GmbH. Superwind is a Registered Trade Mark of superwind GmbH, Germany MANUAL VERSION 01-2017 V 01-2017 www.superwind.com...
- Page 73 Intended use and range of application The SCR 24V (Marine) is designed to sense and limit the output voltage of a Superwind 350 24V wind generator and thus to prevent batteries from becoming overcharged. It is suitable for lead acid batteries, gel batteries, and AGM (Absorbed Glass Mat) batteries, and has two battery charging outputs isolated by Schottky blocking diodes.
- Page 74 In the absence of applicable national legislation, this warranty will be the purchaser ́ s sole and exclusive remedy, and superwind GmbH shall not be liable for any incidental or consequential damages for breach of any expressed or implied warranty of this product.
- Page 75 Please carefully study this manual before starting assembly and installation. The information provided is to ensure your safety during mounting, operation, and in case of trouble. If you have any additional questions please contact your dealer, a Superwind service partner, or the manufacturer.
- Page 76 Description of functions The SCR 24V (Marine) has been especially designed for the Superwind 350 24V wind generator and guarantees optimum charging of the batteries. The secondary function of the SCR 24V (Marine) is to electronically keep the wind generator under load. When the batteries have reached their maximum charging voltage, the SCR 24V (Marine) PWM circuit automatically diverts the wind turbine’s surplus power the the power resistor.
- Page 77 Connect the two generator cables together (CAUTION: make sure to disconnect the battery before! Graphic No. 5.2.1) or tie one of the rotor blades loosely to the mast (if accessible). Slide the regulator’s black cover sidewards and take it off. V 01-2017 www.superwind.com...
- Page 78 Connect the wind generator to the terminals labeled ‘Gen +‘ and ‘Gen –‘ on the charge regulator. Never interchange the polarity of the cables. Interchanged polarity would destroy the charge regulator and void the warranty. Marking of the connecting cables at the Superwind 350: POSITIVE (+): NEGATIVE (-): BLACK...
- Page 79 Schottky blocking diodes. In order to avoid accidentally short-circuiting, first connect the cables to the charge regulator and then to the battery © 2016 superwind GmbH. Superwind is a Registered Trade Mark of superwind GmbH, Germany MANUAL VERSION 01-2017 V 01-2017 www.superwind.com...
Need help?
Do you have a question about the 350 12V and is the answer not in the manual?
Questions and answers