Table of Contents
Advertisement
Quick Links
Advertisement
Table of Contents

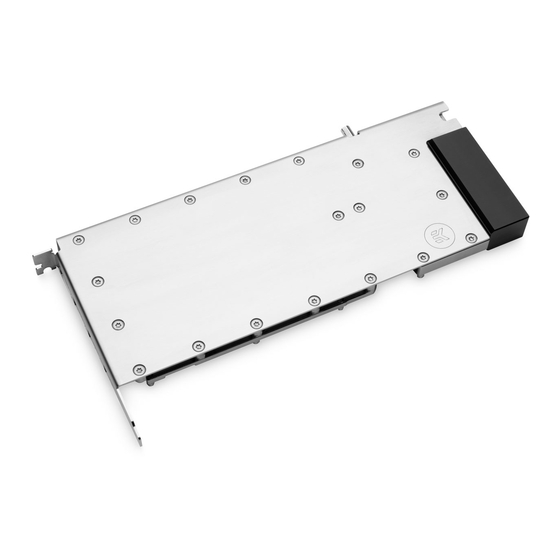
Summary of Contents for ekwb EK-PRO GPU RTX A6000
- Page 1 EK-PRO GPU WB RTX A6000 GPU WATER BLOCK USER GUIDE...
- Page 2 Before you start using this product, please follow these basic guidelines: Carefully read the manual before beginning with the installation process. Remove your graphics card from the computer for the safest mounting process to prevent any possible damage to your GPU or its circuit board (PCB).
-
Page 3: Table Of Contents
TABLE OF CONTENTS BOX CONTENTS WATER BLOCK DIMENSIONS TECHNICAL SPECIFICATIONS AND WATER BLOCK PARTS PREPARING YOUR GRAPHICS CARD REMOVING THE STOCK COOLER CLEANING THE PCB CUTTING AND PLACING THERMAL PADS APPLYING THERMAL COMPOUND INSTALLING THE WATER BLOCK PLACING THE BLOCK ON THE GRAPHICS CARD ATTACHING THE BACKPLATE CHECKING THE CONTACT IN CASE OF HIGH TEMPERATURES INSERTING THE GRAPHICS CARD INTO THE CHASSIS... -
Page 4: Box Contents
BOX CONTENTS Washer POLYAMID M2.5 0.7mm Screw UNC 6/32x5 (1x) 8483 with self-adhesive tape (2x) 8627 EK-Pro GPU WB RTX A6000 Ni +Inox Thermal PAD G 1.0mm - (120x24mm) 3831109847930 (3x) 3830046996770 EK-TIM Ectotherm (1g) (1x) 3830046998446 Screw M2.5x8 ax1 (10x) 8104A Thermal PAD F 1.0mm - (120x16mm) Screw M2.5x10 ax1 (3x) 3830046996732... -
Page 5: Water Block Dimensions
WATER BLOCK DIMENSIONS 19.3 mm 23.6 mm 241.4 mm 252.8 mm - 5 -... -
Page 6: Technical Specifications And Water Block Parts
TECHNICAL SPECIFICATIONS AND WATER BLOCK PARTS Position EAN Description Quantity 054 - copper - RTX A6000 Pro 103686 coldplate (Ni) 029 - top plexi – FC Quadro RTX 101975 8000 Pro insert 102549 Metal – Pro GPU WB jet MS – Vector FE RTX Standoff 102924 M3.5-M2.5x3 (Ni) Top acetal –... -
Page 7: Preparing Your Graphics Card
Do not forget to unplug all the LED and fan connectors. Pay attention to the following steps in order to install the EK-Pro GPU RTX A6000 water block onto the graphics card. STEP 2 CLEANING THE PCB... -
Page 8: Cutting And Placing Thermal Pads
CUTTING AND PLACING THERMAL PADS Your GPU water block comes with un-cuted thermal pads to cover all Thermal Pad F 1.0 mm the VRM components, such as COILs, MOSFETs, and drivers. Please use 1.0mm thick thermal pads which should be placed on the PCB, as illustrated below. -
Page 9: Installing The Water Block
INSTALLING THE WATER BLOCK STEP 1 PLACING THE BLOCK ON THE GRAPHICS CARD This procedure is the same for all full-cover water blocks. Carefully position the water block with preinstalled standoffs on the graphics card. During this process, make sure you have aligned mounting holes of the PCB with holes of the water block. - Page 10 STEP 3 Secure power cable with mounting it into included inox power adapter. STEP 3a Stick the two included plastics pads (M3) on to inox power addapter as shown on picture. STEP 3b Insert 8-pin power connector in to the inox adapter. Pads on the power adapter must be alligned with openings in inox power adapter.
- Page 11 STEP 4 Install 1.0mm thick thermal pads on the PCB, as illustrated below to ensure better connection between graphic card and backplate. EK made sure to provide you with more than an adequate quantity of thermal pads to complete this Step. STEP 4 STEP 5 Apply the enclosed EK-TIM Ectotherm thermal grease (thermal...
-
Page 12: Attaching The Backplate
Then repeat Steps from the previous section to re-attach the block. In case you fail to obtain good contact, please check again or contact our support service at https://www.ekwb.com/customer-support/. - 12 -... -
Page 13: Inserting The Graphics Card Into The Chassis
INSERTING THE GRAPHICS CARD INTO THE CHASSIS Carefully lift your graphics card with the installed water block and insert it into your PC’s motherboard PCI express expansion slot. Please keep in mind that your graphics card is heavier than before it was equipped with the water block. -
Page 14: Support And Service
SUPPORT AND SERVICE In case you need assistance or wish to order spare parts or a new mounting mechanism, please contact: https://www.ekwb.com/customer-support/ For spare parts orders, refer to the page with “TECHNICAL SPECIFICATIONS AND WATER BLOCK PARTS” where you can find the EAN number of each part you might need.


Need help?
Do you have a question about the EK-PRO GPU RTX A6000 and is the answer not in the manual?
Questions and answers