Table of Contents
Advertisement
Quick Links
Advertisement
Table of Contents

Subscribe to Our Youtube Channel
Related Manuals for Signal Hound USB-SA124B


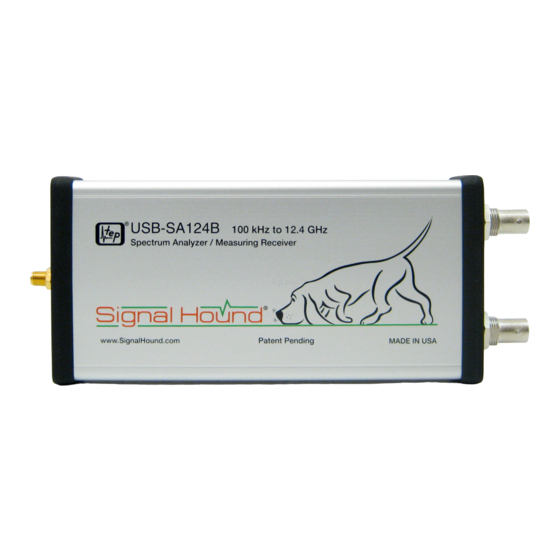
Summary of Contents for Signal Hound USB-SA124B
- Page 1 TEST EQUIPMENT PLUS Signal Hound USB-SA124B User Manual...
- Page 2 T E S T E Q U I P M E N T P L U S Signal Hound USB-SA124B User Manual 2012, Test Equipment Plus 35707 NE 86 Phone (360) 263-5006 • Fax (360) 263-5007 This information is being released into the public domain in accordance with the Export Administration Regulations 15 CFR 734 Version 2.17A...
-
Page 3: Table Of Contents
HELP ............. 12 Using Limit Lines ......... 25 The Status Bar ..........12 Using the SA124B as a Downconverter ..26 The USB-SA124B Front & Rear Panels ..13 THEORY OF OPERATION ..... 27 5.1.1 The Four Sweep Modes ......27 TAKING MEASUREMENTS .... - Page 4 CALIBRATION AND ADJUSTMENT ..31 SPECIFICATIONS ........32 Frequency ............. 32 Amplitude (RBW ≤100KHz) ....... 32 Sweep ............33 Measuring Receiver ........33 Inputs and Outputs ........33 Environment ..........34 Calibration ........... 34 Adjustments..........34 FCC Compliance .......... 34 REVISION HISTORY ......
-
Page 5: Preparing For Use
The Signal Hound is powered from the USB cable, eliminating the need for a separate power supply. Measuring less than 8 inches long and weighing less than 1 pound, the Signal Hound can be used virtually anywhere! 1.1 Initial Inspection... -
Page 6: Software Installation
1.3 Running the software for the first time 1. If your Signal Hound is not yet plugged in to your computer's USB port, connect the Signal Hound to any available USB 2.0 port. Wait while Windows installs the necessary device drivers. -
Page 7: Getting Started
The Graticule contains ten vertical and ten horizontal divisions to display trace data. The trace data is the processed and formatted data from the Signal Hound, displayed in the graticule. Above and below the Graticule, you will find indicators regarding... -
Page 8: The Control Panel
G E T T I N G S T A R T E D REF: Reference level, top left. The reference level is the signal amplitude for the top Graticule line. DB/div: Amplitude scale, near top left, in dB per division of the Display Window. In Linear scale, this will be mV/div. -
Page 9: Frequency Controls
G E T T I N G S T A R T E D 2.2.1 FREQUENCY CONTROLS CENTER FREQ sets the center frequency of the sweep. When clicked, a popup will open, allowing you to enter the frequency using the mouse or keyboard. -
Page 10: Bandwidth Controls
G E T T I N G S T A R T E D by simply clicking on the trace. Fine-tune a marker's placement using your mouse wheel. PEAK moves the marker to the highest amplitude signal on the graticule. ... -
Page 11: Trace Controls
TRIGGER AND SWEEP CONTROLS CONTINUOUS: A new sweep begins as soon as the last sweep is completed. SINGLE: A single sweep is run, then the Signal Hound remains inactive. FREE RUN: In Zero Span mode, a sweep begins immediately... -
Page 12: Additional Controls
S T A R T E D VIDEO: In Zero Span mode, the Signal Hound waits for a minimum signal amplitude before sweeping. When clicked, a popup opens where the user sets the minimum signal amplitude. This is useful for measuring pulses as short as 10 microseconds. -
Page 13: Edit
G E T T I N G S T A R T E D Print… Used to print the Graticule, trace data and settings. The title is printed as well. Free PDF print utilities, such as PDF995, are available to "print to"... -
Page 14: Trace
G E T T I N G S T A R T E D Set Marker Freq: Places the active marker at a specific frequency. Signal Track: At the end of each sweep, the center frequency will be set to the frequency of the peak signal, thus "tracking"... - Page 15 G E T T I N G S T A R T E D frequency, then set channel bandwidth and spacing. If channel power and adjacent channel power all fit within the currently selected span, the selected channel and adjacent channels will display their respective power levels, in dBm.
-
Page 16: Help
G E T T I N G S T A R T E D 2.3.8 HELP About Signal Hound: Look here for hardware, software, and firmware versions. Annunciator Help: Explains the meaning of various annunciators which appear in the top left graticule. -
Page 17: The Usb-Sa124B Front & Rear Panels
3) A multi-purpose BNC connector. This may be used as a TTL/CMOS trigger input, a Self Test Signal output, a Tracking Generator Sync signal, or a generic CMOS Sync Output. The Signal Hound software controls the function of this BNC. It defaults to unused / no output. -
Page 18: Taking Measurements
Learn how to take amplitude, frequency, and modulation measurements with the Signal Hound he Signal Hound is capable of making a wide range of measurements. The internal I/Q demodulator captures up to 2 Megabytes of information each second, with a hardware-limited bandwidth of 250 KHz. The trace is actually a combination of several sweeps, mathematically combined to reject image and spurious responses. -
Page 19: Example: Identify A Signal's Frequency And Amplitude
T A K I N G M E A S U R E M E N T S To measure a signal that is not the peak, you may simply move the mouse over the desired signal and left-click to place a marker. The frequency and amplitude are read as before. -
Page 20: Measuring Low Level Signals
T A K I N G M E A S U R E M E N T S 2. Turn the marker off if it is currently on. Adjust the settings until your desired signal is displayed, with a span narrow enough for your required accuracy. A 5 to 50 KHz span is ideal for many measurements. -
Page 21: Capturing Pulses In Zero Span
T A K I N G M E A S U R E M E N T S 1. Click the ZERO SPAN button. A popup should appear with the Zero Span controls. 2. Select your desired "Resolution Bandwidth." This is equivalent to the intermediate frequency, or IF, Bandwidth. -
Page 22: Measuring Channel Power
The Signal Hound automatically selects the IF gain based on avoiding compression for the given reference level. As the attenuator settings change or the reference level changes, the IF gain may change as well. -
Page 23: Measuring Harmonics
The Signal Hound’s internal TCXO timebase contributes more phase noise to these measurements than an external OCXO 10MHz timebase. Please review the Signal Hound’s specifications for phase noise. If the signal you’re measuring has considerably more phase noise than the Signal Hound, you should be able to get meaningful results using the internal TCXO timebase. -
Page 24: Using The Measuring Receiver Utility
T A K I N G M E A S U R E M E N T S When your measurements are complete, again select Utilities Phase Noise Plot to un-check this utility and resume normal operation. 3.7 Using the Measuring Receiver Utility The measuring receiver utility takes measurements of AM and FM modulation and relative signal level measurements. -
Page 25: The Analyzer Data Window
T A K I N G M E A S U R E M E N T S overlapping area, the “Low Power Range” button will become available. Select the low power range to generate a correction for spanning the two gains. Once this correction value is calculated, an asterisk will appear by “Relative Power”... -
Page 26: Emc Measurements
GHz CF, use an RBW of 1.6 Hz or higher. Your RBW may be 10x less when using a high quality external timebase. The Signal Hound mostly uses digital RBWs in powers of two starting at 0.1 Hz. 3.9.2 IF Feed-Through Intermediate frequencies of 2.9 MHz and 10.7 MHz are used for all frequencies. -
Page 27: Additional Features
4 Additional Features Learn about save/recall state, Automation, Live Audio Streaming, Downconverting, and Printing he Signal Hound leverages the power and flexibility of your Windows® PC, making printing and automation easy and straightforward. Saving and recalling instrument states are now as simple as saving and opening files, with virtually no limit to the number of instrument states saved. -
Page 28: Listening To Demodulated Audio
A D D I T I O N A L F E A T U R E S 4.1.3 Listening to Demodulated Audio When you identify a modulated signal and wish to listen Figure 4: Audio Listen to the modulation, you may position your marker on the signal in question and select Utilities ... -
Page 29: Using Sync Out
3. The maximum amplitude allowed, in dBm or dBc. Enter 50 for "no maximum". From the Signal Hound menu, Select File->Import->Limit Line Table. This will open a popup where you can navigate to your limit line CSV file. Select your file and click Open. -
Page 30: Using The Sa124B As A Downconverter
F E A T U R E S 4.3 Using the SA124B as a Downconverter The USB-SA124B has on optional IF output of 63 MHz, which also happens to be "channel 3" in the Americas for analog and digital TV stations. There is an internal IF amplifier, adjustable over a 60 dB range to adjust the signal level for an external TV tuner, oscilloscope, or analog to digital converter. -
Page 31: Theory Of Operation
Spans using 6.5 KHz - 250 KHz RBW or VBW: the Signal Hound operates by rapidly stepping LO frequencies in 200 KHz steps, covering above and below the center frequency. These are processed with small FFTs and masked together to reject image responses and produce the displayed trace. -
Page 32: If-To-Bits Receiver
T H E O R Y O P E R A T I O N known residual responses at multiples of the primary Measurement tip: Linearity of a mixer improves at lower system clocks, a secondary clock frequency is signal levels. For accurate selected for spans 100 KHz or below. -
Page 33: Troubleshooting
Make sure the USB cable is connected at both ends, your PC is on and the USB drivers are installed properly. Is your PC or laptop configured in low power mode? The Signal Hound is a high-powered USB device and may be shut down in some power- saving configurations. - Page 34 4) You receive a specific error code Error 1: Your Signal hound was not found on a USB port. Plug in your Signal Hound if it isn’t already. If it is already plugged in, unplug it, reboot, re-install the USB driver, and/or try a different USB port.
-
Page 35: Calibration And Adjustment
Chapter C A L I B R A T I O N A N D A D J U S T M E N T 7 Calibration and Adjustment Contact Test Equipment Plus for more information regarding calibration software and required equipment. -
Page 36: Specifications
Chapter S P E C I F I C A T I O N S 8 Specifications Unless otherwise stated, specifications are valid for an ambient temperature range of 0 to 50°C, image rejection on, amplitude of signal applied less than the reference level. 8.1 Frequency Frequency Range: 100 kHz to 12.4 GHz Span Modes: (Center Frequency + Span) or (Start + Stop Frequencies) -
Page 37: Sweep
S P E C I F I C A T I O N S Relative Accuracy (Reference level ≤0 dBm): 0.25 dB Maximum Safe Input Level (preamp off, 15 dB atten): +20dBm DC Volts: < 16V absolute maximum Residual Responses (6.5 KHz RBW, 0 dB RF Atten) Frequency Range Signal Level Test Conditions... -
Page 38: Environment
8.6 Environment Operating Temperature: 0 to +50 °C 8.7 Calibration Test with factory calibration software to verify that USB-SA124B is operating within tolerance. Recommended calibration interval is 1 year at 20°C to 25°C. 8.8 Adjustments Factory adjustment software shall be used to generate new calibration constants when USB- SA124B will not pass calibration. -
Page 39: Revision History
Chapter R E V I S I O N H I S T O R Y 9 Revision History Software Version 2.04 – Initial Release of 2nd Generation software Firmware Version 2.02 – Added support for broadband signal peaking utility ... -
Page 40: Warranty And Disclaimer
Chapter W A R R A N T Y A N D D I S C L A I M E R 10 Warranty and Disclaimer Copyright © 2012 Test Equipment Plus All rights reserved Reproduction, adaptation, or translation without prior written permission is prohibited, except as allowed under the copyright laws. -
Page 41: Exclusive Remedies
10.1.4 Exclusive Remedies The remedies provided herein are the Buyer’s sole and exclusive remedies. Test Equipment Plus shall not be liable for any direct, indirect, special, incidental, or consequential damages, whether based on contract, tort, or any other legal theory. 10.1.5 Certification Test Equipment Plus certifies that, at the time of shipment, this product conformed to its published specifications.
Need help?
Do you have a question about the USB-SA124B and is the answer not in the manual?
Questions and answers