Table of Contents
Troubleshooting

Related Manuals for Sony KS-50R200A


Summary of Contents for Sony KS-50R200A
- Page 1 HISTORY Model Name : KS-50R200A/60R200A/70R200A SERVICE MANUAL Part No. : 9-883-602-02 When clicking an item, it’s detail is displayed. Change of Date SUPP./CORR. Description of SUP/COR main text 2006.7 – – 2006.9 SUPP.-1 Addition of KS-70R200A...
- Page 2 SERVICE MANUAL SP-3 CHASSIS MODEL COMMANDER DEST. CHASSIS NO. MODEL COMMANDER DEST. CHASSIS NO. –––––– –––––––––––– ––––– ––––––––––– –––––– –––––––––––– ––––– ––––––––––– KS-50R200A KS-60R200A RM-GA006 RM-GA006 Saudi Arabia Malaysia KS-50R200A KS-60R200A RM-GA006 Kuwait RM-GA006 KS-50R200A KS-60R200A RM-GA006 India RM-GA006 Thailand...
- Page 3 SCHEMATIC DIAGRAMS, EXPLODED VIEWS AND IN THE PARTS LIST ARE CRITICAL TO SAFE OPERATION. REPLACE THESE COMPONENTS WITH SONY PARTS WHOSE PART NUM- BERS APPEAR AS SHOWN IN THIS MANUAL OR IN SUPPLE- MENTS PUBLISHED BY SONY. CIRCUIT ADJUSTMENTS THAT ARE CRITICAL TO SAFE OPERATION ARE IDENTIFIED IN THIS MANUAL.
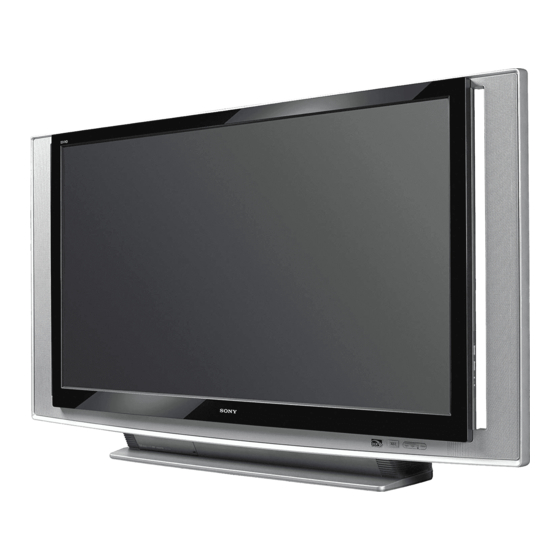
- Page 4 KS-70R200A: 70 inches HDMI IN 1, 2 KS-60R200A: 60 inches Video: 1080p, 1080i, 720p, 576p, 576i, 480p, 480i KS-50R200A: 50 inches Audio: Two channel linear PCM Power Consumption: 32, 44.1 and 48 kHz, 16, 20 and 24 bits KS-70R200A: 290 W...
- Page 5 KS-50R200A/60R200A/70R200A RM-GA006 RM-GA006 RM-GA006 PC Input Signal Reference Chart Horizontal Vertical Signals Horizontal (Pixel) Vertical (Line) frequency Standard frequency (Hz) (kHz) 31.5 37.5 VESA 31.5 VGA-T SVGA 37.9 VESA Guidelines 46.9 VESA 1024 48.4 VESA Guidelines 1024 56.5 VESA 1024...
- Page 6 • After switching on your TV, it may take a while (1 minute or less) before the picture appears. • When the projection lamp wears out, the screen goes dark. Replace the lamp with a new Sony XL-5100 replacement lamp (for KS-60R200A/50R200A, not supplied) or XL- 5300 replacemant lamp (for KS-70R200A, supplied).
- Page 7 Electric appliances can cause fire or high temperature, resulting in injury or death. Be sure to follow the instructions below. • Use a Sony XL-5100 replacement lamp (for KS- 60R200A/50R200A, not supplied) or XL-5300 replacemant lamp (for KS-70R200A, supplied) for replacement.
- Page 8 KS-50R200A/60R200A/70R200A RM-GA006 RM-GA006 RM-GA006 Pull out the lamp. Put the new lamp into its place. For KS-60R200A/50R200A, place your For KS-60R200A/50R200A, slide it in index finger through the hoop of the lamp slowly by pressing the PUSH part of the...
- Page 9 TV. • Consult your Sony dealer for a Sony XL-5100 replacement lamp (for KS-60R200A/50R200A) or XL-5300 replacement lamp (for KS-70R200A).
-
Page 10: Table Of Contents
KS-50R200A/60R200A/70R200A RM-GA006 RM-GA006 RM-GA006 TABLE OF CONTENTS Section Title Page Section Title Page –––––– –––– –––– –––––– –––– –––– 3. ELECTRICAL ADJUSTMENTS 1. SELF DIAGNOSIS FUNCTION ..... 1-1 3-1. Electrical Adjustment by Remote Commander ..3-1 3-1-1. Method of Setting the Service Adjustment 2. -
Page 11: Section Title
KS-50R200A/60R200A/70R200A RM-GA006 RM-GA006 RM-GA006 Section Title Page Section Title Page –––––– –––– –––– –––––– –––– –––– (20) Schematic Diagram of C (3/11) Board ..... 4-36 5. EXPLODED VIEWS (21) Schematic Diagram of C (4/11) Board ..... 4-37 (22) Schematic Diagram of C (5/11) Board ....4-38 5-1. -
Page 12: Self Diagnosis Function
KS-50R200A/60R200A/70R200A SECTION 1 RM-GA006 RM-GA006 RM-GA006 SELF DIAGNOSIS FUNCTION 1. Summary of Self-Diagnosis Function - This device includes a self-diagnosis function. - In case of abnormalities, the 1-On/ standby indicator automatically blinks. It is possible to predict the abnormality location by the number of blinks. The Instruction Manual... - Page 13 KS-50R200A/60R200A/70R200A RM-GA006 RM-GA006 RM-GA006 3. Blinking count display of 1-On/ standby indicator - One blink is not used for self-diagnosis. - Example Diagnosis item LED blinks Lamp cover 3 tim KS-50/60R200A 1-On/ standby 4 tim indicator LAMP indicator LED ON : 0.3sec LED OFF : 0.3sec...
- Page 14 KS-50R200A/60R200A/70R200A RM-GA006 RM-GA006 RM-GA006 Detail data (diagnosis history screen) Trouble information SELF CHECK(1) <1> Next Page --> 002: LED frequency LTEMP: Item name 002 LTEMP 0501210811 0412311234 0311111825 3 003 LAMPC 0000000000 0000000000 0000000000 0 0501210811: The last failure time...
- Page 15 KS-50R200A/60R200A/70R200A RM-GA006 RM-GA006 RM-GA006 - The results display is not automatically cleared. In case of repairs and after repairs, check the self-diagnosis screen and be sure to return the results display to "0". - If the results display is not returned to "0" it will not be possible to judge a new malfunction after completing repairs.
-
Page 16: Disassembly
KS-50R200A/60R200A/70R200A SECTION 2 RM-GA006 RM-GA006 RM-GA006 DISASSEMBLY 2-1. REAR COVER(50R200A/60R200A) Photo: KS-60R200A 3 9 screws (+BVTP2 4x16) Rear cover – 2-1 –... -
Page 17: Rear Cover(70R200A)
KS-50R200A/60R200A/70R200A RM-GA006 RM-GA006 RM-GA006 2-2. REAR COVER(70R200A) 2 10 screws (+BVTP2 4x16) Lamp door assembly Rear cover – 2-2 –... -
Page 18: Chassis Assembly(50R200A/60R200A)
KS-50R200A/60R200A/70R200A RM-GA006 RM-GA006 RM-GA006 2-3. CHASSIS ASSEMBLY(50R200A/60R200A) 3 2 screws(+BVTP2 4x16) 1 2 screws(+BVTP2 4x16) 2 Side stay (R) 4 2 connectors 5 Screw (+BVST 3x6) 4 screws (+BVTP2 4x16) 3 Wire holder 4 Disconnect connectors 6 Disconnect connectors 5 Loosen wire holder 6 Disconnect connectors –... -
Page 19: Chassis Assembly(70R200A)
KS-50R200A/60R200A/70R200A RM-GA006 RM-GA006 RM-GA006 2-4. CHASSIS ASSEMBLY(70R200A) 1 2 screws(+BVTP2 4x16) 2 Center pillar 1 2 screws(+BVTP2 4x16) 8 Slide out the chassis block 5 2 screws(+BVTP2 4x16) 3 2 screws(+BVTP2 4x16) 8 Wire holder 6 2 connectors 9 Disconnect connectors... -
Page 20: Terminal Bracket
KS-50R200A/60R200A/70R200A RM-GA006 RM-GA006 RM-GA006 2-5. TERMINAL BRACKET Screw(+BVST3x6) Screw(+BVST3x8) 4 2 screws(+BVST3x12) KS-70R200A only 5 Terminal bracket Screw(+PSW 3x6) 2 screws(+BVST3x6) 2-6. UG BOARD 1 2 screws (+BVST3x6) P-P cable 2 screws (+BVST3x6) 2 screws (+BVST3x6) 4 UG board 1 2 screws (+BVST3x6) On removing or attaching UG board, Be careful about the connector on back. -
Page 21: Fxe, Tug Boards
KS-50R200A/60R200A/70R200A RM-GA006 RM-GA006 RM-GA006 2-7. FXE, TUG BOARDS Note:It is necessory to update the firmware by Memory Stick in case of replacing FXE board. (See 3-5. HOW TO UPDATE FIRMWARE BY MEMORY STICK on page 3-3.) Photo:KS-60R200A 1 4 screws (+BVST3x6) -
Page 22: S1 Board
KS-50R200A/60R200A/70R200A RM-GA006 RM-GA006 RM-GA006 2-8. S1 BOARD 1 Screw (+BVST3x6) 2 S1 board 2-9. AG, B2 BOARDS, G BLOCK ASSEMBLY Note:It is necessory to update the firmware by Memory Stick in case of replacing AG board and B2 board. (See 3-5. HOW TO UPDATE FIRMWARE BY MEMORY STICK on page 3-3.) -
Page 23: H3 Board
KS-50R200A/60R200A/70R200A RM-GA006 RM-GA006 RM-GA006 AG board Disconnect from G board B2 board Main shield 2 screws (+BVST3x6) These boards are connected in the center. So, be carefull about it. 2-10. H3 BOARD 2 H3 board block Main shield G block... -
Page 24: Dc Motor Sff21C/C-Np(70R200A)
KS-50R200A/60R200A/70R200A RM-GA006 RM-GA006 RM-GA006 2-12. DC MOTOR SFF21C/C-NP(70R200A) 1 2 screws(+BVTP2 4x16) 4 2 claws 3 Screw(+BVTP2 4x16) 3 Screw(+BVTP2 4x16) DC motor SFF21C/C-NP – 2-9 –... -
Page 25: Power Supply Block(50R200A/60R200A)
KS-50R200A/60R200A/70R200A RM-GA006 RM-GA006 RM-GA006 2-13. POWER SUPPLY BLOCK(50R200A/60R200A) 1 2 screws (+BVTP2 4x16) 4 2 PCB holders 3 2 connectors 2 Remove side stay (R) by pulling it down forwoard 2-14. POWER SUPPLY BLOCK(70R200A) 1 2 screw(+BVTP2 4x6) 5 Pull down power supply block... -
Page 26: Dc Motor Sff22B/C-Np(50R200A/60R200A)
KS-50R200A/60R200A/70R200A RM-GA006 RM-GA006 RM-GA006 2-15. DC MOTOR SFF22B/C-NP(50R200A/60R200A) 1 2 screws (+BVTP2 4x16) 3 2 screws (+BVTP2 4x16) 4 Pull out fan bracket (EX) with scirocco fan (DC motor SFF22B/C-NP) 2 Remove side stay (R) by pulling it down forwoard... -
Page 27: Dc Motor Sff25A/C-Np(70R200A)
KS-50R200A/60R200A/70R200A RM-GA006 RM-GA006 RM-GA006 2-16. DC MOTOR SFF25A/C-NP(70R200A) 5 Screw(+BVTP4x16) 6 Claw 2-17. DC MOTOR SFF24A/C-NP 1 2 screws (+BVTP2 4x16) Scirocco fan cover 3 Scirocco fan (DC motor SFF24A/C-NP) 2 Scirocco fan cover – 2-12 –... -
Page 28: Cover Unit
KS-50R200A/60R200A/70R200A RM-GA006 RM-GA006 RM-GA006 2-18. COVER UNIT Cover unit 1 6 screws (+BVTP2 4x16) 2 Cover unit 2-19. LAMP GUIDE (F)(50R200A/60R200A) 1 2 screws (+BVTP2 4x16) 2 Side stay (S) 3 Lamp guide (F) 2-20. LAMP GUIDE (F)(70R200A) 1 2 Claws 3 3 screw(+BVTP2 4x16) –... -
Page 29: H1 Board(50R200A/60R200A)
KS-50R200A/60R200A/70R200A RM-GA006 RM-GA006 RM-GA006 2-21. H1 BOARD(50R200A/60R200A) 1 2 screws (+BVTP2 4x16) 3 Screw (+BVTP 3x12) 4 H1 board 2 H1 bracket with H1 baord 2-22. OPTICS BLOCK ASSEMBLY(50R200A/60R200A) 2 Screw (+BVTP2 4x16) Front cover 1 Lamp door assembly – 2-14 –... -
Page 30: Optics Block Assembly(70R200A)
KS-50R200A/60R200A/70R200A RM-GA006 RM-GA006 RM-GA006 3 4 screws (+PSW M4x12) 4 Optics block assembly 2-23. OPTICS BLOCK ASSEMBLY(70R200A) 1 Screw(+BVTP2 4x16) 2-24. SCREEN FRAME BLOCK ASSEMBLY(50R200A/60R200A) Photo: KS-60R200A 1 4 screws (+BVTP2 4x16) 3 Screen frame block assembly 2 KS-R60A200: 14 screws (+BVTP2 4x16) KS-R50A200: 9 screws (+BVTP2 4x16) –... -
Page 31: Screen Frame Block Assemblyy
KS-50R200A/60R200A/70R200A RM-GA006 RM-GA006 RM-GA006 2-25. SCREEN FRAME BLOCK ASSEMBLY(70R200A) 1 Screw(+BVTP2 4x16) Pull it forward picking both ends of the door. 6 Screw(+BVTP2 4x16) 5 3 connectors – 2-16 –... -
Page 32: (50R200A/60R200A)
KS-50R200A/60R200A/70R200A RM-GA006 RM-GA006 RM-GA006 7 Screw(+BVTP2 4x16) 9 6 screws(+BVTP2 4x16) 0 22 screws(+BVTP2 4x16) Note:Remove the screw from the under. 2-26. H1 BOARD(70R200A) 2-27. MIRROR COVER BLOCK ASSEMBLY (50R200A/60R200A) Photo: KS-60R200A H1 board 3 Raise it up 2 Pull it forward... -
Page 33: Mirror Cover Block Assembly(70R200A)
KS-50R200A/60R200A/70R200A RM-GA006 RM-GA006 RM-GA006 2-28. MIRROR COVER BLOCK ASSEMBLY(70R200A) 2-29. S2 BOARD(50R200A/60R200A) 1 Screw (+BVTP2 4x16) 1 5 screws(+BVTP2 4x16) 1 5 screws(+BVTP2 4x16) Front side of lamp (F) guide 4 S2 board 3 Screw (+BVTP 3x12) 2 Lamp (F) guide 2-30. -
Page 34: Notes On Harness Arranemens
KS-50R200A/60R200A/70R200A RM-GA006 RM-GA006 RM-GA006 T1 BOARD S2 BOARD 2-31. NOTES ON HARNESS ARRANGEMENTS Manage the lead wires inside of the core not to contact the corner of the shileld case. Core Clamper Flat clamps Pass the fan leads below. Cores Set cores in a frame. - Page 35 KS-50R200A/60R200A/70R200A RM-GA006 RM-GA006 RM-GA006 There is no leads to be caught. Chassis assembly should be atached gradually with managing leads. Bottom assembly Chassis assembly The shield and leads from C board come out from here. * Be sure not to break the lead.
- Page 36 KS-50R200A/60R200A/70R200A RM-GA006 RM-GA006 RM-GA006 PHOTO:KS-60R200A Be sure to connect the same color of the connectors and the same number of the pins PHOTO:KS-70R200A Not to run in parallel to 2P lead, when it processes it. Process Parsrock as it intersects in the point as shown in figure.
-
Page 37: How To Handle Fan Motor
KS-50R200A/60R200A/70R200A RM-GA006 RM-GA006 RM-GA006 PHOTO:KS-70R200A 2-32. How to handle FAN Motor Note: It is possible to cause some problems or defects by how to handle this FAN Motor. Therefore, please handle this FAN Motor with care. 2-32-1. If blads are stressed, it is possible to affect the performance. therefore, please handle this product with special care. - Page 38 KS-50R200A/60R200A/70R200A RM-GA006 RM-GA006 RM-GA006 To prevent blade fluctuations and/or changes in height How to hold a FAN Motor correctly How to hold a FAN Motor wrongly If blades are stressed, it causes some problems such Hold casing, and don’t give any stresses to blades.
-
Page 39: Electrical Adjustments
KS-50R200A/60R200A/70R200A SECTION 3 RM-GA006 RM-GA006 RM-GA006 ELECTRICAL ADJUSTMENTS 3-1. ELECTRICAL ADJUSTMENT BY REMOTE 3-1-2. Service Mode Adjustment COMMANDER 1. The SCREEN displays the item being adjusted. By using remote commander (RM-GA006), all circuit adjust- 2. Press “1” or “4” on the remote commander to select the ments can be made. -
Page 40: Memory Write Confirmation Method
KS-50R200A/60R200A/70R200A RM-GA006 RM-GA006 RM-GA006 3-1-4. Adjusting Buttons and Indicator DEM Service Menu POWER Detail Information-2 Adjustment category Adjustment item Service Detail Device Item Explanation Adjustment item Data up PROT_C NT CNTRST Reset DIAG Counter (set "1" --> Write) down TEMPERR... -
Page 41: H/V Center Confirmation And Adjustment
KS-50R200A/60R200A/70R200A RM-GA006 RM-GA006 RM-GA006 3-3. H/V CENTER CONFIRMATION AND AD- 3-4. REGISTRATION ADJUSTMENT JUSTMENT 1. Set the service mode to DEM. Please check the picture horizontal/vertical center after the re- 2. Display the crosshatch of Test Pattern (see below 1)). - Page 42 KS-50R200A/60R200A/70R200A RM-GA006 RM-GA006 RM-GA006 3-6. PICTURE DISTORTION CORRECTION MECHANISM(70R200A) 1. Start Download Turn on power to TV, and confirm that the picture 3-6-1. Preparation comes out. <Place of correction mechanism> Make it standby mode with commander. Pull out the AC cable, and insert Memory Stick at backside.
- Page 43 KS-50R200A/60R200A/70R200A RM-GA006 RM-GA006 RM-GA006 3-6-5. Picture Rotation Correction 2 3-6-2. V-TRAP Correction 1 In case of movimg the V spacer by changing the position of cen- In case of movimg the H spacer by changing the position of ter screw on the V spacer 2 to 1, the picture center goes down and screws on the H spacer N to +, the picture rotates counterclock- square to trapezoid as shown in figure.
-
Page 44: Diagrams
KS-50R200A/60R200A/70R200A SECTION 4 RM-GA006 RM-GA006 RM-GA006 DIAGRAMS 4-1. BLOCK DIAGRAM (1) AU_PROT CN8007 (1/4) CV/Y MAIN_CV/Y MAIN_C Q8265 CB/B PFC_DET MAIN_CB/B CV/Y (3/3) MAIN_Y/G CR/R MAIN_CR/R B2 BOARD CV/Y-SUB FLASH_WRITE_TVM SUB_CV/Y CN4002 IC8403(1/3) C-SUB SUB_C SCL_DEV_5V, SDA_DEV_5V (2/3) IC9153 TV MICRO... -
Page 45: Block Diagram (2)
KS-50R200A/60R200A/70R200A RM-GA006 RM-GA006 RM-GA006 BLOCK DIAGRAM (2) IC8710 CN8702 IIC-BUS REPEATER D3.3V BE3.3V SDA_SENSE S1 BOARD SCLA SCLB SDA_SENSE SCL_SENSE CN3150 SDAA SDAB SCL_SENSE DAC _I2C CN8701 D3.3V IC8705 S2 BOARD SDA_SENSE CN3200 DE MICRO SCL_SENSE (3/3) T2,T3 BOARD (50R200A/60R200A) -
Page 46: Block Diagram (3)
KS-50R200A/60R200A/70R200A RM-GA006 RM-GA006 RM-GA006 BLOCK DIAGRAM (3) IC8403(1/3) TV MICRO CN8252 O_ATT +B(9V) SPLITTER X8401 16.5MHz IC8402 FAN4_POW FAN4_POW FAN4_PROT 7 DAT IC8255 D8259 X8400 6 CLK FAN CONTROL 32.768kHz IC8253 Q8256 XOUT FAN4 REG. DAC1 9 SW2 IC8405 FAN1... -
Page 47: Block Diagram (4)
KS-50R200A/60R200A/70R200A RM-GA006 RM-GA006 RM-GA006 BLOCK DIAGRAM (4) IC4700 CN4002(1/2) IC4708 CCP-XA(MAIN) MAIN_HS M_YS 1MY2-9 Q4715,4720 SUB_Y M_YS/AEP OUT1Y2-9 Q4718,4719 BUFFER AIN5 BUFFER 1MC2-9 OUT1C2-9 (3/4) AD5_SEL Q4710,4712 MAIN_C 1M_HS BUFFER Q4716,4717 OUT1H AD4_SEL 1M_VS BIAS (2/4) OUT1V CV/Y Q4707 SUB_C... -
Page 48: Block Diagram (5)
KS-50R200A/60R200A/70R200A RM-GA006 RM-GA006 RM-GA006 BLOCK DIAGRAM (5) CLPIN COAST IFP_VS IC5300 IC5301 BUS SW1 BUS SW2 IEX_VS O2G0-7 SW2Y1IN0-7 A0-7 M_D1Y0-7 IGPX0_A0-7 OPC_GE0-7 IGPX1_A0-7 OGPX_A0-7 SW2C2IN0-7 O2B0-7 M_D1C0-7 R0-7 IGPX0_R0-7 OPC_BE0-7 IGPX1_B0-7 OGPX_R0-7 SW2Y2IN0-7 O2CLK M_D1H/M_D1V/M_D1CLK M_D1H/M_D1V/ G0-7 OPC_CK (3/4) -
Page 49: Block Diagram (6)
KS-50R200A/60R200A/70R200A RM-GA006 RM-GA006 RM-GA006 BLOCK DIAGRAM (6) IC5900 LVDS TRANSMITTER IC5007(1/2) CN5900 IFP2 TA1- TA1- TB13-16, SW2Y1IN0-7 IFPR1OUT0 IFPR1 OUT0-9 IR1_[0]-[9] TA1+ TA1+ DRCY1IN0-7 TC10-13, IFPR1OUT9 TD10-11 TB1- TB1- SW2C2IN0-7 DRCC1IN0-7 TB1+ TB1+ SW2Y2IN0-7 IFPG1OUT0 IG1_[0]-[9] TC1- IFPG1 OUT0-9 TA10-16,... -
Page 50: Block Diagram (7)
KS-50R200A/60R200A/70R200A RM-GA006 RM-GA006 RM-GA006 BLOCK DIAGRAM (7) CONT_BUS REC_656 O_IFPVSOUT (3/4) (1/4) CONT_BUS2 SET_ON CN4002 (2/2) CN4017 O_IFPVSOUT IRIS_GAIN IC4000 IFP_VSYNC IRIS_GAIN-JIG REPEATER SCLA SCLB SCL_SENSE SENE_SCL SDA_SENSE SDAA SDAB SENS_SDA SDA_E C BOARD SDA_E SCL_E PANEL_ON CN2000 SCL_E PANEL_ON... -
Page 51: Block Diagram (8)
KS-50R200A/60R200A/70R200A RM-GA006 RM-GA006 RM-GA006 BLOCK DIAGRAM (8) DWNX IC2100 DWNX LVDS RECEIVER IFP(L) 19-17,8, LRR0-11/LRL0-11/LLCLKRL CN2101 RLOUT00-11/RROUT00-11/LCLKRL 10-15, R,G,B RA1- 49 RA- R,G,B LBR0-11/LBL0-11/LLCLKBL 47-45, IFQE[0]-[29] IFQE[0]-[29] GLOUT00-11/GROUT00-11/LCLKGL BRIN0-9/GRIN0-9/RRIN0-9 RA1+ 50 RA+ 43-38, LGR0-11/LGL0-11/LLCLKGL (2/2) RD29 36-32, BLOUT00-11/BROUT00-11/LCLKBL R,G,B IFQO[0]-[29]... -
Page 52: Block Diagram (9)
KS-50R200A/60R200A/70R200A RM-GA006 RM-GA006 RM-GA006 BLOCK DIAGRAM (9) DWNX DWNX CN2600 LRR0-11/LRL0-11/LLCLKRL 2,1,80-59,56 DB_IN0-11/DA_IN0-11/CLK SIG_OUT1 38,37,35,34 SIG_R[0-22(EVEN)] SIG_R[0]-[23] SIG[0] 32,31,29,28 LBR0-11/LBL0-11/LLCLKBL 53,55 FPR/PRG FROM SIG_OUT12 26,25,23,22 SIG[23] LGR0-11/LGL0-11/LLCLKGL (1/2) IC2600 SID_OUT 54 VD LCD DRIVER DIRC FRP_RL/PCG_RL 52 51 42 44 17... - Page 53 KS-50R200A/60R200A/70R200A RM-GA006 RM-GA006 RM-GA006 BLOCK DIAGRAM (10) IC7101 CLOCK OSC CLK27IN CN7402 IC7102 X7101 MSDIO/DATA0 SDIO/DATA0 27MHz EMMA2LR PWMOUT IR_IN_0 CN7401 MEMORY MSCLK SCLK STICK VDOE_A[0-7] MSBS GFX-A0-7 VDOE_A0-7/AD4-11 IC7201 3.3V VDOE_R[0-7] GFX-R0-7 VDOE_R0-7/AD12-19 DDR SDRAM 2,4,5,7, DQ[0-15] VDOE_G[0-7] 8,10,11,13,...
- Page 54 KS-50R200A/60R200A/70R200A RM-GA006 RM-GA006 RM-GA006 BLOCK DIAGRAM (11) D6000 L6507 R6500 CN6501 RECT D6506 400V LAMP DC TO LAMP (BALLAST) Q6501,6502 LAMP GND Q6500,6505 SWITCHING SWITCHING IC6100 DRIVE SWITCHING T6200 CN6902 R6102 D6202 REGULATOR A1,B1, RECT AU_VCC C1,A2, AU_VCC B2,C2, IC6502...
- Page 55 KS-50R200A/60R200A/70R200A RM-GA006 RM-GA006 RM-GA006 BLOCK DIAGRAM (12) 50R200A/60R200A CN3001 J3100 AG BOARD CN3100 CN8001 COMP2_CR UG BOARD COMP2_CB COMP2_Y CN9452 S3000 S3006 S3005 S3004 S3002 S3001 MENU CHANNEL CHANNEL VOLUME VOLUME ENTER/ TV/VIDEO VIDEO/HD/DVD IN2 (PANEL SWITCH ) (1080i/720p/480p/480i) J3101...
- Page 56 KS-50R200A/60R200A/70R200A RM-GA006 RM-GA006 RM-GA006 BLOCK DIAGRAM (13) 70R200A IC3150 CN3150 S3250 CN3250 LAMP COVER SCL_E LAMP_COVER TEMPERATURE SWITCH AG BOARD AG BOARD SDA_E SENSOR CN8701 CN8702 D3.3V LAMP COVER DETECTION (AMBIENT TEMPERATURE ) 50R200A/60R200A IC3200 CN3200 S3260 CN3260 LAMP COVER...
- Page 57 KS-50R200A/60R200A/70R200A RM-GA006 RM-GA006 RM-GA006 BLOCK DIAGRAM (14) CN9454 SPLITTER TU9450 MAIN TUNER VHF/UHF TU7800 SUB TUNER CN9450 AUDIO SIF_M AUDIO AUDIO SIF_M AG BOARD AFT_M AFT_M C8252 AM/FM_M AM/FM_M TU_M_DET DTAU_CVBS CN7800 VIDEO-SUB SCL_5V CVBS_TUNER(S) SCL_DEV_5V SDA_5V SDA_DEV_5V AUDIO-SUB FM/AM(S)
-
Page 58: Frame Schematic Diagram
KS-50R200A/60R200A/70R200A RM-GA006 RM-GA006 RM-GA006 4-2. FRAME SCHEMATIC DIAGRAM B to B connector/FFC B to B connector/FFC 2nd Layer Harness Harness 50R200A/60R200A FXE Board FXE Board H1 Board H1 Board Ch/Vol Key Ch/Vol Key To AG To AG Power Power Main Analog... -
Page 59: Circuit Boards Location
KS-50R200A/60R200A/70R200A RM-GA006 RM-GA006 RM-GA006 4-3. CIRCUIT BOARDS LOCATION Terminal name of semiconductors in silk screen printed circuit ( 50R200A/60R200A 70R200A Device Printed symbol Terminal name Circuit Collector Transistor Emitter Base Collector Transistor Emitter Base Cathode Diode Anode Cathode Diode (NC) -
Page 60: Schematic Diagram Of Ag (1/6) Board
KS-50R200A/60R200A/70R200A RM-GA006 RM-GA006 RM-GA006 (1) Schematic Diagram of AG (1/6) Board To UG CN9450 TU33V *FB8012 0uH *FB8040 TU33V AFT_M(CH/GA/AUS) AFT_M_GA001:11B To H1/H2/H2B/H4 32.1 *R8109 0 I2C_DEV_5V TU_I2C TU5V SIF_M(CH/GA/AUS) SIF_GA 001:11B *R8144 *R8161 001:15C *FL8009 001:6B;003:15E;005:7G SCL_DEV_5V TU_SCL FM/AM_M_GA... -
Page 61: Schematic Diagram Of Ag (2/6) Board
KS-50R200A/60R200A/70R200A RM-GA006 RM-GA006 RM-GA006 (2) Schematic Diagram of AG (2/6) Board D3.3V CN8250 10.8 D3.3V JL8300 11V_DET R8250 CHIP R8305 FAN_DRV FAN_DRV D8255 JL8263 D3.3V RSQ035P03TR L8254 JL8250 002:11C 10uH PTZ-TE25-3.9B CHIP D3.3V Q8254 CHECK_D3.3V JL8278 C8273 002:13G;004:7E L8258 002:15J... -
Page 62: Schematic Diagram Of Ag (3/6) Board
KS-50R200A/60R200A/70R200A RM-GA006 RM-GA006 RM-GA006 (3) Schematic Diagram of AG (3/6) Board STBY3.3V STBY3.3V M_STBY5V << STBY3.3V >> C8479 RESET M24128-BWMN6T(A) R8577 R8595 EEPROM *R8674 FB8405 R8620 2.2k R8630 JL8428 1/16W 1608 1/16W 1/16W C8410 RN-CP CHIP CHIP JL8425 C8459 0.5%... -
Page 63: Schematic Diagram Of Ag (4/6) Board
KS-50R200A/60R200A/70R200A RM-GA006 RM-GA006 RM-GA006 (4) Schematic Diagram of AG (4/6) Board 002:15G DAC_I2C FB8712 R8903 4.7k Q8712 1/16W CHIP SSM6N15FU(TE85R) SDA_DAC BE3.3V R8904 4.7k 1/16W IC8706 CHIP 001:3G;001:8F;004:4H R8882 SENSE_I2C M24128-BWMN6T(A) FB8710 1/16W CHIP SCL_DAC JIG_RESET_DEM JL8705 001:2I JL8706 R8894... -
Page 64: Schematic Diagram Of Ag (5/6) Board
KS-50R200A/60R200A/70R200A (5) Schematic Diagram of AG (5/6) Board RM-GA006 RM-GA006 RM-GA006 001:10B MAIN_INV_LR L8950 10uH EMMA_DAC_R C9058 001:8J FM/AM_M 2012 C8976 EMMA_DAC_L 001:12B 0.01 001:8J L8952 C9031 1005 R9102 10uH 1/10W R9094 C8982 R9031 R9122 4.7k C9062 RN-CP C8980 0.01... -
Page 65: Schematic Diagram Of Ag (6/6) Board
KS-50R200A/60R200A/70R200A RM-GA006 RM-GA006 RM-GA006 (6) Schematic Diagram of AG (6/6) Board AUDIO_VCC F9150 *L9158 6.3A PS9150 *R9192 0.63A Q9168 PS9151 *R9191 L9152 C9188 10uH *R9194 *C9175 *R9190 *R9193 *R9196 C9159 C9226 IC9156 *R9182 C9231 2012 PQ200WNA1ZPH C9232 *R9195 R9240 TO DETECT... -
Page 66: Schematic Diagram Of B2 (1/11) Board
KS-50R200A/60R200A/70R200A (7) Schematic Diagram of B2 (1/11) Board RM-GA006 RM-GA006 RM-GA006 16.5V 16.5V U2_TX U2_TX 002:10I FEE/QM(Plug) L4003 *R4054 XX CHIP 4.7uH 16.5V OSD_HS 002:15E;009:7B *R4055 1005 CHIP SAIPH_OSD_HSOUT BUS_SW(Sync) *R4056 1005 CHIP SUB6.5V OSD_VS 002:15F;009:7C *R4057 1005 CHIP SAIPH_OSD_VSOUT L4000 4.7uH... -
Page 67: Schematic Diagram Of B2 (2/11) Board
KS-50R200A/60R200A/70R200A RM-GA006 RM-GA006 RM-GA006 (8) Schematic Diagram of B2 (2/11) Board PQ070XNA1ZPH IC4205 DRC1.2V D4201 L4200 D4203 DRC1.2V 6.5V EC31QS03L-TE12L 10uH PTZ-TE25-3.9B C4204 C4211 CCPS1.8V 2200p FB4202 CCPS1.8V C4202 C4200 PS4200 1608 3216 R4293 C4205 3216 C4252 2200p 3216 3216... -
Page 68: Schematic Diagram Of B2 (3/11) Board
KS-50R200A/60R200A/70R200A RM-GA006 RM-GA006 RM-GA006 (9) Schematic Diagram of B2 (3/11) Board CEC2 002:6K HPG_DET1 002:4J D4334 D4336 IC4313 R4426 HPG_DET2 002:6J R4427 C4395 HPG_DET3 002:6J *R4428 R4495 A Board (120p) C4397 D4335 Q4307 R4498 DTC114EUA-T106 C4396 IC4312 WRT_PRT 002:6I R4429... -
Page 69: Schematic Diagram Of B2 (4/11) Board
KS-50R200A/60R200A/70R200A RM-GA006 RM-GA006 RM-GA006 (10) Schematic Diagram of B2 (4/11) Board IFP_CCPB_IN_YUV CCPM_HS 006:2B;007:2B 002:4I R4839 1/16W CHIP JL4706 SET3.3V IFP,DRC IC4704 JL4707 C4763 MT48LC4M16A2P-75:G R4711 R4837 R4838 RB4700 0.01 C4774 L4711 RB4703 1/16W 1/16W 1/16W 2.2uH CHIP CHIP CHIP... -
Page 70: Schematic Diagram Of B2 (5/11) Board
KS-50R200A/60R200A/70R200A RM-GA006 RM-GA006 RM-GA006 (11) Schematic Diagram of B2 (5/11) Board R4966 R4968 R4967 R4969 SET3.3V 1005 C4987 0.01 SET3.3V C4914 IFP_CCPB_IN_YUV 1005 1005 1005 1005 1005 1005 1005 1005 1005 C4994 1005 0.01 005:2A;007:2B 0.01 0.01 0.01 0.01 1005 C4957 0.01... -
Page 71: Schematic Diagram Of B2 (6/11) Board
KS-50R200A/60R200A/70R200A RM-GA006 RM-GA006 RM-GA006 (12) Schematic Diagram of B2 (6/11) Board SET1.2V SET3.3V 011:2G IFPOUT2 C5044 SET2.5V2 R5108 1/16W CHIP 008:2B AD{21:0} 007:8B SSPCLKOUT C5045 SET3.3V 008:2B D{7:0} 007:11I SSPTXD 008:1D DDRIF XDRC 006:14G R5109 C5046 R5042 1/16W CHIP SET1.2V... -
Page 72: Schematic Diagram Of B2 (7/11) Board
KS-50R200A/60R200A/70R200A RM-GA006 RM-GA006 RM-GA006 (13) Schematic Diagram of B2 (7/11) Board SET3.3V 1.25V C5236 C5238 C5249 0.01 0.01 R5239 0.01 C5246 007:2A CHIP C5212 C5216 C5218 1005 1005 D{7:0} 0.01 0.01 0.01 1005 C5207 C5215 C5217 C5263 C5269 AD{21:0} C5256 C5259 0.01... -
Page 73: Schematic Diagram Of B2 (8/11) Board
KS-50R200A/60R200A/70R200A RM-GA006 RM-GA006 RM-GA006 (14) Schematic Diagram of B2 (8/11) Board COAST R5388 1/16W CHIP PCCOSOUT 007:5B RB5304 CLPIN R5389 1/16W CHIP PCCLPOUT 007:9B SAIPH_OSD_B7 SAIPH_OSD_B6 IGPX1_B7 SAIPH_OSD_B6 RB5312 RB5320 IGPX1_B6 M_D1C7 M_D1C7 007:2B;010:1B SAIPH_OSD_B5 SAIPH_OSD_B5 IGPX1_B7 IPC_BE7 OPC_BE7 IFP_CCPA_IN_YUV... -
Page 74: Schematic Diagram Of B2 (9/11) Board
KS-50R200A/60R200A/70R200A (15) Schematic Diagram of B2 (9/11) Board RM-GA006 RM-GA006 RM-GA006 IFP(CCPA) SET5V R5521 L5504 1/16W 10uH R5529 R5505 RN-CP 0.5% R5504 1/16W R5520 CHIP R5527 C5549 IFP_CCPA_IN_YUV RB5501 1/16W 3.3k 009:7A;007:2B CHIP 1/16W O2CLK 1/16W CHIP RN-CP R5511 CHIP... -
Page 75: Schematic Diagram Of B2 (10/11) Board
KS-50R200A/60R200A/70R200A RM-GA006 RM-GA006 RM-GA006 (16) Schematic Diagram of B2 (10/11) Board SET3.3V PANEL_ON L5903 C5930 2.2uH 002:4G C5929 C5931 C5932 C5933 0.01 C5913 0.01 1005 SET3.3V C5909 C5911 C5912 0.01 0.01 0.01 IFPOUT1 1005 1005 1005 RB5900 007:2B IFPG1OUT0 IG1_[0] L5900 2.2uH... -
Page 76: Schematic Diagram Of B2 (11/11) Board
KS-50R200A/60R200A/70R200A RM-GA006 RM-GA006 RM-GA006 (17) Schematic Diagram of B2 (11/11) Board D5706 JL5702 HN1D03FU-TE85R 012:14I PC_R R5721 R5741 R5755 C5720 CHIP JL5703 012:14I PC_G R5742 R5756 009:5K R5722 C5721 ADC_2 CHIP SET3.3V D5707 R5865 HN1D03FU-TE85R JL5704 DATACK1 012:14I PC_B R5866... -
Page 77: Schematic Diagram Of C (1/11) Board
KS-50R200A/60R200A/70R200A (18) Schematic Diagram of C (1/11) Board RM-GA006 RM-GA006 RM-GA006 IRIS9V PQ200WNA1ZPH IC2003 SET9V SDADE_400K 003:5C;004:5C 30mA 30mA SCLDE_400K 003:5C;004:5C JL2014 R2025 C2024 R2033 R2042 4.7k 1/16W 1/16W 1/16W R2043 RN-CP CHIP 2012 CHIP 1/16W 0.5% R2003 R2005 C2036... -
Page 78: Schematic Diagram Of C (2/11) Board
(19) Schematic Diagram of C (2/11) Board KS-50R200A/60R200A/70R200A RM-GA006 RM-GA006 RM-GA006 IFQE 003:2A;004:2A IFCLKE,IFDEE,IFQE[0-29] D2.5V TP2100 IFDEE R2138 1/16W CHIP IFHSYNC R2139 1/16W CHIP 003:6B;004:6B IFHSYNC IFVSYNC R2140 1/16W CHIP 003:6C;004:6B IFVSYNC TP2101 RB2117 IFQE[9] IFQE[8] C2106 C2120 0.01 IFQE[7] 0.01... -
Page 79: Schematic Diagram Of C (3/11) Board
KS-50R200A/60R200A/70R200A (20) Schematic Diagram of C (3/11) Board RM-GA006 RM-GA006 RM-GA006 IFCLKE,IFDEE,IFQE[0-29] 002:9A;004:2A IFQE RED_DA_L007:2B BLUE_DA_L 009:2B TG_RL IFQO[0-29] 007:2A 002:9E;004:2B IFQO RB2215 GREEN_DA_L 008:2B IFQO[29] LRR0 RB2200 RLIN9 RLOUT11 TG_GL IFQO[28] LRR1 008:2A RLIN8 RLOUT10 IFQO[27] LRR2 RLIN7 RLOUT09... -
Page 80: Schematic Diagram Of C (4/11) Board
KS-50R200A/60R200A/70R200A (21) Schematic Diagram of C (4/11) Board RM-GA006 RM-GA006 RM-GA006 IFCLKE,IFDEE,IFQE[0-29] IFQE 002:9A;003:2A RED_DA_R 007:2E TG_RR BLUE_DA_R 009:2E 007:2E IFQO[0-29] FRP_RR,PCG_RR IFQO GREEN_DA_R 008:2E RB2315 IFQO[29] RRR0 IFHSYNC TG_GR 002:9E;003:2B RB2300 RLIN9 RLOUT11 002:8A;003:6B IFHSYNC 008:2E IFQO[28] RRR1 IFVSYNC... -
Page 81: Schematic Diagram Of C (5/11) Board
KS-50R200A/60R200A/70R200A (22) Schematic Diagram of C (5/11) Board RM-GA006 RM-GA006 RM-GA006 1.25V C2402 C2403 0.01 0.01 C2452 C2453 C2454 R2418 0.01 0.01 0.01 1005 1005 CHIP 1005 1005 1005 C2432 C2455 C2400 C2414 0.01 C2451 0.01 0.01 0.01 6.3V 1005... -
Page 82: Schematic Diagram Of C (6/11) Board
KS-50R200A/60R200A/70R200A RM-GA006 RM-GA006 RM-GA006 (23) Schematic Diagram of C (6/11) Board D2.5V R1.25V C2555 0.01 C2556 C2554 C2523 C2525 SET5V C2511 0.01 0.01 R2518 FB2500 0.01 1005 6.3V 6.3V CHIP 1005 1005 C2552 10mA 1005 2012 2012 C2557 0.4A 6.3V C2553 0.01... -
Page 83: Schematic Diagram Of C (7/11) Board
(24) Schematic Diagram of C (7/11) Board KS-50R200A/60R200A/70R200A RM-GA006 RM-GA006 RM-GA006 SET3.3V C2601 C2600 0.01 15V_R 70mA 3216 1005 L2605 0.11A 3216 L2601 2.2uH 2.2uH 003:8B TG_RL C2616 004:9G;007:4E C2620 C2622 VS_RED C2606 003:5B RED_DA_L 0.01 C2617 3216 470p 3216 SET3.3V... -
Page 84: Schematic Diagram Of C (8/11) Board
KS-50R200A/60R200A/70R200A RM-GA006 RM-GA006 RM-GA006 (25) Schematic Diagram of C (8/11) Board C2701 SET3.3V 0.01 15V_G 70mA 1005 L2705 C2700 3216 L2701 2.2uH 2.2uH GREEN 0.11A 3216 C2716 003:8B TG_GL C2720 C2722 C2706 GREEN_DA_L 004:9H;008:4E C2717 003:5B 0.01 SIG_G[0-23] 470p VS_GREEN... -
Page 85: Schematic Diagram Of C (9/11) Board
KS-50R200A/60R200A/70R200A RM-GA006 RM-GA006 RM-GA006 (26) Schematic Diagram of C (9/11) Board SET3.3V C2801 0.01 15V_B 70mA 1005 L2805 C2800 3216 0.11A 2.2uH L2801 BLUE 2.2uH 3216 C2816 TG_BL 003:8B C2820 C2822 C2806 003:5B BLUE_DA_L 004:9H;009:4E 0.01 C2817 VS_BLUE 470p 3216 3216 SET3.3V... -
Page 86: Schematic Diagram Of C (10/11) Board
KS-50R200A/60R200A/70R200A RM-GA006 RM-GA006 RM-GA006 (27) Schematic Diagram of C (10/11) Board D2900 R2921 MM3Z3V3T1 1/10W IRIS_FB 001:2C C2905 001:2C R2920 IRIS_CTRL 1/10W D2901 SET9V UDZSTE-173.3B SET9V 30mA R2935 Q2900 C2900 0.01 2SC3052EF-T1-LEF R2922 C2906 0.01 R2911 1/10W R2931 R2933 NJM2904V(TE2) NJM2904V(TE2) 0.5%... -
Page 87: Schematic Diagram Of C (11/11) Board
KS-50R200A/60R200A/70R200A RM-GA006 RM-GA006 RM-GA006 (28) Schematic Diagram of C (11/11) Board SET3.3V 0.2A 0.12A L2970 20mA 20mA 2.2uH SN74LVC2G157DCUR SN74LVC2G157DCUR IC2973 IC2976 IC2972 R2978 SN74LV595APWR 1/16W R2988 CHIP C2974 40mA JL2975 0.01 C2977 0.01 C2971 1005 JL2976 0.01 003:9H 1005... -
Page 88: Schematic Diagram Of Fxe (1/5) Board
KS-50R200A/60R200A/70R200A RM-GA006 RM-GA006 RM-GA006 (29) Schematic Diagram of FXE (1/5) Board FOR I2C ALLOCATION SEE SHEET 1 FOR UART ALLOCATION SEE SHEET 1 DIFFERENTIAL PAIR SIGNALS USB CLOCK IN_TSCLK,IN_TSSYNC,IN_TSVAL 3.3V SOFTWARE CONFIGURATION OPTIONS SEE SHEET 1 REG_V 3.3V_EMMA FB7102 CONT... -
Page 89: Schematic Diagram Of Fxe (2/5) Board
KS-50R200A/60R200A/70R200A RM-GA006 RM-GA006 RM-GA006 (30) Schematic Diagram of FXE (2/5) Board NAND FLASH 3.3V 128Mbits FB7200 FB7201 IC7200 HY27US08281A-TPCB 2.5V PLACE THESE CAPACITORS CLOSE TO IC PINS. NOTE: PIN-6 IS GND C7205 C7206 C7207 C7208 C7209 C7210 ON TOSHIBA DEVICES... -
Page 90: Schematic Diagram Of Fxe (3/5) Board
KS-50R200A/60R200A/70R200A RM-GA006 RM-GA006 RM-GA006 (31) Schematic Diagram of FXE (3/5) Board CI_ENB CE1B CE1B FOEB FOEB EMMA2LR IORDB IORDB D_IOWRB IOWRB FWEB FWEB CI_RSTB CI_RSTB REGB REGB * R7301 * R7302 * C7301 3.3V * FB7307 * R7303 TS from CAM... -
Page 91: Schematic Diagram Of Fxe (4/5) Board
KS-50R200A/60R200A/70R200A RM-GA006 RM-GA006 RM-GA006 (32) Schematic Diagram of FXE (4/5) Board 3.3V DEBUG I/F *CN7400 +3V3D DBG_RSTB JL7412 TXD0B_MAIN TXD0B JL7415 RXD0B_MAIN RXD0B JL7416 REG_V TXD1B_MAIN TXD1B EMMA2LR JL7420 RXD1B RXD1B_MAIN JL7421 TXD3B TXD3B_MAIN JL7422 RXD3B_MAIN RXD3B *IC7405 JL7425 AUDIO DAC & AMP... -
Page 92: Schematic Diagram Of Fxe (5/5) Board
KS-50R200A/60R200A/70R200A RM-GA006 RM-GA006 RM-GA006 (33) Schematic Diagram of FXE (5/5) Board D7510 MMDL914T1 2012 *IC7502 *FB7503 NCP1117STAT3 VOUT GND/ADJ *R7531 *C7547 0.5% REG_V *C7540 *C7541 8.5V 2012 3216 JL7531 *PS7501 3216 *CN7500 *FB7500 *R7530 181946511 1.6A *C7548 JL7521 *R7532 *C7542... -
Page 93: Schematic Diagram Of G (1/2) Board
KS-50R200A/60R200A/70R200A RM-GA006 RM-GA006 RM-GA006 (34) Schematic Diagram of G (1/2) Board Mount Mecha A6008 408720621 D6506 JL6032 JL6033 C6500 R6500 L6501 0.47 LAMP DC 100uH 1/2W Mount Mecha A6007 268894201 D6000 450V JL6034 JL6035 LAMP GND CN6501 Mount Mecha A6005 268894101 D6203-D6204-D6205-D6200<1>... -
Page 94: Schematic Diagram Of G (2/2) Board
KS-50R200A/60R200A/70R200A RM-GA006 RM-GA006 RM-GA006 (35) Schematic Diagram of G (2/2) Board R6975 CHIP 1608 R6976 CN6901 CHIP 16.4 1608 JL6933 16.5V 16.5V 001:17E;002:14I FB6900 C6972 C6973 6.5V R6977 R6978 6.5V CHIP JL6934 To C-Board CHIP 1608 6.5V 1608 6.5V 001:8H;001:17C;002:14G... -
Page 95: Schematic Diagram Of H1 Board (50R200A/60R200A)
KS-50R200A/60R200A/70R200A RM-GA006 RM-GA006 RM-GA006 (36) Schematic Diagram of H1 Board (50R200A/60R200A) BOARD CN8001 18-20 CN3001 WHT:L R3001 R3002 R3000 R3003 R3004 C3000 0.01 1.5k VD3000 1/10W 1/10W 1/10W 1/10W 1/10W RN-CP 180498821 RN-CP RN-CP RN-CP RN-CP 1608 S3000 S3001 S3002... -
Page 96: Schematic Diagram Of H2A Board (50R200A/60R200A)
KS-50R200A/60R200A/70R200A RM-GA006 RM-GA006 RM-GA006 (37) Schematic Diagram of H2A Board (50R200A/60R200A) STBY_RED POWER_GREEN TIMER_RED P_MUTE_GREEN C3061 D3053 Q3050-3054 C3055 D3055 LED DRIVE SML-020MVT-T86 SML-020MVT-T86 1608 R3065 R3056 R3064 R3055 1/10W 1/10W 1/10W 1/10W RN-CP RN-CP RN-CP R3067 RN-CP R3058 R3061... -
Page 97: Schematic Diagram Of H2B Board (70R200A)
KS-50R200A/60R200A/70R200A RM-GA006 RM-GA006 RM-GA006 (38) Schematic Diagram of H2B Board (70R200A) 6-703-744-01:SHARP GP1UE26SXKOF IC3080 R3082 R3080 RN-CP 1/10W STBY3.3V RN-CP C3082 SIRCS C3083 C3080 AG BOARD 1608 P-ON CN8001 C3081 1608 1/10W D3.3V D3081 BL_IN D3080 RD6.2SB-T1 C3084 0.01 S3080 D3082 RD6.2SB-T1... -
Page 98: Schematic Diagram Of H3 Board
KS-50R200A/60R200A/70R200A RM-GA006 RM-GA006 RM-GA006 (39) Schematic Diagram of H3 Board CN3102 COMP2_Y R3116 100k 1/10W R3117 RN-CP COMP2_CB VD3100 180498821 1/10W 1608 COMP2_CR *CN3100 J3100 VD3101 180498821 R3118 CHIP R3119 VD3102 CHIP 180498821 R3120 CHIP COMP_DET R3101 D3100 V2_V UDZSTE-176.2B... -
Page 99: Schematic Diagram Of H4 Board (70R200A)
KS-50R200A/60R200A/70R200A RM-GA006 RM-GA006 RM-GA006 (40) Schematic Diagram of H4 Board (70R200A) R3308 1/10W RN-CP R3301 Q3300 C3305 1/10W DTA114EUA-T106 RN-CP STBY STBY5V 1608 D3301 SMLU12D16W POWER TIMER_LED C3300 C3301 P_MUTE_LED R3304 AG BOARD LAMP_LED Q3301 CN8001 1/10W 1608 DTC144EUA-T106 RN-CP... -
Page 100: Schematic Diagram Of S1, S2 Boards
KS-50R200A/60R200A/70R200A RM-GA006 RM-GA006 RM-GA006 (41) Schematic Diagram of S1, S2 Boards R3200 D3.3V AG BOARD SDA_E CN8701 SCL_E R3201 R3202 CN3200 1/10W 1/10W RN-CP RN-CP R3150 D3.3V 181946511 AG BOARD SDA_E CN8702 SCL_E O.S. R3151 R3152 CN3150 1/10W C3200 C3201... -
Page 101: Schematic Diagram Of T1, T2, T3 Boards
KS-50R200A/60R200A/70R200A RM-GA006 RM-GA006 RM-GA006 (42) Schematic Diagram of T1, T2, T3 Boards 70R200A 50R200A/60R200A LAMP_COVER LAMP_COVER T3 BOARD CN3270, S3260 AG BOARD AG BOARD CN8701 CN8701 S3250 CN3260 CN3250 WHT:L GH:H 181947211 T2 BOARD (LAMP COVER DETECTION) T1 BOARD LAMP_POS... - Page 102 KS-50R200A/60R200A/70R200A RM-GA006 RM-GA006 RM-GA006 (43) Schematic Diagram of T1, T2, T3 TU7800 CN7801 R7820 R7822 R7818 R7824 R7804 CHIP R7812 R7819 R7821 R7823 R7825 DE-EM R7810 C7806 R7811 R7815 ET7800 GND_1 GND_1 GND_1 GND_1 HOT_GND1 HOT_GND2 HOT_GND3 HOT_GND4 RN-CP CHIP...
-
Page 103: Schematic Diagram Of Ug (1/4) Board
KS-50R200A/60R200A/70R200A (44) Schematic Diagram of UG (1/4) Board RM-GA006 RM-GA006 RM-GA006 To AG FB9456 TU33V 001:10D TU33V AFT_M AFT_M TU5V 001:10C SIF_M SIF_M FB9457 DTAU_LR_IN TU5V 004:12C DTAU_IN_R TU5V DTAU_REC_R *R9474 XX TU5V DTAU_IN_L AM/FM_M AF/FM_M DTAU_REC_L *R9475 XX 001:10C... -
Page 104: Schematic Diagram Of Ug (2/4) Board
KS-50R200A/60R200A/70R200A RM-GA006 RM-GA006 RM-GA006 (45) Schematic Diagram of UG (2/4) Board S_DET1 R9557 003:3F FB9550 D9550 C9597 1/16W COMP1_V_IN CHIP R9615 003:2G GND_1 2012 CHIP COMP1_Y V1_Y_IN R9593 R9607 C9588 R9599 C9567 VD9570 C9594 R9552 R9571 1/10W 1/10W 1/10W 1608... -
Page 105: Schematic Diagram Of Ug (3/4) Board
KS-50R200A/60R200A/70R200A RM-GA006 RM-GA006 RM-GA006 (46) Schematic Diagram of UG (3/4) Board V_SW5V L9705 10uH C9738 C9740 R9725 R9732 V_SW9V 6.3V 1005 1/10W 1/16W C9798 V_SW9V R9723 CHIP MAIN_CV/Y L9707 001:5D V_SW5V 1/16W 10uH L9704 R9736 1005 V_SW5V 10uH R9740 L9703... -
Page 106: Schematic Diagram Of Ug (4/4) Board
KS-50R200A/60R200A/70R200A RM-GA006 RM-GA006 RM-GA006 (47) Schematic Diagram of UG (4/4) Board 002:12C L9852 COMP1_LR_IN 10uH 002:7F V3_LR_IN 002:6E V1_LR_IN L9851 001:5F 10uH V2_IR_IN C9879 L9853 R9877 4.7k 10uH R9882 1/16W 1005 C9862 C9863 4.7k R9884 R9875 1/16W 4.7k 4.7k R9906... -
Page 107: Printed Wiring Boards
4-5. PRINTED WIRING BOARDS KS-50R200A/60R200A/70R200A RM-GA006 RM-GA006 RM-GA006 (1) AG Board (Side A) • AG BOARD SEMICONDUCTOR LOCATION Q8707 Q8710 Side A Side B Q8711 IC8001 Q8712 IC8002 Q8713 IC8250 Q8950 IC8251 Q8951 IC8252 Q8952 IC8253 Q8953 IC8255 Q8954 IC8400... -
Page 108: Ag Board (Side B)
KS-50R200A/60R200A/70R200A RM-GA006 RM-GA006 RM-GA006 (2) AG Board (Side B) • AG BOARD SEMICONDUCTOR LOCATION Q8707 Q8710 Side A Side B Q8711 IC8001 Q8712 IC8002 Q8713 IC8250 Q8950 IC8251 Q8951 IC8252 Q8952 IC8253 Q8953 IC8255 Q8954 IC8400 Q8955 IC8401 Q8956 IC8402... -
Page 109: B2 Board (Side A)
KS-50R200A/60R200A/70R200A RM-GA006 RM-GA006 RM-GA006 (3) B2 Board (Side A) Text Search HDMI 0-000-000-09 IC5300 BUS-SW CCP(Main) HDMI1.8V A-1183- 920-A CCP(SUB) DRC-MFV2.5 C5713 SET5V SET2.5V DRC1.8V SET1.2V C5931 – 4-66 –... -
Page 110: B2 Board (Side B)
KS-50R200A/60R200A/70R200A RM-GA006 RM-GA006 RM-GA006 (4) B2 Board (Side B) Text Search SDRAM IC4704 IC4905 SDRAM L4706 IC5200 IC5301 SET2.5V SET5V IC4201 IC4000 R5061 IC5900 LVDS IC5201 Flash – 4-67 –... -
Page 111: C Board (Side A)
KS-50R200A/60R200A/70R200A Text Search RM-GA006 RM-GA006 RM-GA006 (5) C Board (Side A) CN2101 CN2000 CN2002 ET2001 R2122 R2120 R2115 R2114 R2104 R2102 R2100 C2341 R2121 R2119 R2105 R2103 R2101 C2114 C2106 R2113 R2109 R2147 R2110 R2146 C2006 R2129 R2126 TP2000 C2121... -
Page 112: C Board (Side B)
KS-50R200A/60R200A/70R200A Text Search (6) C Board (Side B) RM-GA006 RM-GA006 RM-GA006 1-870-334-11 R2033 JL2005 C2353 JL2007 C2018 R2125 R2143 C2108 C2009 RB2100 R2132 R2124 C2102 R2131 R2127 R2142 JL2105 R2015 JL2101 R2111 R2133 IC2003 C2111 R2016 C2103 R2134 JL2100 R2112... -
Page 113: Fxe Board (Side A)
KS-50R200A/60R200A/70R200A RM-GA006 RM-GA006 RM-GA006 (7) FXE Board (Side A) Text Search R7532 R7531 TP7404 D7510 FB7503 TP7403 TP7414 C7407 CN7500 C7425 TP7413 CN7400 IC7404 TP7512 IC7502 R7425 CN7100 D7402 IC7403 R7244 C7202 TP7409 TP7408 R7243 TP7510 IC7103 TP7514 TP7410 TP7200... -
Page 114: Fxe Board (Side B)
KS-50R200A/60R200A/70R200A RM-GA006 RM-GA006 RM-GA006 Text Search (8) FXE Board (Side B) JL7433 JL7431 JL7414 C7412 JL7426 JL7521 JL7522 JL7415 JL7420 R7423 FB7401 C7410 C7428 1-870-700-12 R7413 JL7109 R7479 C7409 R7480 JL7413 C7544 JL7108 IC7405 C7546 FB7500 PS7501 R7439 JL7111 JL7425... -
Page 115: G Board (Side A)
KS-50R200A/60R200A/70R200A RM-GA006 RM-GA006 RM-GA006 (9) G Board (Side A) • G BOARD SEMICONDUCTOR LOCATION DIODE Side A Side B Side A Side B IC6100 D6000 B-11 D6001 D-10 IC6200 D-11 IC6202 D6002 D-11 IC6300 D6102 IC6301 D6103 B-10 IC6401 D6104... -
Page 116: G Board (Side B)
KS-50R200A/60R200A/70R200A RM-GA006 RM-GA006 RM-GA006 (10) G Board (Side B) • G BOARD SEMICONDUCTOR LOCATION DIODE Side A Side B Side A Side B IC6100 D6000 B-11 D6001 D-10 IC6200 D-11 IC6202 D6002 D-11 IC6300 D6102 IC6301 D6103 B-10 IC6401 D6104... -
Page 117: H1, H2A, H2B, H3, H4 Boards
KS-50R200A/60R200A/70R200A RM-GA006 RM-GA006 RM-GA006 (11) H1, H2A, H2B, H3, H4 Boards 50R200A/60R200A 70R200A – 4-74 –... -
Page 118: S1, S2 Boards
KS-50R200A/60R200A/70R200A RM-GA006 RM-GA006 RM-GA006 (12) S1, S2 Boards 50R200A/60R200A 70R200A – 4-75 –... -
Page 119: T1, T2, T3 Boards
KS-50R200A/60R200A/70R200A RM-GA006 RM-GA006 RM-GA006 (13) T1, T2, T3 Boards 50R200A/60R200A 70R200A – 4-76 –... -
Page 120: Tug Board
KS-50R200A/60R200A/70R200A RM-GA006 RM-GA006 RM-GA006 (14) TUG Board – 4-77 –... -
Page 121: Ug Board
KS-50R200A/60R200A/70R200A RM-GA006 RM-GA006 RM-GA006 (15) UG Board – 4-78 –... -
Page 122: Semiconductors
KS-50R200A/60R200A/70R200A RM-GA006 RM-GA006 RM-GA006 4-6. SEMICONDUCTORS LM75BIM-5/NOPB D2SB60A-F04 D4SBS6 TOP VIEW – 8 pins MM1431ATT – TC7SET32FU(TE85L) DTZ10B MA113-(TX) MMDL914T1 RD5.6SB-T1 5 pins UDZ-TE-17-3.9B UDZ-TE-17-7.5B PQ09RD21J00H ANODE CATHODE ERA22-08KFLB S3L20UF4 PQ30RV11J00H CATHODE ANODE MM3Z11VT1 MM3Z15VT1 MM3Z7V5T1 2SA1576A-T106-QR RD6.2SB 2SB709A-QRS-TX 2SC1623-L5L6... -
Page 123: Circuit Operation Description And Trouble Shooting
KS-50R200A/60R200A/70R200A RM-GA006 RM-GA006 RM-GA006 4-7. CIRCUIT OPERATION DESCRIPTION AND TROUBLE SHOOTING Boards' function KS-60R200A/R50R200A Board Function Fan driver, DE-Micro, TV-Micro/ AV S/W, AV Connector, Main tuner AG/UG CCP-XA, DRC V2.5, IFP2, HDMI/PC input Panel driver,3D-gamma, panel temperature sensor Power supply, Fan driver... - Page 124 KS-50R200A/60R200A/70R200A RM-GA006 RM-GA006 RM-GA006 Microcomputer & NVM Board Microcomputer TV-Micro TV-Micro Data DE-Micro DE-Micro Data DE-Micro Data DE-Micro Data DE-Micro Data WE-Micro EMMA Trouble shooting ( over all ) Trouble See G board part no power, LED turns on ?
- Page 125 KS-50R200A/60R200A/70R200A RM-GA006 RM-GA006 RM-GA006 Description of Power Supply Board. G Board Primary area AC Fuse, Line Filer Circuit. Standby converter , Main Power Relay, AC Rectifier PFC (Power Factor Correction)converter 390V for Lamp power source, for Main converter Secondary area...
- Page 126 KS-50R200A/60R200A/70R200A RM-GA006 RM-GA006 RM-GA006 Power tree DTAU 16.5V IC2602 IC2702 IC2802 IC8252 V9V IC2003 IC8251 TU5V TU5V IC7500 3.3V 3.3V 1.5V IC4201 SET5V SET5V SET2. 5 V IC4200 SET1. SET1. 2 V DRC1.2V IC4204 SET3. SET3. 3 V IC2001 3.3V 3.3V...
- Page 127 KS-50R200A/60R200A/70R200A RM-GA006 RM-GA006 RM-GA006 POWER ON SEQUENCE AC IN Standby converter ON STBY5V output Main converter ON AC Relay Audio_Vcc/11V/6.5V/16.5V out CN6902 pin C24 “H” Standby mode G board Pin C24 "H" is supplied by TV Micro. 9V Out Inrush restriction resistor...
- Page 128 KS-50R200A/60R200A/70R200A RM-GA006 RM-GA006 RM-GA006 PFC converter trouble shooting PFC converter fail on G board (PFC out<380V) PFC out PFC out Standby IC6502 pin8 C6008 (Block) 200V<Vout<350V ? 20V ? Floating 18V fail PFC out<10V? Please check F6000 Check IC6502 R6002/6009/...
- Page 129 KS-50R200A/60R200A/70R200A RM-GA006 RM-GA006 RM-GA006 AG UG Overview for GA PWB information ï4 layer Reflow/Reflow and spot DIP solder process ïFR4 material ïLead/Halogen free Function ïVideo input select 5 CVBS inputs (Video 1/2/3 input, 2 RF input for Main and Sub Tuner)
- Page 130 KS-50R200A/60R200A/70R200A RM-GA006 RM-GA006 RM-GA006 CN8701 TV Micro CN8001 CN8010 CN9150 To S2, T board and ballast IC8403 MB91305 To H1 and H2 board To H3 board To Speaker CN8008 To FXE and TUG board PS2100 Audio AMP IC9157 M61571 CN8007...
- Page 131 KS-50R200A/60R200A/70R200A RM-GA006 RM-GA006 RM-GA006 CN9451 CN9452 To H3 board To H3 board Main Analog Tuner TU9450 BTF-BG412Z Video SW PS2100 IC9700 CXA2239AR Audio SW IC9852 CXA2188Q UG-BOARD A side 06 SXRD AG UG ñBOARD BLOCK DIAGRAM (Audio / Video flow)
- Page 132 KS-50R200A/60R200A/70R200A RM-GA006 RM-GA006 RM-GA006 06 SXRD AG UG ñBOARD BLOCK DIAGRAM (Power map) CN8250 CN8005 To G To B2 B4 / A5 / B5 A20 / B20 / C20 A6 / B6 / A7 A21 / B21 / C21 A15 / B15/ C15...
- Page 133 KS-50R200A/60R200A/70R200A RM-GA006 RM-GA006 RM-GA006 AG Trouble shooting (Video) No Picture LAMP or Ballast DEM LED (D8710) OSD is appeared? Panel is pri m ing? Trouble Is blinking B2 board No picture for all C, B2 board Check DEM (IC8705) Trouble...
- Page 134 KS-50R200A/60R200A/70R200A RM-GA006 RM-GA006 RM-GA006 SXRD Projection TV SXRD-R series Service Training Document B2 board Overview ï B2 board is digital signal processing board. ï All analog signals are digitalized at CCPXA. ï Changing resolution and making better picture at IFP2.
- Page 135 KS-50R200A/60R200A/70R200A RM-GA006 RM-GA006 RM-GA006 B2 Block diagram Main devices A side IC4310 IC4700 HDMI Rx CCP-XA(main) HDMI IC5500 IC4907 CCP-XA(Sub) DRCMFv2.5 Video, Control AG board IC5704 A/D converter Power IC5007 IC5007 IC5202 IFP2 IFP2 DDR mem Video, Control – 4-92 –...
- Page 136 KS-50R200A/60R200A/70R200A RM-GA006 RM-GA006 RM-GA006 Main devices B side IC4704 SD-RAM IC4905 SD-RAM IC4904 SD-RAM IC5200 DDR mem IC5900 LVDS Tx IC5201 Flash mem B2 board power check ï Power source of B2 board is supplied by AG board. Please see ìPower supply Treeî.
- Page 137 KS-50R200A/60R200A/70R200A RM-GA006 RM-GA006 RM-GA006 B2 Power Supply Tree B2 board side B2 board Power Check Jig Land & IC Link JL4206 SET2.5V2 JL4205 SET5V PS4201 3.15A JL4207 DRC1.2V JL4208 SET3.3V PS4202 3.15A PS4203 1A JL4200 SET1.2V PS4200 1A – 4-94 –...
- Page 138 KS-50R200A/60R200A/70R200A RM-GA006 RM-GA006 RM-GA006 B2 board Trouble shooting (Video) Picture Problem NO OSD or Wrong OSD Check connection to FXE Press Menu OSD is OK Same Which Input? Turn DRC mode off IFP2 or LVDS Tx is broken HDMI DRC is broken...
- Page 139 KS-50R200A/60R200A/70R200A RM-GA006 RM-GA006 RM-GA006 C board Overview Function & Key Devices CXD9859GP ($74/$76) Gamma Control White Balance Control Uniformity Control Flame Doublers CXA7007R SXRD Panel Driver EEPROM Memory $AE: Display Engine Micro $A4/A6: Panel Look Up Table Data Temperature Sensor...
- Page 140 KS-50R200A/60R200A/70R200A RM-GA006 RM-GA006 RM-GA006 A16.5V C Board (A Side View) Fuse F2000 NVM($A6) IC2301 IC2502 IC2501 1.5V, 3.3V 2.5V D6.5V CXD9859GP CXA7007R Fuse IC2300 Green IC2700,IC2701 F2001 3.15A IC2400 IC2402 CXD9859GP IC2203 CXA7007R CXA7007R Blue IC2800,IC2801 IC2600,IC2601 NVM($A4) IC2200 IRIS...
- Page 141 KS-50R200A/60R200A/70R200A RM-GA006 RM-GA006 RM-GA006 C board Power Check Point Provided outside To these devices Name FUSE PIN# (CN2002) IC2003, IC2602, IC2702, IC2802 A16.5V F2000 D6.5V F2001 IC2001, IC2005, IC2004, Q2002, Q2005 4, 5, 6 Generated inside Check Supply Name Reg/DC-DC...
- Page 142 KS-50R200A/60R200A/70R200A RM-GA006 RM-GA006 RM-GA006 C Board Trouble shoot No Picture or Abnormal Picture CN2000 Power Lamp&Fan CN2002 Supply are OK? CN2101 is OK? Cable is OK? CN2000 CN2002 CN2101 Cable CHECK JL9000 TEST Menu is Low is OK ? Level? 3.3V...
-
Page 143: Exploded Views
KS-50R200A/60R200A/70R200A SECTION 5 RM-GA006 RM-GA006 RM-GA006 EXPLODED VIEWS NOTE: • Items with no part number and no • Items marked " " are not stocked since The components identified by shading and description are not stocked because they they are seldom required for routine mark are critical for safety. -
Page 144: Screen, Covers (70R200A)
KS-50R200A/60R200A/70R200A RM-GA006 RM-GA006 RM-GA006 2. SCREEN, COVERS (70R200A) REF. NO. PART NO. DESCRIPTION REMARK ––––––––– REF. NO. PART NO. DESCRIPTION REMARK –––––––– ––––––––– ––––––––––––– –––––––– ––––––––– ––––––––––––– ––––––––– A-1219-004-A SCREEN FRM BEZEL(70) ASSY (70R200A) 4-100-506-01 COIN SCREW (DIA.16) (70R200A) A-1216-294-A SPEAKER BOX(L) ASSY (70R200A) -
Page 145: Bottom Block-1 (50R200A/60R200A)
KS-50R200A/60R200A/70R200A RM-GA006 RM-GA006 RM-GA006 3. BOTTOM BLOCK-1 (50R200A/60R200A) Main chassis assembly The components identified by shading and mark are critical for safety. Replace only with part number specified. REF. NO. PART NO. DESCRIPTION REMARK ––––––––– REF. NO. PART NO. DESCRIPTION REMARK ––––––––... -
Page 146: Bottom Block-1 (70R200A)
KS-50R200A/60R200A/70R200A RM-GA006 RM-GA006 RM-GA006 4. BOTTOM BLOCK-1 (70R200A) Main chassis assembly The components identified by shading and mark are critical for safety. Replace only with part number specified. REF. NO. PART NO. DESCRIPTION REMARK ––––––––– REF. NO. PART NO. DESCRIPTION REMARK ––––––––... -
Page 147: Bottom Block-2 (50R200A/60R200A)
KS-50R200A/60R200A/70R200A RM-GA006 RM-GA006 RM-GA006 5. BOTTOM BLOCK-2 (50R200A/60R200A) The components identified by shading and mark are critical for safety. Replace only with part number specified. REF. NO. PART NO. DESCRIPTION REMARK ––––––––– REF. NO. PART NO. DESCRIPTION REMARK –––––––– –––––––––... -
Page 148: Bottom Block-2 (70R200A)
KS-50R200A/60R200A/70R200A RM-GA006 RM-GA006 RM-GA006 6. BOTTOM BLOCK-2 (70R200A) The components identified by shading and mark are critical for safety. Replace only with part number specified. REF. NO. PART NO. DESCRIPTION REMARK ––––––––– REF. NO. PART NO. DESCRIPTION REMARK –––––––– –––––––––... -
Page 149: Main Chassis Assembly
KS-50R200A/60R200A/70R200A RM-GA006 RM-GA006 RM-GA006 7. MAIN CHASSIS ASSEMBLY Note: It is necessory to update the firmware by Memory Stick in case of replacing AG board, B2 board and FXE board. (See 3-5. HOW TO UPDATE FIRMWARE BY MEMORY STICK on page 3-3.) REF. - Page 150 KS-50R200A/60R200A/70R200A SECTION 6 RM-GA006 RM-GA006 RM-GA006 ELECTRICAL PARTS LIST • Items marked " * " are not stocked since • RESISTORS Electrical parts list of the specified boards for board they are seldom required for routine replacement service are not included in this All resistors are in ohms section.
- Page 151 KS-50R200A/60R200A/70R200A RM-GA006 RM-GA006 RM-GA006 REF. NO. PART NO. DESCRIPTION REMARK REF. NO. PART NO. DESCRIPTION REMARK ––––––– –––––––– ––––––––––– ––––––– ––––––– –––––––– ––––––––––– ––––––– C8454 1-100-905-11 CERAMIC CHIP 0.001uF 10% 50V C8959 1-100-567-81 CERAMIC CHIP 0.01uF 10% 25V C8455 1-100-916-11 CERAMIC CHIP 0.1uF...
- Page 152 KS-50R200A/60R200A/70R200A RM-GA006 RM-GA006 RM-GA006 REF. NO. PART NO. DESCRIPTION REMARK REF. NO. PART NO. DESCRIPTION REMARK ––––––– –––––––– ––––––––––– ––––––– ––––––– –––––––– ––––––––––– ––––––– C9215 1-164-004-11 CERAMIC CHIP 0.1uF 10% 25V C9055 1-100-916-11 CERAMIC CHIP 0.1uF 10% 16V C9216 1-163-275-11 CERAMIC CHIP 0.001uF...
- Page 153 KS-50R200A/60R200A/70R200A RM-GA006 RM-GA006 RM-GA006 REF. NO. PART NO. DESCRIPTION REMARK REF. NO. PART NO. DESCRIPTION REMARK ––––––– –––––––– ––––––––––– ––––––– ––––––– –––––––– ––––––––––– ––––––– D8707 6-500-335-01 DIODE MC2838-T112-1 FB8050 1-469-082-21 INDUCTOR, FERRITE BEAD (1005) D8710 8-719-045-61 DIODE SEC1901C FB8051 1-469-082-21 INDUCTOR, FERRITE BEAD (1005)
- Page 154 KS-50R200A/60R200A/70R200A RM-GA006 RM-GA006 RM-GA006 REF. NO. PART NO. DESCRIPTION REMARK REF. NO. PART NO. DESCRIPTION REMARK ––––––– –––––––– ––––––––––– ––––––– ––––––– –––––––– ––––––––––– ––––––– < IC > L9151 1-412-058-11 INDUCTOR 10uH IC8001 6-706-489-01 IC TC7SH32FU (T5RSOYJF) L9152 1-412-058-11 INDUCTOR 10uH...
- Page 155 KS-50R200A/60R200A/70R200A RM-GA006 RM-GA006 RM-GA006 REF. NO. PART NO. DESCRIPTION REMARK REF. NO. PART NO. DESCRIPTION REMARK ––––––– –––––––– ––––––––––– ––––––– ––––––– –––––––– ––––––––––– ––––––– Q8955 8-729-421-19 TRANSISTOR UN2213 R8064 1-218-990-81 SHORT CHIP R8065 1-218-990-81 SHORT CHIP Q8956 8-729-421-19 TRANSISTOR UN2213...
- Page 156 KS-50R200A/60R200A/70R200A RM-GA006 RM-GA006 RM-GA006 REF. NO. PART NO. DESCRIPTION REMARK REF. NO. PART NO. DESCRIPTION REMARK ––––––– –––––––– ––––––––––– ––––––– ––––––– –––––––– ––––––––––– ––––––– R8155 1-218-990-81 SHORT CHIP R8292 1-208-683-11 METAL CHIP 0.50% 1/16W R8156 1-218-990-81 SHORT CHIP R8293 1-208-683-11 METAL CHIP 0.50% 1/16W...
- Page 157 KS-50R200A/60R200A/70R200A RM-GA006 RM-GA006 RM-GA006 REF. NO. PART NO. DESCRIPTION REMARK REF. NO. PART NO. DESCRIPTION REMARK ––––––– –––––––– ––––––––––– ––––––– ––––––– –––––––– ––––––––––– ––––––– R8391 1-218-990-81 SHORT CHIP R8477 1-218-990-81 SHORT CHIP R8393 1-218-990-81 SHORT CHIP R8478 1-216-825-11 METAL CHIP 2.2K...
- Page 158 KS-50R200A/60R200A/70R200A RM-GA006 RM-GA006 RM-GA006 REF. NO. REF. NO. PART NO. PART NO. DESCRIPTION DESCRIPTION REMARK REMARK REF. NO. PART NO. DESCRIPTION REMARK ––––––– –––––––– ––––––––––– ––––––– ––––––– –––––––– ––––––––––– ––––––– R8557 1-218-941-81 RES-CHIP 1/16W R8629 1-218-949-11 RES-CHIP 1/16W R8632 1-218-949-11 RES-CHIP...
- Page 159 KS-50R200A/60R200A/70R200A RM-GA006 RM-GA006 RM-GA006 REF. NO. PART NO. DESCRIPTION REMARK REF. NO. PART NO. DESCRIPTION REMARK ––––––– –––––––– ––––––––––– ––––––– ––––––– –––––––– ––––––––––– ––––––– R8745 1-218-965-11 RES-CHIP 1/16W R8836 1-218-965-11 RES-CHIP 1/16W R8746 1-218-965-11 RES-CHIP 1/16W R8837 1-218-933-11 RES-CHIP 1/16W...
- Page 160 KS-50R200A/60R200A/70R200A RM-GA006 RM-GA006 RM-GA006 REF. NO. PART NO. DESCRIPTION REMARK REF. NO. PART NO. DESCRIPTION REMARK ––––––– –––––––– ––––––––––– ––––––– ––––––– –––––––– ––––––––––– ––––––– R9073 1-218-990-81 SHORT CHIP R8956 1-218-937-11 RES-CHIP 1/16W R9074 1-218-990-81 SHORT CHIP R8961 1-218-937-11 RES-CHIP 1/16W...
- Page 161 KS-50R200A/60R200A/70R200A RM-GA006 RM-GA006 RM-GA006 REF. NO. PART NO. DESCRIPTION REMARK REF. NO. PART NO. DESCRIPTION REMARK ––––––– –––––––– ––––––––––– ––––––– ––––––– –––––––– ––––––––––– ––––––– R9171 1-218-953-11 RES-CHIP 1/16W R9266 1-216-864-11 SHORT CHIP R9172 1-218-963-11 RES-CHIP 6.8K 1/16W R9272 1-218-973-11 RES-CHIP...
- Page 162 KS-50R200A/60R200A/70R200A RM-GA006 RM-GA006 RM-GA006 REF. NO. PART NO. DESCRIPTION REMARK REF. NO. PART NO. DESCRIPTION REMARK ––––––– –––––––– ––––––––––– ––––––– ––––––– –––––––– ––––––––––– ––––––– C4217 1-100-907-11 CERAMIC CHIP 0.1uF 10% 10V C4325 1-100-909-11 CERAMIC CHIP 10uF 10% 6.3V C4218 1-164-227-11 CERAMIC CHIP 0.022uF...
- Page 163 KS-50R200A/60R200A/70R200A RM-GA006 RM-GA006 RM-GA006 REF. NO. PART NO. DESCRIPTION REMARK REF. NO. PART NO. DESCRIPTION REMARK ––––––– –––––––– ––––––––––– ––––––– ––––––– –––––––– ––––––––––– ––––––– C4705 1-131-661-21 ELECT CHIP 100uF 20% 10V C4782 1-100-906-11 CERAMIC CHIP 0.01uF 10% 16V C4706 1-131-661-21 ELECT CHIP...
- Page 164 KS-50R200A/60R200A/70R200A RM-GA006 RM-GA006 RM-GA006 REF. NO. PART NO. DESCRIPTION REMARK REF. NO. PART NO. DESCRIPTION REMARK ––––––– –––––––– ––––––––––– ––––––– ––––––– –––––––– ––––––––––– ––––––– C4959 1-100-907-11 CERAMIC CHIP 0.1uF 10% 10V C5030 1-100-906-11 CERAMIC CHIP 0.01uF 10% 16V C4962 1-100-906-11 CERAMIC CHIP 0.01uF...
- Page 165 KS-50R200A/60R200A/70R200A RM-GA006 RM-GA006 RM-GA006 REF. NO. PART NO. DESCRIPTION REMARK REF. NO. PART NO. DESCRIPTION REMARK ––––––– –––––––– ––––––––––– ––––––– ––––––– –––––––– ––––––––––– ––––––– C5103 1-100-906-11 CERAMIC CHIP 0.01uF 10% 16V C5246 1-126-412-11 ELECT CHIP 220uF 20% 4V C5104 1-100-906-11 CERAMIC CHIP 0.01uF...
- Page 166 KS-50R200A/60R200A/70R200A RM-GA006 RM-GA006 RM-GA006 REF. NO. PART NO. DESCRIPTION REMARK REF. NO. PART NO. DESCRIPTION REMARK ––––––– –––––––– ––––––––––– ––––––– ––––––– –––––––– ––––––––––– ––––––– C5327 1-100-906-11 CERAMIC CHIP 0.01uF 10% 16V C5560 1-100-906-11 CERAMIC CHIP 0.01uF 10% 16V C5328 1-100-906-11 CERAMIC CHIP 0.01uF...
- Page 167 KS-50R200A/60R200A/70R200A RM-GA006 RM-GA006 RM-GA006 REF. NO. PART NO. DESCRIPTION REMARK REF. NO. PART NO. DESCRIPTION REMARK ––––––– –––––––– ––––––––––– ––––––– ––––––– –––––––– ––––––––––– ––––––– C5775 1-162-968-11 CERAMIC CHIP 0.0047uF 10% 50V D4212 8-719-069-29 DIODE RB520S-30TE61 C5776 1-100-906-11 CERAMIC CHIP 0.01uF...
- Page 168 KS-50R200A/60R200A/70R200A RM-GA006 RM-GA006 RM-GA006 REF. NO. PART NO. DESCRIPTION REMARK REF. NO. PART NO. DESCRIPTION REMARK ––––––– –––––––– ––––––––––– ––––––– ––––––– –––––––– ––––––––––– ––––––– FB4210 1-400-580-21 FERRITE, EMI (SMD) IC5500 8-753-252-69 IC CXD3815Q FB4900 1-400-499-21 FERRITE, EMI (SMD) IC5501 6-705-529-01 IC LMH6658MMX/J5000172...
- Page 169 KS-50R200A/60R200A/70R200A RM-GA006 RM-GA006 RM-GA006 REF. NO. PART NO. DESCRIPTION REMARK REF. NO. PART NO. DESCRIPTION REMARK ––––––– –––––––– ––––––––––– ––––––– ––––––– –––––––– ––––––––––– ––––––– L5503 1-469-551-21 INDUCTOR 2.2uH Q4712 6-550-586-01 TRANSISTOR 2PA1576R-115 Q4713 6-550-586-01 TRANSISTOR 2PA1576R-115 L5504 1-469-555-21 INDUCTOR 10uH...
- Page 170 KS-50R200A/60R200A/70R200A RM-GA006 RM-GA006 RM-GA006 REF. NO. PART NO. DESCRIPTION REMARK REF. NO. PART NO. DESCRIPTION REMARK ––––––– –––––––– ––––––––––– ––––––– ––––––– –––––––– ––––––––––– ––––––– R4041 1-218-990-81 SHORT CHIP R4125 1-218-990-81 SHORT CHIP R4042 1-218-990-81 SHORT CHIP R4126 1-218-990-81 SHORT CHIP...
- Page 171 KS-50R200A/60R200A/70R200A RM-GA006 RM-GA006 RM-GA006 REF. NO. PART NO. DESCRIPTION REMARK REF. NO. PART NO. DESCRIPTION REMARK ––––––– –––––––– ––––––––––– ––––––– ––––––– –––––––– ––––––––––– ––––––– R4265 1-218-990-81 SHORT CHIP R4359 1-218-929-11 RES-CHIP 1/16W R4268 1-218-985-11 RES-CHIP 470K 1/16W R4360 1-218-929-11 RES-CHIP...
- Page 172 KS-50R200A/60R200A/70R200A RM-GA006 RM-GA006 RM-GA006 REF. NO. PART NO. DESCRIPTION REMARK REF. NO. PART NO. DESCRIPTION REMARK ––––––– –––––––– ––––––––––– ––––––– ––––––– –––––––– ––––––––––– ––––––– R4708 1-218-958-11 RES-CHIP 2.7K 1/16W R4804 1-218-941-81 RES-CHIP 1/16W R4709 1-218-929-11 RES-CHIP 1/16W R4805 1-218-953-11 RES-CHIP...
- Page 173 KS-50R200A/60R200A/70R200A RM-GA006 RM-GA006 RM-GA006 REF. NO. PART NO. DESCRIPTION REMARK REF. NO. PART NO. DESCRIPTION REMARK ––––––– –––––––– ––––––––––– ––––––– ––––––– –––––––– ––––––––––– ––––––– R5068 1-218-965-11 RES-CHIP 1/16W R4947 1-218-941-81 RES-CHIP 1/16W R5071 1-218-965-11 RES-CHIP 1/16W R4948 1-218-941-81 RES-CHIP 1/16W...
- Page 174 KS-50R200A/60R200A/70R200A RM-GA006 RM-GA006 RM-GA006 REF. NO. PART NO. DESCRIPTION REMARK REF. NO. PART NO. DESCRIPTION REMARK ––––––– –––––––– ––––––––––– ––––––– ––––––– –––––––– ––––––––––– ––––––– R5232 1-218-937-11 RES-CHIP 1/16W R5354 1-218-935-11 RES-CHIP 1/16W R5233 1-218-990-81 SHORT CHIP R5355 1-218-935-11 RES-CHIP 1/16W...
- Page 175 KS-50R200A/60R200A/70R200A RM-GA006 RM-GA006 RM-GA006 REF. NO. PART NO. DESCRIPTION REMARK REF. NO. PART NO. DESCRIPTION REMARK ––––––– –––––––– ––––––––––– ––––––– ––––––– –––––––– ––––––––––– ––––––– R5533 1-218-937-11 RES-CHIP 1/16W R5822 1-218-990-81 SHORT CHIP R5534 1-218-945-11 RES-CHIP 1/16W R5823 1-218-990-81 SHORT CHIP...
- Page 176 KS-50R200A/60R200A/70R200A RM-GA006 RM-GA006 RM-GA006 REF. NO. PART NO. DESCRIPTION REMARK REF. NO. PART NO. DESCRIPTION REMARK ––––––– –––––––– ––––––––––– ––––––– ––––––– –––––––– ––––––––––– ––––––– RB4710 1-234-372-11 RES, NETWORK 100 (1005X4) RB5248 1-234-371-21 RES, NETWORK 47 (1005X4) RB4711 1-234-372-11 RES, NETWORK 100 (1005X4)
- Page 177 KS-50R200A/60R200A/70R200A RM-GA006 RM-GA006 RM-GA006 REF. NO. PART NO. DESCRIPTION REMARK REF. NO. PART NO. DESCRIPTION REMARK ––––––– –––––––– ––––––––––– ––––––– ––––––– –––––––– ––––––––––– ––––––– C2206 1-112-777-11 CERAMIC CHIP 0.01uF 10% 25V C BOARD ********* C2207 1-112-777-11 CERAMIC CHIP 0.01uF 10% 25V...
- Page 178 KS-50R200A/60R200A/70R200A RM-GA006 RM-GA006 RM-GA006 REF. NO. PART NO. DESCRIPTION REMARK REF. NO. PART NO. DESCRIPTION REMARK ––––––– –––––––– ––––––––––– ––––––– ––––––– –––––––– ––––––––––– ––––––– C2312 1-112-777-11 CERAMIC CHIP 0.01uF 10% 25V C2417 1-100-909-11 CERAMIC CHIP 10uF 10% 6.3V C2313 1-112-777-11 CERAMIC CHIP 0.01uF...
- Page 179 KS-50R200A/60R200A/70R200A RM-GA006 RM-GA006 RM-GA006 REF. NO. PART NO. DESCRIPTION REMARK REF. NO. PART NO. DESCRIPTION REMARK ––––––– –––––––– ––––––––––– ––––––– ––––––– –––––––– ––––––––––– ––––––– C2520 1-100-909-11 CERAMIC CHIP 10uF 10% 6.3V C2611 1-112-777-11 CERAMIC CHIP 0.01uF 10% 25V C2521 1-100-909-11 CERAMIC CHIP 10uF 10% 6.3V...
- Page 180 KS-50R200A/60R200A/70R200A RM-GA006 RM-GA006 RM-GA006 REF. NO. PART NO. DESCRIPTION REMARK REF. NO. PART NO. DESCRIPTION REMARK ––––––– –––––––– ––––––––––– ––––––– ––––––– –––––––– ––––––––––– ––––––– C2718 1-112-777-11 CERAMIC CHIP 0.01uF 10% 25V C2828 1-100-911-11 CERAMIC CHIP 4.7uF 10% 25V C2829 1-100-911-11 CERAMIC CHIP 4.7uF...
- Page 181 KS-50R200A/60R200A/70R200A RM-GA006 RM-GA006 RM-GA006 REF. NO. PART NO. DESCRIPTION REMARK REF. NO. PART NO. DESCRIPTION REMARK ––––––– –––––––– ––––––––––– ––––––– ––––––– –––––––– ––––––––––– ––––––– D2006 6-500-294-01 DIODE PTZ-TE25-3.9B IC2101 6-708-739-01 IC THC63LVD104S-T D2007 6-500-294-01 DIODE PTZ-TE25-3.9B IC2200 6-702-985-01 IC M24256-BWMN6T...
- Page 182 KS-50R200A/60R200A/70R200A RM-GA006 RM-GA006 RM-GA006 REF. NO. PART NO. DESCRIPTION REMARK REF. NO. PART NO. DESCRIPTION REMARK ––––––– –––––––– ––––––––––– ––––––– ––––––– –––––––– ––––––––––– ––––––– R2013 1-218-990-81 SHORT CHIP L2606 1-469-551-21 INDUCTOR 2.2uH R2015 1-218-953-11 RES-CHIP 1/16W L2607 1-469-551-21 INDUCTOR 2.2uH...
- Page 183 KS-50R200A/60R200A/70R200A RM-GA006 RM-GA006 RM-GA006 REF. NO. PART NO. DESCRIPTION REMARK REF. NO. PART NO. DESCRIPTION REMARK ––––––– –––––––– ––––––––––– ––––––– ––––––– –––––––– ––––––––––– ––––––– R2261 1-218-929-11 RES-CHIP 1/16W R2136 1-218-935-11 RES-CHIP 1/16W R2262 1-218-929-11 RES-CHIP 1/16W R2138 1-218-969-11 RES-CHIP 1/16W...
- Page 184 KS-50R200A/60R200A/70R200A RM-GA006 RM-GA006 RM-GA006 REF. NO. PART NO. DESCRIPTION REMARK REF. NO. PART NO. DESCRIPTION REMARK ––––––– –––––––– ––––––––––– ––––––– ––––––– –––––––– ––––––––––– ––––––– R2528 1-218-937-11 RES-CHIP 1/16W R2360 1-218-990-81 SHORT CHIP R2529 1-218-937-11 RES-CHIP 1/16W R2361 1-218-947-11 RES-CHIP 1/16W...
- Page 185 KS-50R200A/60R200A/70R200A RM-GA006 RM-GA006 RM-GA006 REF. NO. PART NO. DESCRIPTION REMARK REF. NO. PART NO. DESCRIPTION REMARK ––––––– –––––––– ––––––––––– ––––––– ––––––– –––––––– ––––––––––– ––––––– R2666 1-218-965-11 RES-CHIP 1/16W R2744 1-218-941-81 RES-CHIP 1/16W R2745 1-218-941-81 RES-CHIP 1/16W R2667 1-218-990-81 SHORT CHIP...
- Page 186 KS-50R200A/60R200A/70R200A RM-GA006 RM-GA006 RM-GA006 REF. NO. PART NO. DESCRIPTION REMARK REF. NO. PART NO. DESCRIPTION REMARK ––––––– –––––––– ––––––––––– ––––––– ––––––– –––––––– ––––––––––– ––––––– R2833 1-218-967-11 RES-CHIP 1/16W R2928 1-218-692-11 METAL CHIP 0.50% 1/10W R2929 1-218-716-11 METAL CHIP 0.50% 1/10W...
- Page 187 KS-50R200A/60R200A/70R200A RM-GA006 RM-GA006 RM-GA006 REF. NO. PART NO. DESCRIPTION REMARK REF. NO. PART NO. DESCRIPTION REMARK ––––––– –––––––– ––––––––––– ––––––– ––––––– –––––––– ––––––––––– ––––––– RB2326 1-234-944-21 RES, NETWORK 47 (1005X4) RB2125 1-234-379-21 RES, NETWORK 22K (1005X4) RB2327 1-234-945-21 RES, NETWORK 100 (1005X4)
- Page 188 KS-50R200A/60R200A/70R200A RM-GA006 RM-GA006 RM-GA006 REF. NO. PART NO. DESCRIPTION REMARK REF. NO. PART NO. DESCRIPTION REMARK ––––––– –––––––– ––––––––––– ––––––– ––––––– –––––––– ––––––––––– ––––––– RB2525 1-234-944-21 RES, NETWORK 47 (1005X4) C7204 1-117-720-11 CERAMIC CHIP 4.7uF RB2526 1-234-944-21 RES, NETWORK 47 (1005X4)
- Page 189 KS-50R200A/60R200A/70R200A RM-GA006 RM-GA006 RM-GA006 REF. NO. PART NO. DESCRIPTION REMARK REF. NO. PART NO. DESCRIPTION REMARK ––––––– –––––––– ––––––––––– ––––––– ––––––– –––––––– ––––––––––– ––––––– D7507 6-500-294-01 DIODE PTZ-TE25-3.9B R7141 1-218-965-11 RES-CHIP 1/16W D7508 8-719-069-29 DIODE RB520S-30TE61 R7142 1-218-965-11 RES-CHIP 1/16W <...
- Page 190 KS-50R200A/60R200A/70R200A RM-GA006 RM-GA006 RM-GA006 FXE G REF. NO. PART NO. DESCRIPTION REMARK REF. NO. PART NO. DESCRIPTION REMARK ––––––– –––––––– ––––––––––– ––––––– ––––––– –––––––– ––––––––––– ––––––– R7413 1-218-965-11 RES-CHIP 1/16W C6010 1-137-673-11 ELECT (BLOCK) 330uF 20% 450V R7414 1-218-965-11 RES-CHIP...
- Page 191 KS-50R200A/60R200A/70R200A RM-GA006 RM-GA006 RM-GA006 REF. NO. PART NO. DESCRIPTION REMARK REF. NO. PART NO. DESCRIPTION REMARK ––––––– –––––––– ––––––––––– ––––––– ––––––– –––––––– ––––––––––– ––––––– C6413 1-162-964-11 CERAMIC CHIP 0.001uF 10% 50V D6106 8-719-081-67 DIODE M1FM3 C6500 1-117-227-11 MYLAR 10% 450V...
- Page 192 KS-50R200A/60R200A/70R200A RM-GA006 RM-GA006 RM-GA006 REF. NO. PART NO. DESCRIPTION REMARK REF. NO. PART NO. DESCRIPTION REMARK ––––––– –––––––– ––––––––––– ––––––– ––––––– –––––––– ––––––––––– ––––––– IC6502 6-709-192-01 IC FA5501AN-D1-TE1 R6110 1-218-847-11 METAL CHIP 0.50% 1/10W IC6900 6-704-967-01 IC PQ20RX11J00H R6111 1-218-877-11 METAL CHIP 0.50% 1/10W...
- Page 193 KS-50R200A/60R200A/70R200A RM-GA006 RM-GA006 RM-GA006 REF. NO. PART NO. DESCRIPTION REMARK REF. NO. PART NO. DESCRIPTION REMARK ––––––– –––––––– ––––––––––– ––––––– ––––––– –––––––– ––––––––––– ––––––– R6455 1-218-903-11 METAL CHIP 220K 0.50% 1/10W R6957 1-216-864-11 SHORT CHIP R6456 1-218-871-11 METAL CHIP 0.50% 1/10W...
- Page 194 1-162-970-11 CERAMIC CHIP 0.01uF 10% 25V IC3080 6-703-744-01 IC GP1UE26SXKOF C3058 1-162-970-11 CERAMIC CHIP 0.01uF 10% 25V IC3081 6-600-447-01 IC TPS853 (SONY) C3059 1-100-597-91 CERAMIC CHIP 0.1uF 10% 25V < TRANSISTOR > C3060 1-128-993-21 ELECT CHIP 22uF 20% 10V C3061...
- Page 195 1-216-833-11 METAL CHIP 1/10W < DIODE > R3206 1-216-864-11 SHORT CHIP ************************************************************ D3300 8-719-058-85 DIODE SLR-56VC3F D3301 6-500-672-11 DIODE TLRMHGH48M (SONY) A-1174-526-A T1 BOARD, COMPLETE (70R200A) D3304 6-500-672-11 DIODE TLRMHGH48M (SONY) ********************* < TRANSISTOR > < SWITCH > Q3300 8-729-028-73 TRANSISTOR DTA114EUA-T106...
- Page 196 KS-50R200A/60R200A/70R200A RM-GA006 RM-GA006 RM-GA006 TUG UG REF. NO. PART NO. DESCRIPTION REMARK REF. NO. PART NO. DESCRIPTION REMARK ––––––– –––––––– ––––––––––– ––––––– ––––––– –––––––– ––––––––––– ––––––– C9458 1-117-681-11 ELECT CHIP 100uF 20% 16V A-1174-520-A TUG BOARD, COMPLETE C9461 1-100-916-11 CERAMIC CHIP 0.1uF...
- Page 197 KS-50R200A/60R200A/70R200A RM-GA006 RM-GA006 RM-GA006 REF. NO. PART NO. DESCRIPTION REMARK REF. NO. PART NO. DESCRIPTION REMARK ––––––– –––––––– ––––––––––– ––––––– ––––––– –––––––– ––––––––––– ––––––– C9719 1-100-916-11 CERAMIC CHIP 0.1uF 10% 16V C9856 1-100-916-11 CERAMIC CHIP 0.1uF 10% 16V C9720 1-100-916-11 CERAMIC CHIP 0.1uF...
- Page 198 KS-50R200A/60R200A/70R200A RM-GA006 RM-GA006 RM-GA006 REF. NO. PART NO. DESCRIPTION REMARK REF. NO. PART NO. DESCRIPTION REMARK ––––––– –––––––– ––––––––––– ––––––– ––––––– –––––––– ––––––––––– ––––––– FB9553 1-400-333-21 FERRITE, EMI (SMD) (1608) R9460 1-218-990-81 SHORT CHIP FB9554 1-400-333-21 FERRITE, EMI (SMD) (1608)
- Page 199 KS-50R200A/60R200A/70R200A RM-GA006 RM-GA006 RM-GA006 REF. NO. PART NO. DESCRIPTION REMARK REF. NO. PART NO. DESCRIPTION REMARK ––––––– –––––––– ––––––––––– ––––––– ––––––– –––––––– ––––––––––– ––––––– R9575 1-216-853-11 METAL CHIP 470K 1/10W R9706 1-218-983-11 RES-CHIP 330K 1/16W R9576 1-216-864-11 SHORT CHIP R9707...
- Page 200 KS-50R200A/60R200A/70R200A RM-GA006 RM-GA006 RM-GA006 REF. NO. PART NO. DESCRIPTION REMARK REF. NO. PART NO. DESCRIPTION REMARK ––––––– –––––––– ––––––––––– ––––––– ––––––– –––––––– ––––––––––– ––––––– R9817 1-216-819-11 METAL CHIP 1/10W R9919 1-208-711-11 METAL CHIP 0.50% 1/16W R9820 1-218-839-11 METAL CHIP 0.50% 1/10W...
- Page 201 A-1216-293-A SIDE PANEL(R) ASSY (70R200A) < REMOTE COMMANDER > 1-479-935-11 REMOTE COMMANDER (RM-GA006) 9-885-105-15 COVER, BATTERY 9-885-108-09 COVER, SIDE (FOR RM-GA006) < OPTIONAL ACCESSORIES > 93-0876-20 LAMP XL-5100 (50R200A/60R200A) 93-0887-10 LAMP XL-5300 (70R200A) ************************************************************ Sony EMCS Corporation English 2006IR02-1 Ichinomiya TEC 9-883-602-02 ©2006.9...
- Page 202 2-691-651-13(2) SXRD Projection TV Operating Instructions Before operating the TV, please read the “Safety information” section of this manual. Retain this manual for future reference. KS-70R200A KS-60R200A KS-50R200A © 2006 Sony Corporation...
- Page 203 Introduction • To prevent the risk of electric shock, if the AC power cord Thank you for choosing this Sony product. or plug is damaged, do not insert the plug into the AC Before operating the TV, please read this manual power outlet.
- Page 204 Table of Contents Start-up Guide Safety information ........................9 Overview of the remote ......................12 Overview of the TV buttons and indicators ................14 Watching TV Watching TV..........................16 Viewing pictures from connected equipment ................18 Using MENU Functions Navigating through menus ......................20 Picture menu ...........................21 Sound menu..........................24 Screen menu...........................26 Setup menu..........................28...
-
Page 205: Start-Up Guide
Model Viewing distance KS-70R200A min. 2.4 m KS-60R200A min. 2.2 m KS-50R200A min. 2.0 m KS-70R200A Horizontal Viewing Area Carrying the TV requires at least three people. Do not hold by the pedestal or the speakers of the TV. Doing so may cause these parts to break off. - Page 206 Preventing the TV from toppling over Installing the TV against a wall Keep the TV at least 10 cm away from the wall to KS-60R200A/50R200A provide proper ventilation. Blocking the ventilation opening of the cooling fan may damage the TV. Allow this much space 10 cm SU-GW12...
- Page 207 2: Connecting an 3: Inserting batteries antenna/VCR into the remote Push and slide to open. Connecting an antenna only Antenna cable (not supplied) Notes • Observe the correct polarity when inserting batteries. • Do not use different types of batteries together or mix old and new batteries.
- Page 208 Press to select the language 4: Selecting the displayed on the menu screens, then press language The message confirming the TV start auto-tuning appears on the screen, then go to “5: Auto tuning the TV”. Connect the TV to your AC power outlet (110-240 V AC, 50/60 Hz).
- Page 209 Press MENU to exit. 5: Auto tuning the TV The TV has now tuned in all the available channels. Press to select the desired setting in The TV will search for and store all available TV “Display this menu next time ?” dialog, then channels.
-
Page 210: Safety Information
• Use the TV at temperatures between 5ºC and 35ºC. • If the TV is transported directly from a cold to a warm Safety information location, or if the room temperature has changed suddenly, the picture may be blurred or show poor color. This is because moisture has condensed on the mirror or To prevent fire or shock hazard, do not expose the TV to rain lenses inside. - Page 211 Carry the TV in the specified manner • Unplug the AC power cord during lightning storm. If you carry the TV in a manner other than the specified manner and without the specified number of persons, it may drop and a serious injury may be caused. Be sure to follow the instructions mentioned below.
- Page 212 About the TV • Although the TV is made with high-precision technology, black dots may appear or bright points of light (red, blue, or green) may appear constantly on the screen. This is a structural property of the panel and is not a malfunction. •...
-
Page 213: Overview Of The Remote
Overview of the remote 1 TV "/1 – TV standby Switches off the TV temporarily and on from standby mode. 2 Number buttons • In TV mode: Selects channels. For channel numbers 10 and above, enter the second digit within two seconds. •... - Page 214 • H : Plays a program at a normal speed. • X : Pauses playback. • x : Stops the playback. • VISUAL SEARCH : Only for Sony DVD recorders with the visual search function. For details, see the operating instructions supplied with the DVD recorder.
-
Page 215: Overview Of The Tv Buttons And Indicators
Overview of the TV buttons and indicators 1 PROG +/-/ • In TV mode: Selects the next (+) or previous (-) channel. • In TV menu: Moves through the options up ) or down ( 2 2 +/-/ • In TV mode: Increases (+) or decreases (-) the volume. - Page 216 “R” (right) and “L”(left) are attached to the • When the projection lamp wears out, the screen goes dark. corresponding sides of the TV. Replace the lamp with a new Sony XL-5100 replacement lamp (for KS-60R200A/50R200A, not supplied) or XL- 5300 replacemant lamp (for KS-70R200A, supplied).
-
Page 217: Watching Tv
Watching TV Watching TV Press the number buttons or PROG +/- to select a TV channel. To select channel numbers 10 and above using the number buttons, enter the second digit within two seconds. Additional operations Do this Switch off the TV Press TV "/1. - Page 218 To freeze the picture – Picture freeze Tips • Alternatively, you can set “Auto Wide” to “On”. The TV You can freeze the current picture to make a note of a will automatically select the best mode to suit the input telephone number or recipe.
-
Page 219: Viewing Pictures From Connected Equipment
Do this Viewing pictures from Switch the active Press G/g. screen (the frame of connected equipment the selected screen turns green) Change the program Press PROG +/-. Switch on the connected equipment, then on the active screen press repeatedly until the correct input symbol (see below) appears on the Change the program Press F/f. - Page 220 To use the Tools menu Press TOOLS to display the following options when viewing pictures from connected equipment other than a PC. Options Description Close Closes the Tools menu. Twin Picture See page 17. (or Single Picture) Picture Mode See page 21. Sound Mode See page 24.
-
Page 221: Using Menu Functions
Using MENU Functions Navigating through Icon Description Program List menus Displays available TV channels. • To watch the desired channel, select “MENU” allows you to enjoy various convenient the channel, then press features of this TV. You can easily select channels or •... -
Page 222: Picture Menu
Picture menu You can select the options listed below on the Picture menu. Press to select “Settings” on MENU, then press Press to select a menu icon, then press Press to select an option. Target Inputs For the input currently being viewed, select whether to use the common setting or to set each item separately. - Page 223 Picture Increases or decreases picture contrast. Brightness Brightens or darkens the picture. Color Increases or decreases color intensity. Increases or decreases the green tones and red tones. “Hue” can only be adjusted for an NTSC color signal (e.g. U.S.A. video tapes). Color Temperature Adjusts the whiteness of the picture.
- Page 224 DRC Palette Customizes the level of detail (“Reality”) and smoothness (“Clarity”) for each input signal. For example, you can create a custom setting for your cable input’s picture, and create another for your DVD player’s picture. The DRC palette appears. Press to adjust the position of the marker (z).
-
Page 225: Sound Menu
Sound menu You can select the options listed below on the Sound menu. To select options in “Settings”, refer to “Picture menu” (page 21). Target Inputs For the input currently being viewed, select whether to use the common setting or to set each item separately. - Page 226 Dual Sound Selects the sound from the speaker for a stereo or bilingual broadcast. The selection varies, depending on the Broadcasting. Broadcasting Selection NICAM stereo Stereo (stereo sound) Mono (regular sound) NICAM bilingual Main (main sound) Sub (sub sound) Mono (regular sound) NICAM monaural Main (main sound) Mono (regular sound)
-
Page 227: Screen Menu
Screen menu You can select the options listed below on the Screen menu. To select options in “Settings”, refer to “Picture menu” (page 21). Target Inputs For the input currently being viewed, select whether to use the common setting or to set each item separately. - Page 228 Vertical Shift Adjusts the vertical position of the picture when “Wide Mode” is set to “Zoom”. Vertical Size Adjusts the vertical size of the picture when “Wide Mode” is set to “Wide Zoom”.
-
Page 229: Setup Menu
Setup menu You can select the options listed below on the Setup menu. To select options in “Settings”, refer to “Picture menu” (page 21). Timer Settings Sets the timer to switch on/off the TV. Sleep Timer Sets a period of time after which the TV automatically switches itself into standby mode. - Page 230 Cinema Drive Provides smoother picture movement when playing DVD or VCR images taken on film, reducing picture blur and graininess. “Auto 1”: For a stable picture with minimal noise. Set to “Auto 2” if the screen is partially degraded. “Auto 2”: Use this setting for standard use. “Off”: Turns off the “Cinema Drive”...
-
Page 231: Av Setup Menu
AV Setup menu You can select the options listed below on the AV Setup menu. To select options in “Settings”, refer to “Picture menu” (page 21). Video Labels Assigns a name to any equipment connected to the front and rear jacks. The name will be displayed briefly on the screen when the equipment is selected. -
Page 232: Channel Setup Menu
Channel Setup menu You can select the options listed below on the Channel Setup menu. To select options in “Settings”, refer to “Picture menu” (page 21). 1 Digit Direct When “1 Digit Direct” is set to “On”, you can select a channel using one preset number button (0 - 9) on the remote. - Page 233 Manual Program Before selecting “Label”/“AFT”/“Audio Filter”/“Skip”, press PROG +/- to select the program number with the channel. You cannot select a program number that is Preset set to skip. Program TV System Presets program channels manually. Press to select “Program”, then press Press to select the program number you want to manually tune (if tuning a VCR, select channel 00), then press...
-
Page 234: Pc Settings Menu
PC Settings menu You can select the options listed below on the PC Settings menu when the TV is connected to a PC. Press repeatedly until appears on the screen. Press MENU to display the PC settings menu. Note When you connect a PC to your TV for the first time, you may need to adjust the screen display. - Page 235 Color Temperature Adjusts the whiteness of the picture. “Cool”: Gives the white colors a blue tint. “Neutral”: Gives the white colors a neutral tint. “Warm 1”/“Warm 2”: Gives the white colors a red tint. “Warm 2” gives a redder tint than “Warm 1”.
-
Page 236: Using Optional Equipment
Using Optional Equipment Connecting optional equipment You can connect a wide range of optional equipment to your TV. Connecting cables are not supplied. Connecting to the TV (front) To connect Do this S VHS/Hi8/DVC Connect to the video jack camcorder A and the audio jacks 2. - Page 237 Connecting to the TV (rear) For service use only Digital receiver/ DVD player Video game equipment DVD player DVD player with component output Hi-Fi audio equipment DVD player DVD recorder...
-
Page 238: Programing The Remote
Connect to the HDMI IN 1 or 2 DVD player D jack if the equipment has an If you have Sony VCRs/DVDs and Sony DVD Home HDMI jack. The digital video and Theater Systems/Amplifiers, do the following audio signals are input from the procedure to program the remote so that you can equipment. - Page 239 Switch on your equipment and check that the following main functions work. H (playback), x (stop), m (rewind), M (fast forward), channel selection for both VCR and DVDs, TOP MENU/MENU and only for DVDs. If your equipment is not working, or some of the functions do not work Enter the correct code or try the next code listed.
-
Page 240: Additional Information
Electric appliances can cause fire or high temperature, resulting in injury or death. Be sure to follow the instructions below. • Use a Sony XL-5100 replacement lamp (for KS- 60R200A/50R200A, not supplied) or XL-5300 replacemant lamp (for KS-70R200A, supplied) for replacement. - Page 241 Pull out the lamp. Put the new lamp into its place. For KS-60R200A/50R200A, place your For KS-60R200A/50R200A, slide it in index finger through the hoop of the lamp slowly by pressing the PUSH part of the handle and pull it upwards, while placing front corners of the lamp until it stops with your thumb on the dent on the top.
- Page 242 TV. • Consult your Sony dealer for a Sony XL-5100 replacement lamp (for KS-60R200A/50R200A) or XL-5300 replacement lamp (for KS-70R200A).
-
Page 243: Specifications
KS-70R200A: 70 inches HDMI IN 1, 2 KS-60R200A: 60 inches Video: 1080p, 1080i, 720p, 576p, 576i, 480p, 480i KS-50R200A: 50 inches Audio: Two channel linear PCM Power Consumption: 32, 44.1 and 48 kHz, 16, 20 and 24 bits KS-70R200A: 290 W... - Page 244 PC Input Signal Reference Chart Horizontal Vertical Signals Horizontal (Pixel) Vertical (Line) frequency Standard frequency (Hz) (kHz) 31.5 37.5 VESA 31.5 VGA-T SVGA 37.9 VESA Guidelines 46.9 VESA 1024 48.4 VESA Guidelines 1024 56.5 VESA 1024 VESA 1280 44.7 VESA CVT WXGA 1280 47.4...
-
Page 245: Troubleshooting
For example, the indicator flashes three times, then there is a two second break, followed by another three flashes, etc. Press 1 on the TV (front) to switch it off, disconnect the AC power cord, and inform your dealer or Sony service center of how the indicator flashes (number of flashes). When it is not flashing Check the items in the tables below. - Page 246 Problem Cause/Remedy Picture flashes initially when • This is probably caused by the authentication process between HDMI changing to HDMI mode or equipment and the TV. It does not indicate a malfunction. when switching on the TV in HDMI mode A white oval image appears on •...
- Page 247 If no blockage is found, you may need to set Cooling Mode to “High”, otherwise the TV will turn off. With Cooling Mode set to “High”, if the message reappears and the TV turns off again, the TV may need servicing. Call your local Sony service center.
-
Page 248: Index
Index Numerics Sleep Timer 28 Sound menu 24 1 Digit Direct 31 Headphones 35 Sound Mode 24 4:3 Default 26 Horizontal Shift 26 Speaker 29 Hue 22 Specifications 42 Advanced Iris 21 Surround 24 Advanced Settings 23 Intelligent Volume 24 AFT 32 Target Inputs All Reset 29... - Page 249 2691651130 Printed on 100% recycled paper. Printed in Japan...
Need help?
Do you have a question about the KS-50R200A and is the answer not in the manual?
Questions and answers