
Related Manuals for Seafloor EchoBoat-160


Summary of Contents for Seafloor EchoBoat-160
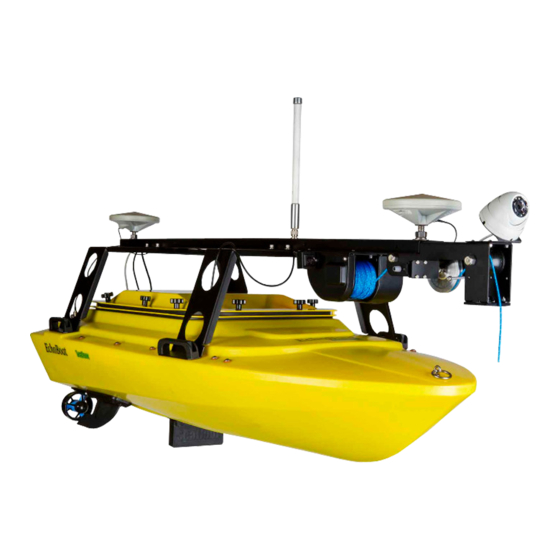
- Page 1 EchoBoat-160 Quick Start Guide Seafloor Systems, Inc. | info@seafloorsystems.com | +1(530) 677-1019 Page 1...
- Page 2 Batteries Before using the EchoBoat-160 in the field, it is important to conduct a systems check to ensure the job is successful. The first check for operation is checking battery voltage. Due to regulations, LiPo batteries must be discharged for shipping, and it is important for their health and longevity that they are charged fully before being used.
- Page 3 Switch: The internal power distribution switch applies power to all components of the EB-160. LAN: Allows the computer to communicate with the front-facing camera on the EchoBoat-160's mast. USB: Allows the computer to communicate with the QuickCast / SmartCast to see the depth of the line released for a Sound Velocity Profiler.
- Page 4 Overview 1. Open control Panel 2. Open “Network and Internet” Seafloor Systems, Inc. | info@seafloorsystems.com | +1(530) 677-1019 Page 4...
- Page 5 3. Right Click on the ethernet port with the description “Unidentified network” and select "properties" 4. Highlight “Internet Protocol Version 4 (TCP/IPv4)” and click “Properties” 5. Set the IP address and Subnet mask 6. Select “OK” and close all windows. Seafloor Systems, Inc. | info@seafloorsystems.com | +1(530) 677-1019 Page 5...
- Page 6 7. Using the Windows search bar type “Remote Desktop” and hit enter. 8. Type in the IP address: 192.168.1.8 as shown below. 9. Login with the username “EchoBoat” and password “Seafloor” The remote desktop will start, and you will be able to access the onboard computer for running Mission Planner and data collection software.
Need help?
Do you have a question about the EchoBoat-160 and is the answer not in the manual?
Questions and answers