Advertisement
Quick Links
Advertisement

Related Manuals for Range Road RR27T


Summary of Contents for Range Road RR27T
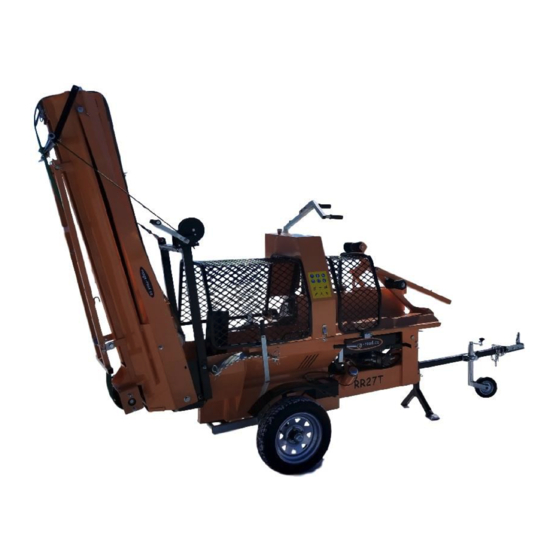
- Page 1 Range Road RR27T Firewood Processor Crated Unit Assembly Manual...
- Page 2 5.) Remove bag containing Bearing, washer, nut, cotter key and cap, place on workbench, set unwrapped wheels out of the way. 6.) Unwrap the following, place on workbench sawdust chute Range Road Enterprises Ltd Box 944 Eckville AB T0M 0X0 Page 2...
- Page 3 Log roller Arm Towbar Splitter Wedge, Axle Chainsaw Bar Cover, Safety Cages (2), Hydraulics Cover The Processor should now be sitting on the crate with all loose pieces removed Range Road Enterprises Ltd Box 944 Eckville AB T0M 0X0 Page 3 www.range-road.ca...
- Page 4 12.) Grease all 4 wheel bearings, use a flat screwdriver to remove dust seals from hubs and remove inner wheel bearings for greasing 13.) Install Wheel on axle Range Road Enterprises Ltd Box 944 Eckville AB T0M 0X0 Page 4...
- Page 5 20.) The four lug nuts of each wheel should be torque to 90ft-lbs. Lower unit to floor Assembler must check that the engine and hydraulic couplers are secure and spaced properly Range Road Enterprises Ltd Box 944 Eckville AB T0M 0X0 Page 5...
- Page 6 24.) Install sawdust chute 10mm Nut x Bolt through body, nuts go in the sawdust collector side. 25.) Remove cotter pin from bottom tube on large safety cover Range Road Enterprises Ltd Box 944 Eckville AB T0M 0X0 Page 6...
- Page 7 32.) Re-install 10mm Bolt, tubing and nut, snug up lock nut, do not tighten 33.) Remove nut from bar lube fitting, insert hose over barb and snug up fitting (14mm) Range Road Enterprises Ltd Box 944 Eckville AB T0M 0X0 Page 7 www.range-road.ca...
- Page 8 37.) Hook sawbar return spring into slot. 38.) Apply grease liberally to the metal surfaces that touch below the spring, this will help them slide Range Road Enterprises Ltd Box 944 Eckville AB T0M 0X0 Page 8...
- Page 9 45.) Adjust cable so that when the chainsaw bar is pulled down, the cable will activate the ram valve, to tight and the cable will stretch, to loose and the ram won’t activate. The cable can be adjusted at both ends. Range Road Enterprises Ltd Box 944 Eckville AB T0M 0X0 Page 9 www.range-road.ca...
- Page 10 49.) Remove 10mm nut, lockwasher and flatwasher from starter solenoid, Install loop from red wire onto stud of solenoid and re-install washer and nut, do not overtighten nut Range Road Enterprises Ltd Box 944 Eckville AB T0M 0X0 Page 10...
- Page 11 180° and re-install Bolt & Nut, do not tighten 55.) Put Hydraulic cover in place (large Orange curved cover), Install 10mm Bolt & Nut in lower hole Range Road Enterprises Ltd Box 944 Eckville AB T0M 0X0 Page 11...
- Page 12 61.) Put engagement arm in place, install bracket and 2 – 13mm Bolts & Nuts, Tighten Install Handle Extension if needed 62.) Remove 16mm bolt x 17mm nut from drawbar Range Road Enterprises Ltd Box 944 Eckville AB T0M 0X0 Page 12...
- Page 13 70.) Mount fenders using the 2 long 13mm bolts and nuts supplied with each fender, make sure that if the fender has signal light mounting holes they face to the rear Range Road Enterprises Ltd Box 944 Eckville AB T0M 0X0 Page 13 www.range-road.ca...
- Page 14 74.) With the handle engaged in the adjustment lock, snug up nut and bolt so that the handle is engaged with the lock plate but it can still be pulled out to change the wedge position 75.) Install splitter wedge Range Road Enterprises Ltd Box 944 Eckville AB T0M 0X0 Page 14...
- Page 15 2 mount bolts, do not over tighten, conveyor must be able to swing up and down freely 78.) Remove bolts at rear of processor body 79.) Put conveyor in place and re-install bolts, tighten Range Road Enterprises Ltd Box 944 Eckville AB T0M 0X0 Page 15...
- Page 16 Some conveyors (with square leg) will have two silver plates that are used as spacers to hold the leg away from the belt when it is in the travel position Range Road Enterprises Ltd Box 944 Eckville AB T0M 0X0 Page 16 www.range-road.ca...
- Page 17 87.) Engage conveyor lock between upper and lower conveyor sections 88.) Remove travel cable from operator side of conveyor, let it hang out of the way on opposite side Range Road Enterprises Ltd Box 944 Eckville AB T0M 0X0 Page 17...
- Page 18 97.) Add fuel to engine fuel tank, do not fill above red level marker in tank neck, the tank vents through the cap, if fuel is above this line engine will not run very well and will stall. Premium fuel is recommended, Farm Fuel Range Road Enterprises Ltd Box 944 Eckville AB T0M 0X0 Page 18 www.range-road.ca...
- Page 19 103.) Shut unit off 104.) Check all nuts, bolts, hose and fittings one more time, check for leaks Range Road Enterprises Ltd Box 944 Eckville AB T0M 0X0 Page 19...
- Page 20 This should be adjusted so that the ram hood does not stick out into the splitting valley when it is in the home position, it should not be sunk into the housing, it should sit almost flush will the front wall. Range Road Enterprises Ltd Box 944 Eckville AB T0M 0X0 Page 20 www.range-road.ca...
- Page 21 (Honda, Lifan, Kohler, Princess Auto, Ducar, Etc.) The warranty begins on the date of sale and is warranted by Range Road Enterprises Ltd. to the original purchaser only. This Warranty does not cover items that have been damaged by accident, alteration, abuse or improper lubrication.
Need help?
Do you have a question about the RR27T and is the answer not in the manual?
Questions and answers