Advertisement
Quick Links
Advertisement

Subscribe to Our Youtube Channel
Related Manuals for Montezuma MF301DW3


Summary of Contents for Montezuma MF301DW3
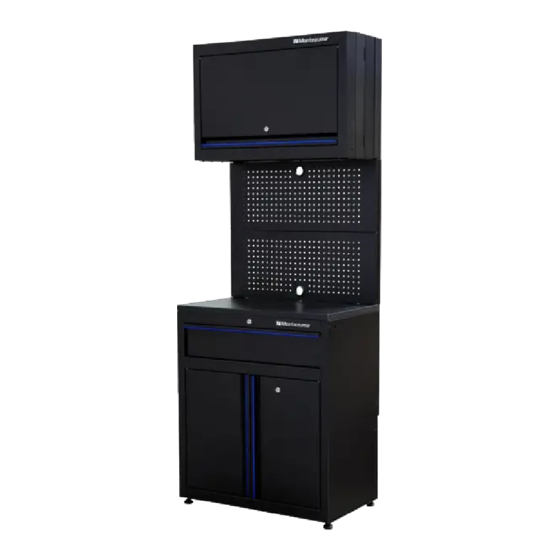
- Page 1 OWNER'S MANUAL 1-DRAWER, 3-DOOR WORKSTATION MF301DW3 www.montezumastorage.com...
- Page 2 LIFE ORGANIZED Montezuma is committed to helping you succeed in both your work and personal life by being organized, prepared and equipped with the right tools, gear and home supplies at your finger tips. We are here to ensure that your life is organized.
-
Page 3: Specifications
SPECIFICATIONS OVERALL DIMENSIONS: 77.6 cm W x 49 cm D x 206.6 cm H (30-1/2" W x 19-1/4" D x 81-3/8" H) 1 x 1-DOOR WALL CABINET DIMENSIONS: 77.6 cm W x 30.5 cm D x 51 cm H (30-1/2" W x 12" D x 20" H) MAXIMUM SHELF WEIGHT: 23 kg (50 lb) 2 x PEGBOARD PIECES... - Page 4 PARTS LIST The keys are taped inside the cabinets.
- Page 5 REF DESCRIPTION PART NUMBER M6 x 16 mm Hex Socket Head Screw 320327 Washer 324050 M6 x 65 mm Hex Tapping Screw 320316 Gas Strut 303002 End Cover 314195 Shelf 233955 Shelf Support 226078 Lock and Key (001) 304178 M6 Hex Flange Nut 323085 Worktop 571406...
- Page 6 M6 x 16 mm Hex Socket Head Screw 8 for attaching top panel of wall cabinet 11 for attaching bottom panel of wall cabinet 4 for attached worktop to base cabinet (pre-installed) 18 for attaching pegboards and wall cabinet to posts 2 for attaching unit to other units M6 x 65 mm Hex Gas Strut...
- Page 7 Slide Set Adjustable Feet Drawer Liner Pre-installed For attaching For protecting drawers For installing drawers to bottom panel Magnet Post A Post B Pre-installed Top and bottom posts Middle post in in each stack For keeping doors closed each stack Pegboard For hanging tools...
- Page 8 ASSEMBLY BASE CABINET ASSEMBLY Carefully lay the cabinet on its back, with a soft mat underneath for protection. Screw the four adjustable feet into the cabinet bottom. Turn the cabinet upright. WARNING: DO NOT STACK A 1-DRAWER, 2-DOOR BASE CABINET ON TOP OF ANOTHER CABINET.
- Page 9 Insert the lip of the bottom panel into the slot in the back of the cabinet, then tilt the bottom panel down. Make sure the holes are aligned. Attach the bottom panel using eleven M6 x 16 mm hex socket head screws.
- Page 10 Turn the cabinet back to the upright position. Attach the top panel using eight M6 x 16 mm hex socket head screws. Insert four shelf supports inside the cabinet at the desired height. Place the shelf on the shelf supports.
- Page 11 PEGBOARD BACK WALL ASSEMBLY Attach two A posts to the back of the base cabinet using three M6 x 16 mm hex socket head screws per post. Slide two B posts fully onto the A posts. Place one pegboard on the front, making sure the grommet hole is on the bottom. Attach using two M6 x 16 mm hex socket head screws per post.
- Page 12 Slide two A posts onto the B posts. Make sure to leave enough room at the top for the wall cabinet. Place one pegboard on the front, making sure the grommet hole is on the top. Attach using two M6 x 16 mm hex socket head screws per post.
- Page 13 Insert two M6 x 16 mm hex socket head screws into the top holes of the wall cabinet, but do not fully tighten. Hang the wall cabinet on the top of the posts, then fully tighten the screws. Attach the bottom of the wall cabinet to the posts using two additional M6 x 16 mm hex socket head screws.
-
Page 14: Installation
INSTALLATION If you have purchased other units, assemble them now, then put all units together to build your garage. For a better appearance, attach the sides of each unit together using M6 x 16 mm hex socket head screws and M6 hex flange nuts at both top and bottom. - Page 15 Hide holes on the exterior ends of the units with the supplied end covers, if necessary.
- Page 16 For safety, secure the tops of the each unit to the wall using M6 x 65 mm hex tapping screws and washers. Use three M6 x 65 mm hex tapping screws and washers on wall cabinets and three M6 x 65 mm hex tapping screws and washers on base cabinets. For best results, mount to studs or other solid surfaces.
- Page 17 DRAWER REMOVAL Pull the drawer out so that it’s almost fully extended. Push up on the black release lever on one side, while pushing down on the black release lever on the other side. While holding the levers in these positions, pull the drawer outward until it is released from the drawer slide.
-
Page 18: Maintenance
MAINTENANCE Periodically clean the drawer and door fronts, trim, and other surfaces with mild detergent and water. Grease and oil can be removed with most standard cleaning fluids. For safety, use a nonflammable cleaning fluid. SAFETY Use two people to move the units into place. Failure to do so can result in back or other injuries. - Page 19 This product is warranted to be free from defects in materials and workmanship for a period of five (5) years from the date of original purchase. If this product is defective, email service@montezumastorage.com or call 1-800-459-4409 (Monday–Friday, 8:00 am–4:30 pm, CST). If the product is defective, we will replace the defective part at no cost to you.
- Page 20 Manufactured by: QUALITY CRAFT Surrey, BC, Canada V3S 5N4 service@montezumastorage.com 1-800-459-4409 (Monday to Friday, 8:00 am–4:30 pm, CST) Made in China www.montezumastorage.com MF301DW3-EN/FR-06/19...
Need help?
Do you have a question about the MF301DW3 and is the answer not in the manual?
Questions and answers