
Related Manuals for Advanced Radiant Systems ES/ESH Series


Summary of Contents for Advanced Radiant Systems ES/ESH Series
- Page 1 Installation, Operation and Service Instructions ES/ESH RANGE SINGLE STAGE UNITARY INFRARED HEATERS...
- Page 3 WARNINGS WARNING FOR YOUR SAFETY Improper installation, adjustment, alteration, service Do not store or use gasoline or other flammable or maintenance can cause property damage, injury vapors and liquids in the vicinity of this or any other or death. Read the installation, operating and appliance.
-
Page 4: Table Of Contents
CONTENTS INTRODUCTION ..........................1 Installation Codes .............................1 GENERAL SPECIFICATIONS ......................2 Gas Supply ................................2 Electrical Supply ...............................2 Flue and Outside Air Connection ........................2 DIMENSIONAL CHARTS ........................ 3 CLEARANCE TO COMBUSTIBLES ....................6 INSTALLATION ..........................9 Installation Sequence ............................9 Hangers Installation and Heater Suspension ....................11 Tube Installation .............................12 Heater and Baffle Installation ........................14 Reflector Installation ............................15... -
Page 5: Introduction
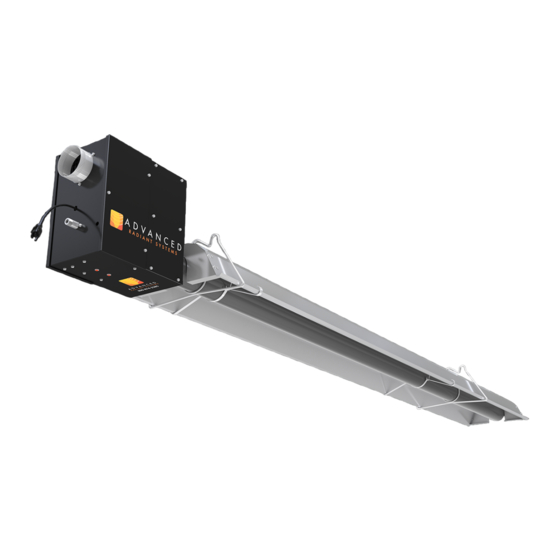
INTRODUCTION Advanced Radiant Systems' Single Stage Unitary Range (ES) offers an entry grade unitary system with the highest radiant outputs available. By utilizing a high efficiency reflector with a dependable and efficient burner, these heaters take on the cost competitive marketplace without sacrificing quality or efficiency. The Single Stage Unitary Range is also available in a harsh environment model. -
Page 6: General Specifications
GENERAL SPECIFICATIONS Gas Supply Inlet Pressure Natural Gas: Minimum 5.0" W.C. Maximum 14.0" W.C. Propane Gas Minimum 11.5" W.C. Maximum 14.0" W.C. Manifold Pressure Natural Gas: 3.5" W. C. Propane Gas: 10.5" W. C. Inlet Connection Natural Gas: 1/2" (12 mm) NPT Electrical Supply 120 VAC, 60 HZ, 1 Amp: 36"... -
Page 7: Dimensional Charts
DIMENSIONAL CHARTS 120" 18" 16" 36" 14" 12" 124" 9" Figure 1: Overall Dimensional Information ELBOW BAFFLE SECTION BAFFLE SECTION STANDARD 16" 4" COUPLER 4', 6' OR 8' REFLECTOR 10' - 4" TUBE 24" U-BEND Figure 2: Component Dimensional Information For additional information, including weights visit AdvancedRadiantSystems.com/Resources Page 3 Single Stage Unitary Range... - Page 8 CONFIGURATIONS HEAT EXCHANGER LENGTH FT (m) RATE BAFFLE BAFFLE KIT MODEL NO. (btu/hr) ft (m) PART NO. MINIMUM MAXIMUM ES/ESH-40 40,000 10 (3) 20 (6) 6 (1.8) T-CT045 ES/ESH-60* 60,000 20 (6) 30 (9) 6 (1.8) T-CT046 ES/ESH-80* 80,000 20 (6) 30 (9) 12 (3.6) T-CT047...
- Page 9 CONFIGURATIONS LEGEND REFLECTOR 10'-6" TYP. BURNER COUPLING 'U' BEND ELBOW TUBE 10' TYP. OVERLAP ADJACENT REFLECTORS 4" TO 6" AVAILABLE IN 40,000 BTU/HR 'U' TUBE CONFIGURATION AVAILABLE IN 40,000/ 60,000 BTU/HR 'L' CONFIGURATION AVAILABLE IN 40,000/ 60,000/ 80,000/ 100,000 BTU/HR AVAILABLE IN 60,000/ 80,000/ 100,000/ 125,000 BTU/HR AVAILABLE IN 80,000/ 100,000/ 125,000/ 150,000 BTU/HR AVAILABLE IN 100,000/ 125,000/ 150,000/ 175,000/ 205,000 BTU/HR...
-
Page 10: Clearance To Combustibles
CLEARANCE TO COMBUSTIBLES A general clearance of 18" (46 cm) in every direction is recommended for servicing only around each burner and air supply (at the far end of each radiant tube). Also, to ensure adequate air flow in and around the heating system. - Page 11 CLEARANCE TO COMBUSTIBLES CLEARANCE TO COMBUSTIBLES in (cm) REFLECTOR CONFIGURATIONS MODEL NUMBER 45° REFLECTOR TILT ES/ESH-40 4 (10) 4 (10) 40 (102) 38 (97) ES/ESH-60 4 (10) 4 (10) 50 (127) 46 (117) ES/ESH-80 4 (10) 4 (10) 58 (147) 50 (127) ES/ESH-100 4 (10)
- Page 12 CLEARANCE TO COMBUSTIBLES CLEARANCE TO COMBUSTIBLES in (cm) REFLECTOR CONFIGURATIONS MODEL NUMBER U-BEND, HORIZONTAL ES/ESH-40 ES/ESH-60 2 (5) 25 (63) 59 (150) 22 (56) ES/ESH-80 2 (5) 28 (71) 62 (157) 26 (66) ES/ESH-100 2 (5) 30 (76) 71 (180) 30 (76) ES/ESH-125 4 (10)
-
Page 13: Installation
INSTALLATION Installation Sequence Generally, there is no unique sequence for installation of the burner or heat exchanger. A review of the job site will usually indicate a logical installation order. However, time and expense can be saved if installation is begun at the most critical dimension, watching for interference from overhead doors, cranes, auto lifts etc. - Page 14 INSTALLATION Overview of Tubes and Reflector Hangers A general overall view of the tubes and reflector hangers are shown in figure 6 below. ADJUSTABLE VENT ADAPTER *NOTE: 30' SYSTEM SHOWN HERE, THE SAME PRINCIPLE (S-20 AND LONGER) SHOULD BE FOLLOWED FOR 40', 50' SYSTEMS OR MORE. REFER TO INSTALLATION SEQUENCE FOR MORE DETAILS.
-
Page 15: Hangers Installation And Heater Suspension
INSTALLATION Hangers Installation and Heater Suspension • The suspension mechanism must allow for lateral tubing expansion. A minimum 12" length welded link chain with a working load limit of at least 200 lbs. is recommended (refer to Figure 7 for more details). The Manufacturer recommends and makes available "quick links"... -
Page 16: Tube Installation
INSTALLATION Tube Installation • Place the first (flanged, aluminized) tube in the first two hangers (Figure 9). Be sure the flange is toward the intended burner location. The other end of the tube should have the first coupling already loosely fitted. •... - Page 17 INSTALLATION • Tighten the cradle loops of the first hanger with the “J-Bolt” found in the burner box, to snugly hold the combustion tube from rotating see Figure 11. • Note: For all coupling joints, ensure that the tube joint is in the center of the coupling length, and that the overlap joint of the coupling is above the centerline of the tube.
-
Page 18: Heater And Baffle Installation
INSTALLATION Heater and Baffle Installation • Locate the burner gasket provided and bolt the burner in place on the tube flange with provided hardware. The burner must never be installed in a tilted position. The sense electrode of the burner cup should be in the 12 o'clock position (Figure 12). -
Page 19: Reflector Installation
INSTALLATION Reflector Installation • Slide a reflector section into place within the support hanger, (Figure 14). SLIDE REFLECTOR THROUGH THE HANGER AND REFLECTOR SUPPORT AS SHOWN NOTE: CLOSE ALL OPEN-ENDED QUICK LINKS, CHAIN LINKS,AND TURNBUCKLES OR ANY OPEN CONNECTION. Figure 14: Reflector Installation •... - Page 20 INSTALLATION Note: Reflectors should overlap adjacent reflectors 4” to 6”. Be sure not to tile reflector sections; that is, reflector sections must be either above both adjacent reflector sections, or below both adjacent reflector sections. Refer to Figure 16.. VENT VENT TERMINATION TERMINATION...
- Page 21 INSTALLATION • Secure every second reflector overlap together with a minimum of 2 - #8 x 3/8” long screws (not supplied), and secure reflector to the reflector bracket at this point by tightening down #8 x 1¼” screws supplied with reflector brackets (Figure 17).
-
Page 22: Elbow And U-Bend Installation
INSTALLATION Elbow and U-Bend Installation • If required by the heater layout, install 90° elbows or U-bend tubes where indicated. Refer to Figure 19 for details. Note: Elbows or U-bends are typically installed without reflectors. To reduce the above clearance to combustibles distance use miter reflectors (see Figure 20) and refer to Clearance to Combustibles information. -
Page 23: Mitered Reflector Installation
INSTALLATION Mitered Reflector Installation • If used, install the Mitered Reflector as shown below in Figure 20. ASSEMBLE CORNER BRACKET TO MITERED FASTEN MITERED REFLECTORS AS SHOWN REFLECTORS WITH ³/ 4 - #8 X " SCREWS MITERED REFLEC- TOR SECTIONS SHOULD OVERLAP STANDARD REFLECTORS... -
Page 24: Side Reflectors & Bottom Shields
INSTALLATION Side Reflectors & Bottom Shields • If used, install side shields (reflectors) and/or bottom shield as required. Refer to Figure 21 and Figure 22 for details. • Side shields are 124” (315cm) long. Fasten one side shield per reflector with #8 x 3/8” screws. Use three side shield brackets per side shield. -
Page 25: Bottom Shield Reflector Installation
INSTALLATION Bottom Shield Reflector Installation Bottom shields need not overlap. Each 5’ section is held with two support brackets (see Figure 22). NOTE: CLOSE ALL OPEN ENDED "S" HOOKS, QUICK LINKS, AND TURNBUCKLES OR ANY OPEN CONNECTION. TIGHTEN SCREW TUBING SECTION #8 X ³/8"... -
Page 26: Decorative Grille (Optional)
INSTALLATION Decorative Grille (Optional) ES/ESH Range heaters are approved for the addition of Decorative Grille either directly to the heater reflector or as part of a T-Bar installation where the heater is above the ceiling structure. Refer to Figure 23 and Figure 24 below for details. -
Page 27: Venting And Combustion Air Ducting
VENTING AND COMBUSTION AIR DUCTING General Requirements • Refer to the National Fuel Gas Code, ANSI Z223.1 (NFPA 54) in the US and CSA B149.1 and B149.2 Installation Codes in Canada, as well as all local requirements for general venting guidance. •... -
Page 28: Horizontal Venting
VENTING AND COMBUSTION AIR DUCTING Horizontal Venting • The heater operates at a positive vent pressure • Use an approved to S636 or UL1738 Category III venting system, or a single wall vent pipe with all joints and seams sealed with heat resistant pliable sealant, such as high temperature RTV silicone for temperatures up to 650°F (343°C). -
Page 29: Vertical Venting
VENTING AND COMBUSTION AIR DUCTING Vertical Venting • The heater operates at a negative vent pressure. • Refer to the National Fuel Gas Code, ANSI Z223.1 (NFPA 54) in the US and CSA B149.1 Installation Codes in Canada, to size for Category I (B-vent) fan assisted appliances. •... -
Page 30: Combustion Air Supply (Optional)
VENTING AND COMBUSTION AIR DUCTING Combustion Air Supply (Optional) • An outside combustion air supply is strongly recommended if the building space encloses a negative pressure due to exhaust etc. or if the building contains materials which would expose the heater to halogenated hydrocarbon atmospheres. -
Page 31: Gas Piping
GAS PIPING General Requirements • The gas meter and service must be sufficiently large to supply gas to the connected building gas load including the heating equipment and any other gas fired equipment. Additionally, the gas distribution piping must be designed according to local and national ordinances. Generally (low pressure) systems designed with a maximum ½"... -
Page 32: Wiring Diagrams
ELECTRICAL WIRING Wiring Diagrams 24V THERMOSTAT GAS VALVE THERMOSTAT IS MOUNTED EXTERNALLY OPTIONAL EXTERNAL LED YELLOW BROWN 24V STAT YELLOW BROWN CNE DSI MODULE LAMP BLUE & PURPLE WIRES ARE PURPLE PURPLE FACTORY JUMPERED, DISCONNECT TO WIRE IN BLUE THERMOSTAT PURPLE SWITCH BLOWER... -
Page 33: Wiring Diagram For Esh Models Only
ELECTRICAL WIRING Wiring Diagram for ESH Models Only THERMOSTAT IS MOUNTED EXTERNALLY BLUE & PURPLE WIRES ARE FACTORY JUMPERED, 24VAC TSTAT DISCONNECT TO WIRE IN THERMOSTAT PURPLE SWITCH CHANNEL MODULE 53X-24 BLUE (P-CE201) PURPLE YELLOW BROWN BLOWER GREEN 120V 120V LAMP ORANGE 120L... -
Page 34: Burner Operation
BURNER OPERATION Starting Sequence of Operation • Turn the thermostat up. When the thermostat calls for heat, the blower motor will energize. • When the motor approaches nominal running RPM, the air-proving switch closes and activates the ignition module. • The ignition module, after a pre-purge period of approximately 30 seconds, energizes the igniter. -
Page 35: Installation Checklist
INSTALLATION CHECKLIST Note: Complete checklist before lighting the heater. Correct any conditions that do not meet these instructions. Did you install the first hanger no more than 8 inches from the burner and tighten with the J-bolt? (J-bolt only required for the first hanger). Is the weld seam facing down? Is the tube system leveled? Did you mount the tube couplings with the band clamp lock bolts... -
Page 36: Troubleshooting
TROUBLESHOOTING Blower Motor Fails To Run • Is the thermostat calling for heat? Is there 115V at the burner receptacle? • Check blower side door for seal. Repair if necessary • Check blower for obstructions. Replace blower if necessary. No Gas Supply •... -
Page 37: Troubleshooting Chart
Verify Ground Signal To Module? Stays Verify Wiring Min. 0.8 Micro Amps Lit? Rectify As Required If problems persist contact your Advanced Radiant Systems Representative. IF PROBLEM PERSISTS CONTACT YOUR LOCAL SRP REPRESENTATIVE Page 33 Single Stage Unitary Range ES/ESH-LT209_10152019... -
Page 38: Replacement Parts
REPLACEMENT PARTS REFERENCE PART NUMBER DESCRIPTION P-CE057 Indicator Light P-CE266 Ignition Module - ES P-CE201 Ignition Module - ESH P-CG142 Honeywell Valve Train Replacement Kit (NG) P-CG143 Honeywell Valve Train Replacement Kit (LPG) P-CE058 Transformer FA-CE004 Blower for Models 40,000 to 175,000 BTU FA-CE013 Blower for Models 205,000 to 220,000 BTU P-CH007... -
Page 39: Warranty
WARRANTY THE ECONOMY RANGE WARRANTY The manufacturer warrants to the original owner that the product will be free of defects in material and workmanship as described below. Warranty Period ES/ESH Component 3 Years 5 Years 7 Years 10 Years Burner and Controls Hot Rolled Heat Exchanger w/o Post Purge Aluminized Heat Exchanger w/o Post Purge Hot Rolled Heat Exchanger with Post Purge... - Page 40 315 N Madison Street Fortville, IN 46040 317-577-0337 800-874-3285 sales@advancedradiantsystems.com www.AdvancedRadiantSystems.com ES/ESH-LT209_10162019...
Need help?
Do you have a question about the ES/ESH Series and is the answer not in the manual?
Questions and answers