
Related Manuals for SereneLife SLGT22


Summary of Contents for SereneLife SLGT22
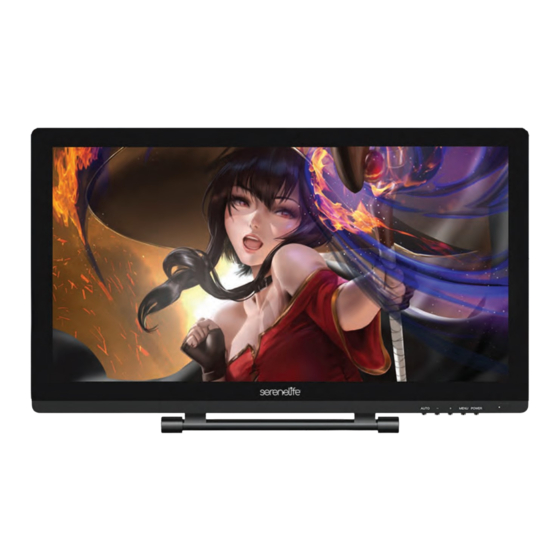
- Page 1 SLGT22 21.5'' Dual Mode Graphic Tablet Monitor Pro Drawing Pen Display Monitor with Capacitive Touch Screen and Wireless Passive Pen...
-
Page 2: Table Of Contents
In order for you to better understand and use your graphics tablet, please be sure to read this manual carefully before use. CONTENTS Precautions Chapter 1 Product Introduction Chapter 2 Accessories Description Chapter 3 How the pen display is connected Chapter 4 Driver Installation Chapter 5 Pen display function settings Chapter 6 Driver Uninstall... -
Page 3: Precautions
Precautions 1. Please read this manual carefully before using, and keep it well for future reference. 2. Before cleaning the display please unplug the USB cable and wipe with a soft damp cloth, do not use any kind of detergents. 3. -
Page 4: Chapter 1 Product Introduction
Chapter 1 Product Introduction 1. About the Product This product doesn’t only achieve paperless digital painting, but also the introduction of advanced electromagnetic induction technology, so as to bring you more convenient creation, painting experience. Users can connect it to a computer, directly with a pressure-sense pen on the pen on the pen display input and drawing operations, can be used in multimedia painting teaching and related elds. -
Page 5: Chapter 2 Accessories Description
5. Wiring 1 USB cable (USB A TO USB B) 1 HDMI cable 1 VGA cable 1 Power cord + Power Adapter 6. System Requirements • Operating system: PC: Windows XP/vista/7/8/10 ( 32/64bit); Mac: Mac OS X 10.8 or above; • Processor: Pentium 233MHz •... -
Page 6: Chapter 3 How The Pen Display Is Connected
2. Core Replacement a. Open the pen barrel equipped with one end of the core; b. With the pen picker clamped the core gently pull out, remove the old core. c. By hand to remove the pen barrel inside the brand-new core; d. -
Page 7: Chapter 4 Driver Installation
Note: If you are using a desktop with a discrete graphics card installed, connect the HDMI plug to a discrete graphics card. Chapter 4 Driver Installation Precautions before installation 1. If your computer has installed another pen board or pen display driver, be sure to uninstall it and turn it back on. - Page 8 MAC Driver Installation 1. The installer in the CD disc, put the disc into the computer optical drive, double-click to open the disc, run "setup.exe" or "setup" les for installation. Follow its prompt steps to install until it is complete and your computer is restarted.
-
Page 9: Chapter 5 Pen Display Function Settings
Chapter 5 Pen display function settings Setup guide under Windows system The rst step in setting up the pen display feature or diagnosing a problem with the pen display: Open the pen display control panel. 1. Turn on the pen display control panel Tap the small digital screen icon in the lower right corner of the computer system taskbar with a press-inducing pen. - Page 10 III. Pressure adjustment: press the tip of the pen in the range of the drive panel, if the applied force is relatively displayed in the current pressure. The pressure gauge indicates that the digital screen pressure sensing function is normal. IV.
- Page 11 I. By default, the digital screen sensing area is fully mapped to the entire display area. If you use multiple monitors, you can optionally map one or more displays. II. When using multiple monitors and in extended mode, select the All Screen option.
- Page 12 III. When screen mapping is switched to screen 1, the mapping of the digital screen will correspond only to screen 1 as shown in the gure. IV. When screen mapping is switched to screen 2, the mapping of the digital screen will correspond only to screen 2 as shown in the gure.
- Page 13 5. Pressure Regulate Press the tip of the pen in the range of the drive panel, and if the applied force is relatively displayed on the current pressure gauge, the digital screen pressure sensing function is normal at this time. 6. Mode Selection I.
- Page 14 Go to the Screen Calibration page and click on the red dot of the calibration page with a pressure-sense pen in accordance with your normal personal habit of holding the pen position to calibrate. 8. Software Update: In case of networking, when the server is updated, an update prompt for "detect a new version"...
- Page 15 Pen Function • Both the rst key and the second key can be set according to personal usage habits. Select the corresponding function in the drop-down box to adjust the key function accordingly. Once set, press the pen button to execute the instructions. •...
- Page 16 b. Dual-screen mode (more screens are also set below) In dual-screen mode, you can click the drop-down box at the screen to select the corresponding screen that you need to control. Shortcut Settings Under this settings page, you can set up the hard shortcut function of the pen display.
- Page 17 c. In the pop-up settings interface, you can set up open applications, customize hotkeys, open web pages, and implement mouse functionality as needed. www.SereneLifeHome.com...
- Page 18 Calibration Page Under this settings page, digital screen calibration and screen rotation are available. The display can choose to rotate 0, 90, 180, 270 degrees, the default is 0 degrees do not rotate, select the rotation angle, the pen coordinates will also rotate. Version Information Digital Screen Driver Version Information.
-
Page 19: Chapter 6 Driver Uninstall
Chapter 6 Driver Uninstall Windows System There are three ways to uninstall: 1. Open the Start Menu → [program] → [Pen tablet] → [Uninstall Pen Tablet], follow the uninstall prompt until the uninstall program is complete. 2. Open the [Control Panel] → [Programs and Features] → [Add or remove programs] ... -
Page 20: Chapter 7 Screen Adjustment
Chapter 7 Screen Adjustment Menu Button Digital Front Control Key and Features 1. POWER Role one: Turn the pen display power on/o ; 2. MENU Role one: Pop-up screen adjustment menu; Role two: Con rmation key of each setting; 3. “+” Role one: Increase the brightness;... - Page 21 Contrast: The / button can be manipulated to change the contrast of the screen, and then press the "menu" key to save. Gamma: You can use the / button to turn it on or o , and then press "menu" to save it.
-
Page 22: Chapter 8 Product Speci Cations
Display Size: Enter the adjustable screen display, which defaults to full-screen display. Reset: This key resets the system menu data and presses the menu key to con rm. Chapter 8 Product Speci cations Speci cation parameters of display screen Speci cation parameters of display screen Appearance dimensions 527 ×... -
Page 23: Chapter 9 Faqs
Chapter 9 FAQs How do I update the latest version of the driver? Answer: Contact customer service for the latest version of the driver. How do I explain that the drive is installed? Answer: After the driver is installed correctly, insert the pen display and the computer taskbar will appear a small driver icon ( ), the pressure sensor pen can control the cursor normally when used on the digital screen, and the pressure... - Page 24 Questions? Issues? We are here to help! Phone: (1) 718-535-1800 Email: support@pyleusa.com...
Need help?
Do you have a question about the SLGT22 and is the answer not in the manual?
Questions and answers
free software for sllgt2