Table of Contents
Advertisement
Quick Links
Advertisement
Table of Contents

Subscribe to Our Youtube Channel
Related Manuals for ShopBot Desktop Series


Summary of Contents for ShopBot Desktop Series
- Page 1 Desktop Series Quick Start Guide 2021 © Copyright ShopBot Tools, Inc. page...
-
Page 2: Table Of Contents
Resources ..............................38 ShopBot Tutorials & Videos ........................38 ShopBot Training Classes .......................... 38 CAD/CAM Software Packages ........................38 Tooling, Materials, and more ........................38 ShopBot Forum............................38 Technical Support ............................38 © Copyright Dec. 2021 ShopBot Tools, Inc. page 2... -
Page 3: Desktop Tools Safety And Precautions
Never place your hands on the rails of the ShopBot. Be aware that the machine may move unexpectedly in any direction, which can cause serious injury if your hands are in the path of movement. - Page 4 Desktop Series Quick Start Guide SBG00232 © Copyright Dec. 2021 ShopBot Tools, Inc. page 4...
- Page 5 The tool is intended to be used with wood, plastic, or non-ferrous materials. It is not intended for use with ferrous materials. Transportation - This tool can be transported by two people by grabbing from the bottom front and rear locations. © Copyright Dec. 2021 ShopBot Tools, Inc. page 5...
-
Page 6: What's In The Crate
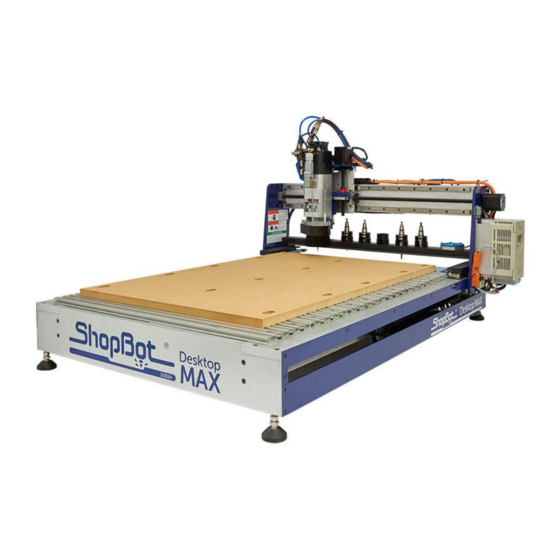
Desktop MAX model shown above with spindle and Variable Frequency Drive (VFD) speed controller. Manilla Envelope, which includes: Desktop Quick Start Guide Desktop Enclosure Document (if applicable) Accessory Documents (if applicable) Thumb Drive with Software © Copyright Dec. 2021 ShopBot Tools, Inc. page 6... - Page 7 Desktop Series Quick Start Guide SBG00232 Z-Zero Assembly Collet Wrenches Pendant USB Cable Hold Down Hardware Power Cord ¼” & ½” Spindle Collet Sets © Copyright Dec. 2021 ShopBot Tools, Inc. page 7...
-
Page 8: Shopbot Desktop Overview
Desktop Series Quick Start Guide SBG00232 ShopBot Desktop Overview (Model DT MAX 36” x 24” Shown) Rear Cable Connections and Power Switch © Copyright Dec. 2021 ShopBot Tools, Inc. page 8... -
Page 9: Uncrating
#2 phillips screwdriver and cordless drill. Lift Desktop onto a sturdy table or bench. CAUTION!! The ShopBot Desktop is a substantial tool and depending on accessories, it can weigh from 150 to 190 lbs. Have AT LEAST one additional person help lift the tool. - Page 10 Desktop Series Quick Start Guide SBG00232 Refer to the Mini Enclosure document to install the enclosure if applicable. © Copyright Dec. 2021 ShopBot Tools, Inc. page 10...
-
Page 11: Tool Orientation And Direction Of Axes
SBG00232 Tool Orientation and Direction of Axes The pictures below show the axis orientation for the ShopBot Desktop 24” x 18” and the ShopBot Desktop MAX 36” x 24.” Normally, the 0, 0, 0 point is located at the intersection of the three axes as shown, and the “front” side is noted. -
Page 12: Video Demonstration
Accompanying documentation and videos can be found throughout ShopBot media. Below are links to the Desktop Quick Start Series videos. These videos and links to the ShopBot YouTube channel can be found on the Documentation page of the ShopBot Website, under the Desktop/Desktop MAX heading. -
Page 13: Software And Computer Configuration
Before Continuing! - Refer to the Control Computer Setup Videos - or - the Uninstalling and Reinstalling ShopBot and VCarve Software document for software installation and software and computer configuration. Plug in Pendant and Connect Power Plug the pendant into the connector on the tool located in the rear (on Desktop tools) or right side (Desktop MAX tools). -
Page 14: Launch Software
“New Device.” Note: Ensure the port is a USB 2.0 port. It is best to use the same USB port every time the ShopBot is attached to the computer. Launch Software Right-click the ShopBot 3 icon and select Run as Administrator to open the machine’s control program for the first time. - Page 15 “ShopBot_PRSDesktop2418.sbd” or “ShopBot_PRSDesktopMAX3624.sbd” depending on your model. Note: If this file is not available, it can be found on the ShopBot website under the Control Software heading, or at: https://support.shopbottools.com/support/control- software Save the file to a thumb drive for future reference ©...
-
Page 16: Setup Home Position And Square The Machine
Setup Home Position and Square the Machine The Desktop tools are somewhat unique among the ShopBot tool lineup in that they do not use the default home position indicated by the SB3 software. Upon loading the Desktop tool profile the home location should be correct. - Page 17 Press “Cut Part” again. © Copyright Dec. 2021 ShopBot Tools, Inc. page 17...
- Page 18 Desktop Series Quick Start Guide SBG00232 Locate and Open “aa_DESKTOP Squaring” or “bb_Desktop MAX Squaring” file in the SBParts folder. Then click START to run the squaring routine. © Copyright Dec. 2021 ShopBot Tools, Inc. page 18...
-
Page 19: Zero The X- And Y-Axes
If the location is not correct, refer first to the video tutorial for steps on setting up the home location before cutting the rabbet file: “Desktop Series – Beginning Cuts and Operations” - https://youtu.be/vscFI13_tOE. Click OK on the “Tool is now Zeroed” message. -
Page 20: Tool Movement
X-, Y-, and Z- axes, and cutting. Click on the yellow button to bring up the “KeyPad” panel. © Copyright Dec. 2021 ShopBot Tools, Inc. page 20... -
Page 21: The Keypad
Click on the X in the upper right corner to close yellow KeyPad. Installing a Bit For routers, the collet nut and collet come locked together as a single unit. © Copyright Dec. 2021 ShopBot Tools, Inc. page 21... - Page 22 Desktop Series Quick Start Guide SBG00232 For spindles, the collet and spindle nut come separately. © Copyright Dec. 2021 ShopBot Tools, Inc. page 22...
- Page 23 If resistance is encountered, do NOT apply force. Stop and try again until it goes smoothly. Once the nut is finger-tight, reposition the bit if it has slipped. © Copyright Dec. 2021 ShopBot Tools, Inc. page 23...
-
Page 24: Zero The Z-Axis
Refer to the Zeroing the Z-Axis section of the “Desktop Series – Beginning Cuts and Operations” video for more information and a demonstration of the process. - Page 25 Desktop Series Quick Start Guide SBG00232 When the Z-zero plate touches the router bit, Input 1 should light up. The Input 1 light will go off when the Z plate is removed © Copyright Dec. 2021 ShopBot Tools, Inc. page 25...
- Page 26 ½” above the deck. The Z-axis is now zeroed to the top of the MDF deck. This is the Safe-Z Pullup height which can be customized in the [V]alues->[C]utter Values menu. Click “OK” to exit the program. © Copyright Dec. 2021 ShopBot Tools, Inc. page 26...
- Page 27 Desktop Series Quick Start Guide SBG00232 © Copyright Dec. 2021 ShopBot Tools, Inc. page 27...
- Page 28 Desktop Series Quick Start Guide SBG00232 If using dust collection, re-attach the dust foot now. © Copyright Dec. 2021 ShopBot Tools, Inc. page 28...
-
Page 29: Move To Home Position
F200 equals 12,000 RPM. Each 100 increment on the display is equivalent to 6,000 RPM for 60Hz power. There are two methods to run this routine. 1) From the SB3 Command Console, select the [C]uts- >C[5] -Spindle Warmup routine © Copyright Dec. 2021 ShopBot Tools, Inc. page 29... -
Page 30: Desktop Spindle Rpm Settings
KeyPad. Desktop Spindle RPM Settings Frequency to RPM chart for 60Hz (US, Canada, and Mexico. also apply to other countries) Frequency to RPM chart for 50Hz (Europe and most other regions) © Copyright Dec. 2021 ShopBot Tools, Inc. page 30... -
Page 31: Trim The Deck
PC before running. If it is not present it can still be downloaded. If the file needs to be downloaded, go to www.shopbottools.com, then click on the ShopBot Docs link at the center of the top of the main page. Then click on you tool (either Desktop or Desktop MAX). - Page 32 The lower left (front) corner of this center section represents the home position for the X- and Y-axes. In many design programs, the ShopBot cut file created will have the tool automatically return to this position after it completes the cut.
-
Page 33: Switch To Shopbot Full
Surfacing the Deck Before continuing, for a visual demonstration and more information on creating and running the surfacing file in SB3 or VCarve Pro, refer to the Cutting the Rabbet section of the “Desktop Series – Creating Surfacing File” video - https://youtu.be/vscFI13_tOE. - Page 34 Open and run the cut file. If an area of the deck is left unsurfaced, re-zero the Z-axis to the area that was missed and rerun the surfacing program. © Copyright Dec. 2021 ShopBot Tools, Inc. page 34...
- Page 35 Repeat this program any time the deck gets worn from use. When the MDF deck gets thin and close to the bolts holding the deck to the machine, simply glue on a new piece of MDF – there is no need to remove the thin part that is still attached. © Copyright Dec. 2021 ShopBot Tools, Inc. page 35...
-
Page 36: Vcarve Pro
The graphic above is a basic overview of the program interface. There are many resources available about how to use this program. Some examples are tutorials, training at ShopBot, online training through ShopBot, help files provided in the program, and online support. Be sure to take advantage of these resources, many of them are listed in the resources section. -
Page 37: Maintenance
Desktop Series Quick Start Guide SBG00232 Maintenance The ShopBot Desktop tools are very robust machines and do not often require maintenance. The table below covers general maintenance guidelines. Item/Duration Maintenance Motor Screws Wipe screws with a clean dry cloth. DO NOT USE any kind of lube or solvent-based cleaner on the Teflon coated screws. -
Page 38: Resources
Desktop Series Quick Start Guide SBG00232 Resources ShopBot Tutorials & Videos https://support.shopbottools.com/training/tutorials ShopBot Training Classes https://support.shopbottools.com/training/basic CAD/CAM Software Packages http://www.shopbottools.com/mProducts/software.htm Tooling, Materials, and more… www.shopbottools.com/mSupport/resourcelist.htm ShopBot Forum http://www.talkshopbot.com/forum/forum.php Technical Support https://support.shopbottools.com/support/ © Copyright Dec. 2021 ShopBot Tools, Inc. page 38...
Need help?
Do you have a question about the Desktop Series and is the answer not in the manual?
Questions and answers