Table of Contents
Advertisement
Quick Links
U s e r M a n u a l
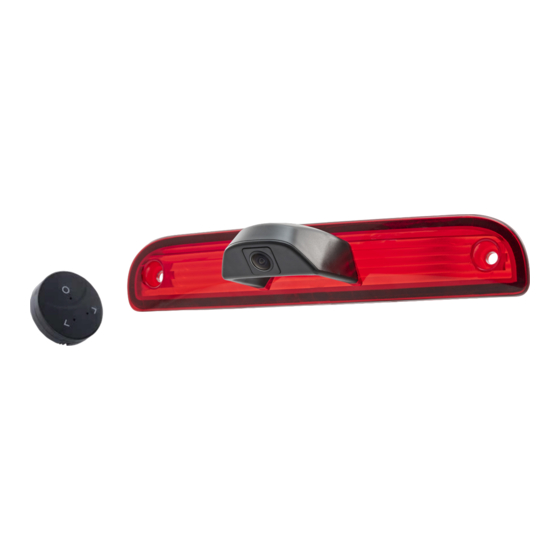
CAM-FT6
PRODUCT FEATURES:
- Resolution
- Picture Mode
- CMOS Chipset:
- Lens FOV:
- Viewing Angles:
- Waterproof Rating:
- Parking Guidelines
Prior to Installation
Read the manual prior to installation. Technical knowledge is necessary for installation. Please ensure you use
the correct tools to avoid damage to the vehicle or product.
Connects2 can not be held responsible for the installation of this product.
Technical Support
Connects2 want to provide a fast and suitable resolution should you encounter any technical issues. With this in
mind, when contacting Connects2, try to provide as much Information as possible. This will speed up the process
and help us to help you.
Please use our dedicated online technical support centre: support.connects2.com
2-in-1 Reversing Camera/Brake Light Solution
with Wireless Controller
Fiat Ducato (X250) 2006 - 2014, (X290) 2014-UP
720 x 480 (Wide Angle View)
NTSC
1/3"
210 Degrees (H) x 140 Degrees (V)
Birds-Eye, Wide Angle, Reversing Left/Right Blind Spot, Driving
IP67
Yes (Removable/Dynamic)
V1-10-19
Connects2Vision
Advertisement
Table of Contents

Related Manuals for 2connect CAM-FT6

Summary of Contents for 2connect CAM-FT6
- Page 1 V1-10-19 Connects2Vision U s e r M a n u a l CAM-FT6 2-in-1 Reversing Camera/Brake Light Solution with Wireless Controller Fiat Ducato (X250) 2006 - 2014, (X290) 2014-UP PRODUCT FEATURES: - Resolution 720 x 480 (Wide Angle View) - Picture Mode...
- Page 2 Connects2Vision INSTALLATION Wiring Diagram Camera replaces OEM brake light Power Adapter Cable CAM-FT6 Make Connections to Vehicle/Unit Wireless Controller (Mount on dashboard) Extension Cable Control Unit Acc 12V Connect to vehicle 12V Accessory feed Black Ground Connect to ground Green...
- Page 3 Connects2Vision Connecting CAN-Bus Wiring Locate the vehicle’s OBD port and unscrew/ remove the female connector. On the reverse of the connector (the side where wiring enters it), connect the CAN + (blue) and CAN - (white) wires from the harness to the locations specified in the diagram (Pins 1 and 9).
- Page 4 Connects2Vision Wide Angle Right Blind Spot (Select from HUD Menu) (Triggered by Indicator - See Page 4) Birds-Eye Left Blind Spot (Select from HUD Menu) (Triggered by Indicator - See Page 4) Adjusting Settings To adjust settings for all viewing modes, press A from the HUD menu to enter the settings menu. Once in the settings menu, short press A to cycle through the various settings screens available.
Need help?
Do you have a question about the CAM-FT6 and is the answer not in the manual?
Questions and answers