Table of Contents
Advertisement
Quick Links
Advertisement
Table of Contents

Related Manuals for Blix Aveny


Summary of Contents for Blix Aveny
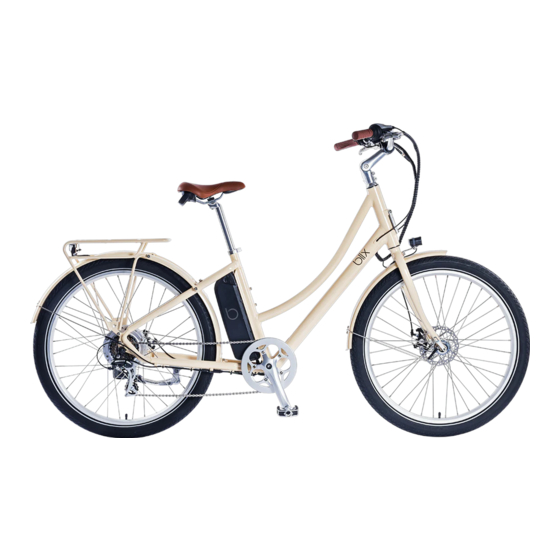
- Page 1 Aveny Assembly Guide...
-
Page 3: Table Of Contents
Table of Contents About this Guide Package Contents Assembly Unpacking your Blix Installing Handlebars Installing Front Fender Installing Lights Front Wheel & Quick Release Installing Pedals Adjustment Adjusting Seat Adjusting Handlebars Inflating Tires Checking Brakes... -
Page 4: About This Guide
Aveny Assembly Guide About this Guide Welcome to the assembly guide for your Blix Aveny. We craft our bikes with an innovative and user-friendly design, and the assembly guide is no different. We’ve broken down each step so it’s easy to follow whether you’re a seasoned pro or an adventure-bound beginner. -
Page 5: Assembly
Assembly Step 1: Unpacking your Blix Remove your bike from the box and set it on a smooth, flat surface. Remove all of the packaging material from the bike and carefully cut the zip-ties. Note: We recommend keeping the box and protective packaging for 30 days after receiving your bike in case any issues arise. -
Page 6: Installing Front Fender
Assembly Step 3: Front Fender 1. Route the light cable through the hole at the top of the front fender. 2. Secure the light cable through the clamps on the inside, and pull the cable through the hole at the front of the fender. -
Page 7: Installing Lights
Assembly Step 4: Lights 1. Install the light on the attachment at the front of the fender using the bolt and 4mm allen wrench. Use the 8mm crescent wrench to keep tension. 2. Connect the light cables to the included front light. -
Page 8: Front Wheel & Quick Release
Assembly 3. Push the quick release skewer through the axle of the front wheel from the side opposite the brake rotor disc. 4. Add the spring, with the small end of the spring facing the bike, and the larger side of the spring resting against the cap. -
Page 9: Installing Pedals
Assembly 8. With the quick release lever open, tighten the cap, then clamp down the quick release arm to firmly attach the wheel to the dropouts. You should feel firm resistance when closing the lever. Step 6: Pedals 1. The pedals are marked with an “L” for left and an “R”... -
Page 10: Adjustment
Adjustment Follow the steps below to personalize your Aveny and to check for safety. Step 7: Seat Adjustment To adjust the seat height, open the quick release seat post clamp. Once you’ve reached your desired height, simply clamp the quick release back down so it squarely closes against the collar. -
Page 11: Checking Brakes
Your bike is now fully assembled. See the Blix Owner’s Manual for tips and instructions on getting the most out of your new Blix. - Page 12 Recommended Torque Values Tighten bolts to torque specifications to prevent the bolts from slipping. Part Torque (Nm) Seat Post Clamp Saddle 18-20 Pedals Crank Bolts Handlebar 18-20 Stem 18-20 Rear Wheel 40-45 In Need of Support? https://support.blixbike.com/ support@blixbike.com (855) 655-BLIX [2549] blixbike.com...
Need help?
Do you have a question about the Aveny and is the answer not in the manual?
Questions and answers