Table of Contents
Advertisement
Quick Links
Advertisement
Table of Contents

Related Manuals for SEEYING TT-918


Summary of Contents for SEEYING TT-918
- Page 1 TURNTABLE SYSTEM TT-918 Owner Manual...
- Page 2 WARNING TO PREVENT FIRE OR SHOCK HAZARD, DO NOT USE THIS PLUG WITH AN EXTENSION CORD, RECEPTACLE OR OTHER OUTLET UNLESS THE BLADES CAN BE FULLY INSERTED TO PREVENT BLADE EXPOSURE. TO PREVENT FIRE OR SHOCK HAZARD, DO NOT EXPOSE THIS APPLIANCE TO RAIN OR MOISTURE. THE CAUTION MARKING AND RATING LABEL ARE LOCATED AT THE BOTTOM OF THE UNIT IMPORTANT SAFETY INSTRUCTIONS...
- Page 3 indicated on the marking label. If you are not sure of the type of power supply to your home, consult your product dealer or local power company. For products intended to operate from battery power, or other sources, refer to the operating instruction. Object and Liquid Entry - Never push objects of any kind into this product through openings as they may touch dangerous voltage points or short-out parts that could result in a fire or electric shock.
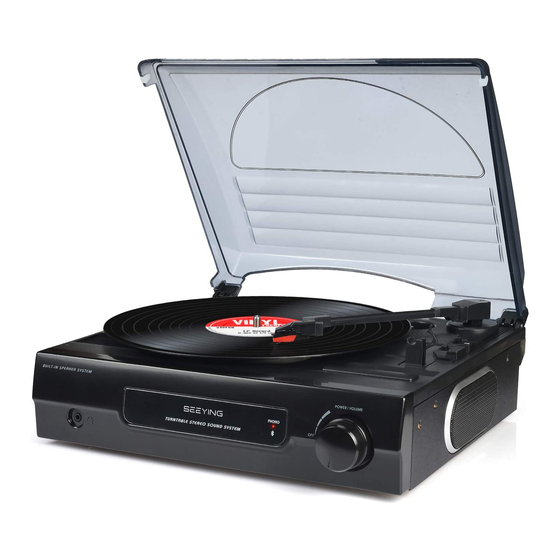
- Page 4 Location of controls 1) Dust cover 2) Left speaker 3) 3.5mm headphone jack 4) Phono LED indicator (Red) / Bluetooth LED indicator (Blue) 5) Power on/off/ volume knobs 6) Right speaker 7) Spindle adaptor 8) Turntable speed selector 9) Tone arm rest 10) Line out socket 11) Auto stop switch 12) AC cord...
- Page 5 Turn on the Bluetooth function for the device you want to link to, and enable the search or scan function to find the unit. Select "TT-918" from the device list when it appears on your device screen. After successfully pairing the unit with your Bluetooth device, the Bluetooth LED Indicator (4) will stop flashing and remain lit in blue color.
- Page 6 Remark : 1. As some kind of record the auto-stop area was out of the unit setting, so it will stop before the last rack finish. In this case, select the auto-stop switch (11) to “ off “ position, then it will run to the end of the record but will not stop automatically (turn off the unit by power button or switch back the auto-stop switch (11) to “...
- Page 8 ...
Need help?
Do you have a question about the TT-918 and is the answer not in the manual?
Questions and answers