
Related Manuals for OPODEE E31B

Summary of Contents for OPODEE E31B
- Page 1 Robotic acuum leaner Instruction Manual SHENZHEN ZAPADOS TECHNOLOGY CO.,LTD Service support: Email:support@opodee.com www.opodee.com...
- Page 2 Important Safety Instructions • Before using this device, pick up objects like clothing and loose paper. Lift up cords To reduce the risk of injury or damage, read these safety instructions carefully and for blinds or curtains, and move power cords and fragile objects out of the way. If keep them at hand when setting up, using, and maintaining this device.
-
Page 3: Table Of Contents
Contents Product Composition / Package Contents Product Composition / Part Name Product Usage / Preparation Product Use/ Charge Robot Product Use / Turn On / Turn Off Product Use / Start Pause, Wake up Product Usage / Select a Cleaning Mode Component Use the Boundary Strip Component Time Scheduling Setting Component Cleaning and Maintenance... -
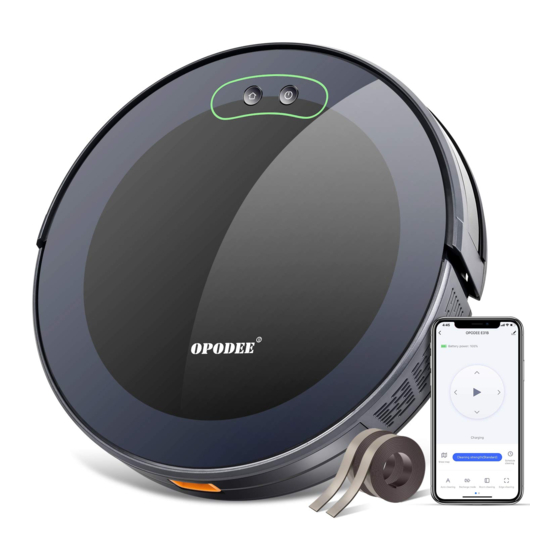
Page 4: Product Composition / Package Contents
Product Composition / Package Contents Remote Control (with battery x2) Charging Base Robot Dust Box Side Brush x4 Mopping Pad x2 Water Tank Power Adapter Boundary Strips HEPA Filter x2 Instruction Manual Cable Ties x5 Cleaning Brush 3.3 ft/1 m length... -
Page 5: Product Composition / Part Name
Product Composition / Part Name Front Robot Back Robot Drop Sensor Hall Sensor Recharge Button Side Brush * Short press to recharge/pause * Hold for 3 seconds to connect Wi-Fi Cleaning / Power ON/OFF Button * Press and hold for 3 seconds to turn on/off * Short press to start sweeping/puase Bumper Surface Cover... - Page 6 Remote Control Dust Box Start Auto Cleaning / Mopping Adjust suction power level in Auto Cleaning Mode Start Auto Cleaning Stop Cleaning Schedule Auto Cleaning start time Vent Mode Switching: Spot Cleaning Mode Single Room Cleaning Mode Edge Cleaning Mode Control cleaning direction manually Adjust the hour and minute Adjust time...
-
Page 7: Product Usage / Preparation
Product Usage / Preparation Important Tips Before Use Battery status Control cleaning direction manually Show Map Function Select (Slide left or right to select more) Auto cleaning Recharge mode Room cleaning Edge cleaning Spot cleaning Positioning of robot Cleaning record Edit Device info Robot Status Schedule Auto Cleaning start time... - Page 8 Place the Charging Base on a hard, horizontal surface and Before using the Robot, remove the protective strip on the Robot. against a wall. Remove Protection Install the side brushes before use, please make sure the Remove objects within 3 ft/1 m on both sides and mark of the side brush, if “L”, please install it at the position within 6 ft/2 m in front of the charging base.
- Page 9 Plug the adapter into the a wall outlet and pulg the DC jack Method 2 into the DC socket of the Charging Base. Place the robot on the charging dock and align it with the charging electrode plates. The power indicator on the robot When the Charging Base connects to AC power, the LED is flashing green indicator on the Charging Base is flashing green.
- Page 10 Product Usage / Clean / Pause Method 3 Click in the APP to start cleaning. Make sure the Robot is turned on before use. Click in the APP to pause the current task. Method 1 Press on the Robot to start cleaning (press any key to pause while cleaning).
-
Page 11: Product Usage / Select A Cleaning Mode
Adjust the suction Select a Cleaning Mode Method 1 You can use the remote control or APP to select a cleaning Press on the remote control repeatedly to adjust the Mode. suction power level. 1. Auto Cleaning Robot optimizes its cleaning path by selecting different cleaning modes automatically until cleaning is complete. - Page 12 4. Single Room Cleaning Select this mode only when one specific room needs to be cleaned. Make sure to confine Robot to the room by closing the door. Robot will also clean the edges before finish. Spot cleaning Press on the remote control repeatedly,until the icon of Single Room Cleaning Mode is displayed on the screen Click in the APP...
- Page 13 Use the Boundary Strip Set Time and Scheduled Cleaning Method 1 --Setting in the remote control With the Boundary Strip, you can keep Robot away from any Set Time area or item you do not want Robot to clean. Robot will recognize the Boundary Strip and will not cross into the blocked-off area.
- Page 14 Show Map Method 2 -- Setting in the APP Click “Show map ” in the APP to check the current cleaning status. Cleaning Time Cleaning Area Schedule cleaning Add Schedule Step 2: Step 1: Click “Add Schedule” Click “Schedule cleaning” Real-time Map Tap the button to turn off or turn on the schedule.
- Page 15 Product Use/ Water Tank Use Do not use the floor mopping function on carpets. After mopping the floor, please empty the water tank in time and remove the mopping pad. Add water Install the Water Tank Assembly Install Mopping Pad Start Mopping the Floor...
- Page 16 Cleaning and Maintenance Clean the Dust Collector and Filters For optimal performance, follow the instructions below to clean 1. Press the dust collector release button to pull the dust and maintain Robot regularly. The cleaning/replacement frequency collector out. will depend on your usage habits of Robot. Recommended cleaning/replacement frequency: Robot Part Cleaning Frequency...
- Page 17 4. Clean the dust collector and filters with a vacuum cleaner 7. Dry the dust box and filter assembly, and keep the or a cleaning brush. robot dry to ensure its service life. -It is recommended to clean the primary strainer with water every 15 - 30 days after been used.
- Page 18 Clean the Rolling Brush Pull on the release tabs to unlock the brush guard as shown. Lift the rolling brush to remove. Clean the rolling brush with the provided cleaning tool or a vacuum cleaner. Reinstall the rolling brush by inserting the fixed protruding end first and then clicking into place.
- Page 19 Clean the Sensors and Charging Pins Clean drive wheels and swivel wheel. To maintain the best performance, clean the drop sensors and charging pins regularly. Dust off the drop sensors and charging contact pins using a cloth or cleaning brush. lease use dry cloth clea o not use...
- Page 20 Clean the water tank and mopping pad 1.Take out the water tank assembly 4.Cleaning Cloth 2.Remove the mopping pad 5. Airing 3.Empty the Water Tank 6. Dry or naturally dry the water tank...
-
Page 21: Troubleshooting
Troubleshooting Prompt Tone Cause of Failure Solution Please put the Robot back to the ground and press the Robot off ground Robot suspended cleaning key again. the dust box to the Robot and press the cleaning Dust container isn’t installed Dust box removed and not installed key again. -
Page 22: Product Parameter
Product Parameter Classification Projects Parameter Diameter 330mm / 1.08ft Height 76mm / 0.25ft Structural class Net weight 3.0kg / 6.61lbs Voltage 14.4v Battery Battery 2500mAh rechargeable lithium battery pack Dust box capacity 600ml Charging type Automatic charging / Manual charging Cleaning mode Auto / Single Room / Edge / Spot/ Mop Floor Parameter...
Need help?
Do you have a question about the E31B and is the answer not in the manual?
Questions and answers