
Related Manuals for OPODEE E30W

Summary of Contents for OPODEE E30W
-
Page 1: Instruction Manual
Robotic vacuum cleaner Instruction Manual For FAQs and more information please visit : www.opodee.com... -
Page 2: Important Safety Instructions
Important Safety Instructions • Before using this device, pick up objects like clothing and loose paper. Lift up cords To reduce the risk of injury or damage, read these safety instructions carefully and for blinds or curtains, and move power cords and fragile objects out of the way. If keep them at hand when setting up, using, and maintaining this device. -
Page 3: Table Of Contents
Contents Product Composition / Package Contents Product Composition / Part Name Product Usage / Preparation Product Use/ Charge Robot Product Use / Turn On / Turn Off Product Use / Start Pause, Wake up Product Usage / Select a Cleaning Mode Component Use the Boundary Strip Component Time Scheduling Setting Component Cleaning and Maintenance... -
Page 4: Product Composition / Package Contents
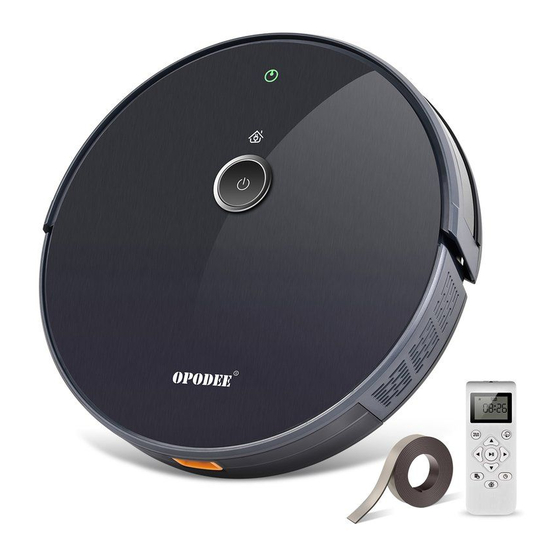
Product Composition / Package Contents Remote Control (with battery x2) Charging Base Robot Dust Box Power Adapter Instruction Manual Side Brush x4 Cleaning Brush Boundary Strips Cable Ties x5 HEPA Filter x2 3.3 ft/1 m length... -
Page 5: Product Composition / Part Name
Product Composition / Part Name Front Robot Back Robot Drop Sensor Hall Sensor Side Brush Bumper Power ON/OFF Button Auto Cleaning Start/Stop Button Surface Cover Infrared sensor Charging Contact Pins Swivel Wheel Battery Compartment Brush Guard Rolling Brush Dust Collector... -
Page 6: Remote Control
Dust Box Remote Control Start Auto Cleaning Adjust suction power level in Auto Cleaning Mode Start Auto Cleaning Stop Cleaning Schedule Auto Cleaning start time Mode Switching: Spot Cleaning Mode Single Room Cleaning Mode Vent Edge Cleaning Mode Control cleaning direction manually Adjust the hour and minute Adjust time Return to Charging Base... -
Page 7: Product Usage / Preparation
Product Usage / Preparation Before using the Robot, remove the protective strip on the Robot. Important Tips Before Use Remove Protection Install the side brushes before use. Remove power cords and small objects from the floor that may entangle Robot. You can use the supplied cable ties to organize your wires and power cords. -
Page 8: Product Use/ Charge Robot
Plug the adapter into the a wall outlet and pulg the DC jack Place the Charging Base on a hard, level surface and into the DC socket of the Charging Base. against a wall. When the Charging Base connects to AC power, the LED indicator on the Charging Base is SOLID GREEN Install the Charging Base in a location that Robot can easily access. -
Page 9: Product Use / Turn On / Turn Off
Start / Stop / Wake up Method 2 Press on the remote control to return Robot to the Make sure the Robot is turned on before use. Charging Base 1. Press on the Robot or on the remote control to start cleaning in Auto Mode Turn On and Turn Off Turn On... -
Page 10: Product Usage / Select A Cleaning Mode
3. Press on the Robot or any key on the remote control to wake up - Robot will return to the Charging Base automatically when the battery level becomes low or when Robot finishes cleaning. - By default, Robot starts in Auto Cleaning mode when it is turned on. -
Page 11: Spot Cleaning
2. Spot Cleaning 4. Single Room Cleaning Robot intensively cleans a specific area in a spiral pattern Select this mode only when one specific room needs to within the 5 ft radius,useful if there is a concentrated area of be cleaned. Make sure to confine Robot to the room by dust or debris. -
Page 12: Component Use The Boundary Strip
Use the Boundary Strip Set Time and Scheduled Cleaning Set Time With the Boundary Strip, you can keep Robot away from any area or item you do not want Robot to clean. Robot will recognize -Make sure the time is set correctly to your local time before the Boundary Strip and will not cross into the blocked-off area. -
Page 13: Component Cleaning And Maintenance
Clean the Dust Collector and Filters Cleaning and Maintenance For optimal performance, follow the instructions below to clean 1. Press the dust collector release button to pull the dust and maintain Robot regularly. The cleaning/replacement frequency collector out will depend on your usage habits of Robot. Recommended cleaning/replacement frequency: Robot Part Cleaning Frequency... - Page 14 4. Clean the dust collector and filters with a vacuum cleaner 7. Dry the dust box and filter assembly, and keep the or a cleaning brush. robot dry to ensure its service life. -It is recommended to clean the primary strainer with water every 15 - 30 days after been used.
- Page 15 Clean the Rolling Brush Pull on the release tabs to unlock the brush guard as shown. Lift the rolling brush to remove. Clean the rolling brush with the provided cleaning tool or a vacuum cleaner. Reinstall the rolling brush by inserting the fixed protruding end first and then clicking into place.
- Page 16 Clean the Sensors and Charging Pins Clean drive wheels and swivel wheel To maintain the best performance, clean the drop sensors and charging pins regularly. Dust off the drop sensors and charging contact pins using a cloth or cleaning brush. please use dry dishcloth for cleaning, and do not use wet dishcloth to prevent damage caused by water.
-
Page 17: Troubleshooting
Troubleshooting Prompt Tone Cause of Failure Solution Please put the Robot back to the ground and press the Wheels off the ground Robot suspended cleaning key again. Return the dust box to the Robot and press the cleaning Dust box not installed Dust box removed and not installed key again. -
Page 18: Product Parameter
Operating voltage ( v ) 14.4v SHENZHEN ZAPADOS TECHNOLOGY CO.,LTD Email:support@opodee.com Hotline: +86-400-0122-918 * Due to the continuous improvement of the product, this information product is subject to the physical object, and our company reserves the right to update the product.
Need help?
Do you have a question about the E30W and is the answer not in the manual?
Questions and answers