Table of Contents
Advertisement
Available languages
Available languages
Having TROUBLE with operation?
Please reset your unit
Refer to page of How to reset your unit
Vous avez des PROBLÈMES de fonctionnement?
Réinitialisez votre appareil
Référez-vous à la page intitulée Comment réinitialiser votre appareil
Dear Customer,
This apparatus is in conformance with the valid
European directives and standards regarding
electromagnetic compatibility and electrical safety.
European representative of Victor Company of
Japan, Limited is:
JVC Technical Services Europe GmbH
Postfach 10 05 04
61145 Friedberg
Germany
EN, FR
© 2011 Victor Company of Japan, Limited
Cher(e) client(e),
Cet appareil est conforme aux directives et
normes européennes en vigueur concernant la
compatibilité électromagnétique et à la sécurité
électrique.
Représentant européen de la société Victor
Company of Japan, Limited:
JVC Technical Services Europe GmbH
Postfach 10 05 04
61145 Friedberg
Allemagne
0111DTSMDTJEIN
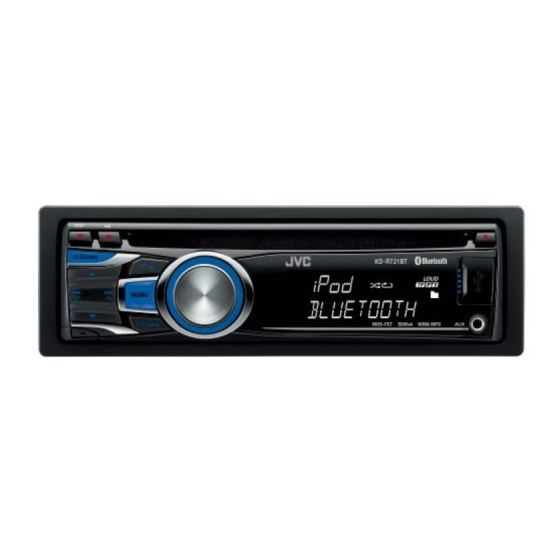
KD-R721BT
CD RECEIVER / RÉCEPTEUR CD
For canceling the display demonstration, see page 4. / Pour annuler la démonstration des
affichages, référez-vous à la page 4.
For installation and connections, refer to the separate manual.
Pour l'installation et les raccordements, se référer au manuel séparé.
INSTRUCTIONS
MANUEL D'INSTRUCTIONS
ENGLISH
FRANÇAIS
GET0710-003A
[E/EU]
Advertisement
Table of Contents

Related Manuals for JVC KD-R721BT


Summary of Contents for JVC KD-R721BT
- Page 1 électromagnétique et à la sécurité électrique. European representative of Victor Company of Japan, Limited is: Représentant européen de la société Victor JVC Technical Services Europe GmbH Company of Japan, Limited: Postfach 10 05 04 JVC Technical Services Europe GmbH 61145 Friedberg...
- Page 2 Thank you for purchasing a JVC product. Please read all instructions carefully before operation, to ensure your complete understanding and to obtain the best possible performance from the unit. IMPORTANT FOR LASER PRODUCTS 1. CLASS 1 LASER PRODUCT 2. CAUTION: Do not open the top cover. There are no user serviceable parts inside the unit; leave all servicing to qualified service personnel.
-
Page 3: Table Of Contents
25 Troubleshooting panel. Use a cotton swab or cloth. 29 Specifications JVC bears no responsibility for any loss of data Condensation : When the car is air- in an iPod/iPhone and/or USB mass storage conditioned, moisture may collect on the class device while using this System. -
Page 4: Canceling The Display Demonstration
Canceling the display demonstration Turn on the power. Select <DEMO OFF>. [Hold] (Initial setting) Finish the procedure. (Initial setting) Setting the clock Adjust the minute. Turn on the power. [Hold] (Initial setting) Select <CLOCK>. Select <24H/12H>. Select <CLOCK SET>. Select <24 HOUR> or <12 HOUR>. -
Page 5: Preparing The Remote Controller
Preparing the remote controller Caution: When you use the remote controller for the first time, pull out the insulation sheet. • Danger of explosion if battery is incorrectly replaced. Replace only with the same or equivalent type. • Battery shall not be exposed to excessive heat Insulation sheet such as sunshine, fire, or the like. -
Page 6: Basic Operations
Basic operations Loading slot Display window Ejects the disc Control dial Remote sensor AUX (auxiliary) input jack • DO NOT expose to bright sunlight. Detaches the panel USB (Universal Serial Bus) input terminal When you press or hold the following button(s)... Remote Main unit General operation... -
Page 7: Listening To The Radio
Remote Main unit General operation controller • Activates/deactivates TA Standby Reception. (page 8) • Enters PTY Searching mode [Hold]. (page 8) T/P BACK — • Selects the controlling terminal of an iPod/iPhone [Hold]. (page 19) • Returns to the previous menu. •... - Page 8 Manual presetting (FM/AM) The following features are available only You can preset up to 18 stations for FM and for FM Radio Data System stations. 6 stations for AM. Searching for your favourite FM Radio Data System programme— PTY Search ] Tune in to a station you want to You can tune in to a station broadcasting your preset.
-
Page 9: Listening To A Disc
NEWS Standby Reception Automatic station selection— NEWS Standby Reception allows the unit to Programme Search switch temporarily to your NEWS programme Usually when you select a preset number, the from any source other than AM. station preset in that number is tuned in. If the signals from the FM Radio Data System To activate NEWS Standby Reception, see preset station are not sufficient for good... - Page 10 Basic operations 3 Turn the control dial to select your desired track. Then press the control dial to confirm. • Only the existing characters will be shown on Selects folder of the MP3/WMA. the search menu. • Press and hold 5/∞ to continuously change the character of the search menu.
-
Page 11: Listening To A Usb Device
Listening to a USB device This unit is equipped with two USB input terminals (on the control panel and USB cable from the rear of the unit). You can use these two terminals at the same time. You can operate the USB device in the same way you operate the files on a disc. (page 9, •... -
Page 12: Using Bluetooth ® Devices
Bluetooth connection is disconnected. Continue the conversation using your mobile phone. • When the unit is turned off, the device is disconnected. • If you wish to receive more information about Bluetooth, visit the following JVC web site: <http://www.jvc.co.jp/english/car/index.html> (English website only). -
Page 13: Connecting A Bluetooth Device
Then, confirm the passkey on the unit Use the Bluetooth device to search and by pressing the control dial. Operate the select “JVC Unit.” Bluetooth device to confirm the passkey. • For some Bluetooth devices, you may •... -
Page 14: Using A Bluetooth Mobile Phone
To delete a registered device To connect/disconnect a registered device 1 Press and hold MENU. 1 Press and hold MENU. 2 Turn the control dial to select 2 Turn the control dial to select <BLUETOOTH>, then press to confirm. <BLUETOOTH>, then press to confirm. 3 Turn the control dial to select 3 Turn the control dial to select <DELETE PAIR>, then press to confirm. - Page 15 If SETTINGS is selected in step 2 ... NR/EC MODE • Turn the control dial to select an item (see ON [Initial] : The unit adjusts the Noise the following), then press the control dial Reduction and Echo Cancellation of the to confirm.
- Page 16 To delete a contact (name/phone number) Using the remote controller 5 / ∞ / 2 / 3 / SOURCE : [Press] Answers calls. Only when “PB IN UNIT” is selected for “P. BOOK SEL.” (page 15) [Hold] Rejects calls. 1 Press to enter “Hands-Free”...
-
Page 17: Using A Bluetooth Audio Player
Using a Bluetooth audio player Operations and display indications differ Selecting the playback modes depending on their availability on the • For Bluetooth devices that support AVRCP 1.3. connected device. ] Select “BT FRONT” or [Hold] “BT REAR.” If playback does not start automatically, operate the Bluetooth audio player to start playback. -
Page 18: Changing The Bluetooth Settings
: Shows connected phone name. / AU CNNT DEV * : Shows connected audio device name. / MY BT NAME : Shows the unit name (JVC Unit). / MY ADDRESS : Shows address of USB Bluetooth Adapter. Will not display if two Bluetooth phones are connected at the same time. -
Page 19: Listening To An Ipod/Iphone
Listening to an iPod/iPhone You can connect an Apple iPod/iPhone using the USB 2.0 cable (accessory of the iPod/iPhone) to the USB input terminal on the control panel or USB cable from the rear of the unit. Ÿ USB input terminal ] Turns on the power. - Page 20 In <APP MODE> : APP MODE APP MODE application with clock time You can operate JVC original application (eg. JVC Drive Smart) with this unit in <APP MODE>. For JVC Drive Smart operations, visit JVC web site: <http://www.jvc.co.jp/english/car/index. html> (English website only) ENGLISH...
-
Page 21: Listening To The Other External Components
• When operating an iPod/iPhone, some operations may iPhone 3GS not be performed correctly or as intended. In this case, iPhone 3G visit the following JVC web site: <http://www.jvc. iPhone co.jp/english/car/index.html> (English website only). <IPOD MODE/ APP MODE> are not available. -
Page 22: Selecting A Preset Sound Mode
Selecting a preset sound mode Storing your own sound mode You can select a preset sound mode suitable for the music genre. You can store your own adjustments in FLAT = NATURAL = memory. DYNAMIC = VOCAL BOOST = BASS BOOST = USER = [Hold] (back to the beginning) While listening, you can adjust the subwoofer... -
Page 23: Menu Operations
Menu operations Repeat step 2 if necessary. [Hold] • To return to the previous menu, press T/P BACK. If no operation is done • To exit from the menu, press for about 60 seconds, the MENU. operation will be canceled. Menu item Selectable setting, [ Initial: Underlined ] DEMO... - Page 24 Menu item Selectable setting, [ Initial: Underlined ] VOL ADJUST –05 — +05 [ 00 ] : Presets the volume adjustment level of each source (except “FM”), compared to the FM volume level. The volume level will automatically increase or decrease when you change the source.
-
Page 25: Troubleshooting
Menu item Selectable setting, [ Initial: Underlined ] USB * DRIVECHANGE : Selects to change the drive when a multiple drives device is connected to the USB input terminal (front/rear). IPOD SWITCH * HEAD MODE : Controls iPod playback through the unit. / IPOD MODE : Controls iPod playback through the iPod/iPhone. - Page 26 Symptom Remedy/Cause Disc cannot be played back. Insert the disc correctly. CD-R/CD-RW cannot be played back and Insert a finalized CD-R/CD-RW (finalize with the component which track cannot be skipped. you used for recording). Disc sound is sometimes interrupted. Stop playback while driving on rough roads. / Change the disc. / Check the cords and connections.
- Page 27 (or reset the unit). (page 3) “HW ERROR” appears on the display. Reset the unit and try the operation again. If “HW ERROR” appears again, consult your nearest JVC IN-CAR ENTERTAINMENT dealer. Continued... ENGLISH...
- Page 28 • The Bluetooth word mark and logos are owned by the Bluetooth SIG, Inc. and any use of such marks by Victor Company of Japan, Limited (JVC) is under license. Other trademarks and trade names are those of their respective owners.
-
Page 29: Specifications
Specifications AUDIO AMPLIFIER SECTION USB SECTION Maximum Power Output : 50 W per channel USB Standard : USB 1.1, USB 2.0 Continuous Power Output (RMS) : 20 W per Data Transfer Rate (Full Speed) : Max. 12 Mbps channel into 4 Ω, 40 Hz to 20 000 Hz at no Compatible Device : Mass Storage Class more than 1% total harmonic distortion. - Page 30 Merci pour avoir acheté un produit JVC. Veuillez lire attentivement toutes les instructions avant d’utiliser l’appareil afin de bien comprendre son fonctionnement et d’obtenir les meilleures performances possibles. IMPORTANT POUR PRODUITS LASER 1. PRODUIT LASER CLASSE 1 2. ATTENTION: N’ouvrez pas le couvercle supérieur. Il n’y a aucune pièce réparable par l’utilisateur à...
- Page 31 Dans ce cas, retirez le disque et attendez que l’humidité s’évapore. Température à l’intérieur de la voiture : JVC ne peut être tenu responsable pour toute Si votre voiture est restée garée pendant perte de données dans un iPod/iPhone et/ longtemps dans un climat chaud ou froid, ou un périphérique USB à...
- Page 32 Annulation des démonstrations des affichages Mise sous tension de l’appareil. Choisissez <DEMO OFF>. [Maintenez pressée] (Réglage initial) Terminez la procédure. (Réglage initial) Réglage de l’horloge Ajustez les minutes. Mise sous tension de l’appareil. [Maintenez pressée] (Réglage initial) Choisissez <CLOCK>. Choisissez <24H/12H>. Choisissez <CLOCK SET>.
- Page 33 Préparation de la télécommande Attention: Lorsque vous utilisez la télécommande pour la première fois, tirez sur la feuille isolante pour • Danger d’explosion si la pile est remplacée de la retirer. façon incorrecte. Remplacez-la uniquement avec le même type de pile ou un type équivalent.
- Page 34 Opérations de base Fente d’insertion Fenêtre d’affichage Éjection d’un disque Molette de commande Capteur de télécommande Prise d’entrée AUX • NE l’exposez PAS à la lumière (auxiliaire) directe du soleil. Retrait du panneau Prise d’entrée USB (bus série universel) Quand vous appuyez ou maintenez pressées les touches suivantes... Appareil Télécommande Opérations générales...
- Page 35 Appareil Télécommande Opérations générales principal • Mise en/hors service de l’attente de réception TA. (page 8) • Entrez en mode de recherche de PTY [Maintenez pressée]. (page 8) T/P BACK — • Permet de sélectionner la prise de commande d’un iPod/iPhone [Maintenez pressée].
- Page 36 Préglage manuel (FM/AM) Les fonctionnalités suivantes sont Vous pouvez prérégler un maximum de accessibles uniquement pour les stations 18 stations pour FM et de 6 stations pour AM. FM Radio Data System. Recherche de votre programme FM Radio Data System préféré— ] Accordez la station que vous souhaitez Recherche PTY prérégler.
- Page 37 Attente de réception d’informations Sélection automatique des L’attente de réception d’informations permet stations— Recherche de programme à l’appareil de commuter temporairement sur Habituellement, quand vous choisissez un votre programme d’informations préféré à numéro de préréglage, la station préréglée sur partir de n’importe quelle source autre que AM. ce numéro est accordée.
- Page 38 Opérations de base 3 Tournez la molette de commande pour choisir la plage souhaité. Puis, appuyez sur la molette de commande pour valider. Choisit un dossier d’un disque • Seul les caractères existant apparaîtront sur le MP3/WMA. menu de recherche. •...
- Page 39 Écoute d’un périphérique USB Cet appareil est muni de deux prises d’entrée USB (sur le panneau de commande et sur le câble USB provenant de l’arrière de l’appareil). Vous pouvez utiliser ces deux prises en même temps. Vous pouvez commander le périphérique USB de la même façon que les fichiers sur un disque.
- Page 40 • Quand cet appareil est mis hors tension, l’appareil extérieur est déconnecté. • Si vous souhaitez recevoir plus d’informations sur le système Bluetooth, consultez le site web de JVC suivant: <http://www.jvc.co.jp/english/car/index.html> (Site web en anglais uniquement).
- Page 41 Puis, validez le code sur Utilisez le périphérique Bluetooth pour l’appareil en appuyant sur la molette rechercher et sélectionner “JVC Unit”. de commande. Utilisez le périphérique Bluetooth pour valider le code. • Pour certains périphériques Bluetooth, il •...
- Page 42 Pour supprimer un périphérique enregistré Pour connecter/déconnecter un 1 Maintenez pressée MENU. périphérique enregistré 2 Tournez la molette de commande pour 1 Maintenez pressée MENU. choisir <BLUETOOTH>, puis appuyez 2 Tournez la molette de commande pour dessus pour valider. choisir <BLUETOOTH>, puis appuyez 3 Tournez la molette de commande pour dessus pour valider.
- Page 43 Si SETTINGS est sélectionné à l’étape 2 ... NR/EC MODE • Tournez la molette de commande pour ON [Réglage initial] : L’appareil ajuste la choisir un élément (voir ci-après), puis réduction du bruit et l’annulation de l’écho du appuyez sur la molette de commande microphone connecté...
- Page 44 Pour supprimer un contact (nom/numéro Utilisation de la télécommande 5 / ∞ / 2 / 3 / SOURCE : [Appuyez sur la touche] de téléphone) Uniquement quand “PB IN UNIT” est choisi pour Répond aux appels. “P. BOOK SEL”. (page 15) [Maintenez pressée] 1 Appuyez sur pour afficher l’écran...
- Page 45 Utilisation d’un lecteur audio Bluetooth Les opérations et les indications de l’affichage Sélection des modes de lecture diffèrent en fonction de leur disponibilité sur le • Pour les périphériques Bluetooth compatibles périphérique connecté. avec AVRCP 1.3. ] Choisissez “BT FRONT” ou “BT REAR”.
- Page 46 : Affiche le nom du périphérique audio connecté. / MY BT NAME : Affiche le nom de l’appareil (JVC Unit). / MY ADDRESS : Affiche l’adresse de l’adaptateur USB Bluetooth. N’apparaît pas si deux téléphones Bluetooth sont connectés en même temps.
- Page 47 Écoute d’un iPod/iPhone Vous pouvez connecter l’iPod/iPhone Apple en utilisant le câble USB 2.0 (accessoire du iPod/iPhone) à la prise d’entrée USB sur le panneau de commande ou le câble USB à l’arrière de l’appareil. Ÿ Prise d’entrée USB ] Met l’appareil sous tension.
- Page 48 Dans <APP MODE> : APP MODE APP MODE avec l’horloge Vous pouvez utiliser une application originale de JVC (par exemple JVC Drive Smart) avec cet appareil en mode <APP MODE>. Pour l’utilisation de JVC Drive Smart, consultez le site Web de JVC: <http://www.jvc.co.jp/english/car/index.html>...
- Page 49 3GS opérations peuvent ne pas être réalisées correctement iPhone 3G ou comme prévues. Dans ce cas, consultez le site Web iPhone JVC suivant: <IPOD MODE/ APP MODE> ne sont pas <http://www.jvc.co.jp/english/car/index.html> disponibles. (Site web en anglais uniquement). Écoute d’un autre appareil extérieur Vous pouvez connecter un appareil extérieur à...
- Page 50 Sélection d’un mode sonore préréglé Mémorisation de votre propre Vous pouvez sélectionner un mode sonore préréglé adapté à votre genre de musique. mode sonore FLAT = NATURAL = Vous pouvez mémoriser vos propres DYNAMIC = VOCAL BOOST ajustements en mémoire. = BASS BOOST = USER = (retour au début) [Maintenez pressée]...
- Page 51 Utilisation des menus Répéter l’étape 2 si nécessaire. [Maintenez pressée] • Pour revenir au menu précédent, appuyez sur Si aucune opération n’est effectuée pendant environ T/P BACK. 60 secondes, l’opération est • Pour quitter le menu, appuyez sur MENU. annulée. Article de menu Réglages pouvant être choisis, [ Réglage initial: Souligné...
- Page 52 Article de menu Réglages pouvant être choisis, [ Réglage initial: Souligné ] VOL ADJUST –05 — +05 [ 00 ] : Préréglez le niveau d’ajustement du volume de chaque source (sauf “FM”), en comparaison avec le niveau de volume FM. Le niveau de volume augmente ou diminue automatiquement quand vous changez la source.
- Page 53 Article de menu Réglages pouvant être choisis, [ Réglage initial: Souligné ] USB * DRIVECHANGE : Choisissez ce réglage pour changer le périphérique quand plusieurs périphériques sont connectés à la prise d’entrée (avant/arrière). IPOD SWITCH * HEAD MODE : Commande la lecture du iPod à travers cet appareil. / IPOD MODE : Commande la lecture du iPod à...
- Page 54 Symptôme Remède/Cause Le disque ne peut pas être reproduit. Insérez le disque correctement. Un CD-R/CD-RW ne peut pas être Insérez un CD-R/CD-RW finalisé (finalisez-le avec l’appareil que vous reproduit et les plages ne peuvent pas avez utilisé pour l’enregistrement). être sautées. Le son du disque est parfois interrompu.
- Page 55 (ou réinitialisez l’appareil). (page 3) “HW ERROR” apparaît sur l’affichage. Réinitialiser l’appareil et essayez de nouveau l’opération. Si “HW ERROR” apparaît de nouveau, consultez le revendeur d’accessoires audio JVC le plus proche. À suivre... FRANÇAIS...
- Page 56 • La marque du mot et les logos Bluetooth sont la propriété de Bluetooth SIG, Inc. et toute utilisation de ces marques par Victor Company of Japan, Limited (JVC) est faite sous licence. Les autres marques et noms de commerce sont la propriété...
- Page 57 Spécifications SECTION DE L’AMPLIFICATEUR SECTION USB AUDIO Standard USB : USB 1.1, USB 2.0 Vitesse de transfert de données (Full Speed) : Puissance de sortie maximum : 50 W par canal Max. 12 Mbps Puissance de sortie en mode continu (RMS) : Périphériques compatibles : À...
- Page 58 The countries where you may use the Bluetooth® function Die Länder, in denen Sie die Bluetooth® Funktion verwenden können Pays où vous pouvez utiliser la fonction Bluetooth® De landen waar u de Bluetooth®-functie mag gebruiken Países en los que se puede utilizar la función Bluetooth® Paesi nei quali è...
- Page 59 Country Country Country Andorra Ísland Türkiye Italia 台湾 대한민국 United States of America Australia Lichtenstein Venezuela Österreich Lietuva Vietnam Bosna i Hercegovina Vi t Nam Luxemburg Belgien South Africa Luxembourg Belgique ENingizimu Afrika Lëtzebuerg България Suid-Afrika Latvija Canada Monaco Schweiz Crna Gora Suisse Македонија...
Need help?
Do you have a question about the KD-R721BT and is the answer not in the manual?
Questions and answers