Table of Contents
Advertisement
Available languages
Available languages
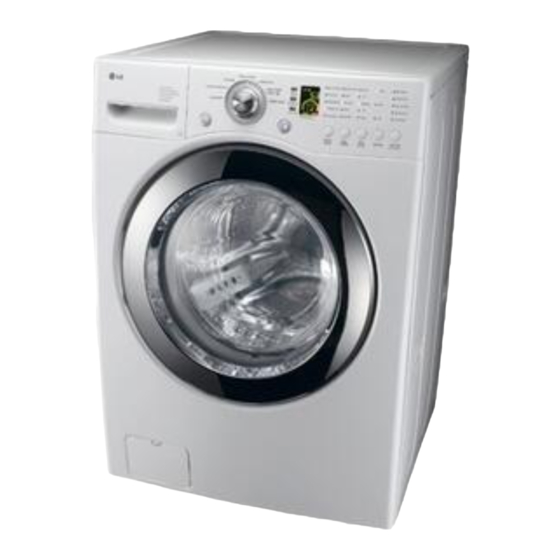
WM2101H*
☎ ☎ 1-800-243-0000
24 HOURS A DAY, 7 DAYS A WEEK FOR LG CUSTOMER SERVICE
☎ ☎ 1-800-243-0000
para el Servicio LG (Atención al Cliente) 24 horas al día, 7 días a la semana
Please read this manual carefully. It provides
instructions on safe installation, use, and maintenance.
Retain it for future reference.
Record the model and serial numbers of your machine
and report this information to your dealer if your machine
requires service.
Lea este manual cuidadosamente. Le proveerá
instrucciones para una instalación, uso y mantenimiento
seguros. Consérvelo para futuras referencias. Cite esta
información a su proveedor si requiere de servicio.
Advertisement
Table of Contents

Related Manuals for LG WM2101HW


Summary of Contents for LG WM2101HW
- Page 1 24 HOURS A DAY, 7 DAYS A WEEK FOR LG CUSTOMER SERVICE ☎ ☎ 1-800-243-0000 para el Servicio LG (Atención al Cliente) 24 horas al día, 7 días a la semana Please read this manual carefully. It provides instructions on safe installation, use, and maintenance.
-
Page 2: Product Features
PRODUCT FEATURES ■ Direct Drive System ■ Tilted Drum and Extra Large Door Opening ■ RollerJets ■ Automatic Wash Load Detection ■ Built-in Heater ■ Child Lock 추가선택, 예약, EST. TIME ■ The LED Display EST. TIME EST. TIME EST. TIME EST. -
Page 3: Important Safety Information
IMPORTANT SAFETY INFORMATION READ ALL INSTRUCTIONS BEFORE USE WARNING! For your safety, the information in this manual must be followed to minimize the risk of fire or explosion, electric shock, or to prevent property damage, personal injury, or loss of life. I I M M P P O O R R T T A A N N T T S S A A F F E E T T Y Y I I N N S S T T R R U U C C T T I I O O N N S S WARNING S S A A V V E E T T H H E E S S E E I I N N S S T T R R U U C C T T I I O O N N S S... -
Page 4: Specifications
SPECIFICATIONS ■ ■ ■ ■ ■ ■ Accessories ■ ” ” ” ”... - Page 5 INSTALLATION INSTRUCTIONS ■ ■...
-
Page 6: Installation Instructions
INSTALLATION INSTRUCTIONS ■ ■ ■ EST. TIME WASH SPIN ■ ■ [Side view] EST. TIME EST. TIME WASH WASH SPIN SPIN [Front view]... - Page 7 INSTALLATION INSTRUCTIONS ■ ■...
- Page 8 INSTALLATION INSTRUCTIONS ■ EST. TIME EST. TIME EST. TIME WASH WASH SPIN SPIN WASH SPIN EST. TIME EST. TIME EST. TIME WASH WASH SPIN SPIN WASH SPIN...
- Page 9 INSTALLATION INSTRUCTIONS ■ Diagonal Check When pushing down the edges of the washing machine top plate diagonally, the machine should not move up and down at all. (Please, check both directions.) If the machine rocks when pushing the machine top plate diagonally, adjust the feet again.
- Page 10 PREPARATION BEFORE WASHING WARNING...
- Page 11 USING THE DISPENSER ■...
- Page 12 USING THE DISPENSER...
- Page 13 CYCLES ■ Select cycles designed for different types of fabric and soil levels. HAND WASH/WOOL...
-
Page 14: How To Use The Washer
HOW TO USE THE WASHER Cycle Selector Knob Start/Pause... - Page 15 HOW TO USE THE WASHER LED DISPLAY Suggested Wash Temp. Garment...
- Page 16 HOW TO USE THE WASHER OPTION EST. TIME REMAINING STATUS INDICATOR CHILD LOCK DOOR LOCKED...
- Page 17 MAINTENANCE ■ ■ CAUTION...
- Page 18 MAINTENANCE ■ SOFTENER SOFTENER ■...
-
Page 19: Cleaning Your Washer
MAINTENANCE ■ Cleaning your washer 1. Exterior 2. Interior Read these instructions carefully before beginning the TUB CLEAN cycle. - If using liquid chlorine bleach - If using powder cleaner - If using tablet cleaner NOTE : It is recommended that TUB CLEAN should be repeated monthly. If mildew or musty smell already exists, run TUB CLEAN for 3 consecutive weeks.After TUB CLEAN is complete or when the washer is not used, leave the washer door open for better ventilation and drying inside of the washer. -
Page 20: Troubleshooting Guide
TROUBLESHOOTING GUIDE Problem Possible Cause Solution... - Page 21 TROUBLESHOOTING GUIDE Problem Possible Cause Solution...
- Page 22 TROUBLESHOOTING GUIDE Problem Possible Cause Solution...
- Page 24 WARRANTY...
- Page 25 MEMO...
- Page 26 CARACTERÍSTICAS DEL PRODUCTO ■ Sistema DD Invertidor. ■ Cilindro Inclinado y Abertura Extra Grande. ■ Bola de Lavado. ■ Detección de la carga de lavado automático ■ Calentador Integrado. ■ Seguro de Niños. 추가선택, 예약, ■ LA PANTALLA DE LED EST.
- Page 27 INFORMACIÓN IMPORTANTE DE SEGURIDAD LEA TODAS LAS INSTRUCCIONES ANTES DE USARLA. ADVERTENCIA! Para su seguridad, la información en este manual debe ser seguida para minimizar el riesgo de incendio ó explosión, descarga eléctrica, ó para prevenir daños a su propiedad, a su persona ó pérdida de la vida. I I n n f f o o r r m m a a c c i i ó...
- Page 28 ESPECIFICACIONES Perno para Transportación Clavija de Energía Panel de Control Manguera de Desagüe Cilindro Distribuidor Entrada de Agua Fría Puerta Ventilación por Seguridad Entrada de Agua Caliente Tapa Inferior de Cubierta Patas Ajustables Conexión de Desagüe Filtro de Bomba de Desagüe ■...
- Page 29 INSTRUCCIONES DE INSTALACIÓN ■ ■ Tapón...
- Page 30 INSTRUCCIONES DE INSTALACIÓN ■ ■ ■ [Vista lateral] EST. TIME WASH SPIN ■ ■ EST. TIME EST. TIME WASH WASH SPIN SPIN [Vista frontal]...
- Page 31 INSTRUCCIONES DE INSTALACIÓN ■ ■...
- Page 32 INSTRUCCIONES DE INSTALACIÓN ■ EST. TIME EST. TIME EST. TIME WASH SPIN WASH WASH SPIN SPIN EST. TIME EST. TIME EST. TIME WASH WASH SPIN SPIN WASH SPIN...
- Page 33 INSTRUCCIONES DE INSTALACIÓN ■ Verificación Diagonal Al empujar hacia abajo los extremos de la tapa superior de la lavadora de forma diagonal, esta no debe moverse hacia arriba y hacia abajo para nada (Verifíquelo en ambas direcciones). Si la máquina se tambalea al empujar diagonalmente los extremos hacia abajo, ajuste las patas nuevamente.
- Page 34 PREPARACIÓN ANTES DE LAVAR ADVERTENCIA...
- Page 35 USANDO EL DISTRIBUIDOR ■...
- Page 36 USANDO EL DISTRIBUIDOR...
- Page 37 CICLOS ■ Usted puede seleccionar ciclos diseñados para diferentes tipos de telas y niveles de suciedad. Temperatura de Ciclo Tipo de Tela Lavado/Enjuague Sanitario Algodón/ Toallas Normal Planchado Permanente Delicados Lavado a Mano/Lana Lavado Rápido LAVADO A MANO/LANA Velocidad Pre- Ciclo Nivel de Suciedada...
- Page 38 COMO USAR LA LAVADORA Selector de Ciclo 1. Encendido 2. Ciclos NOTA: Esta lavadora de carga frontal requiere un tiempo de ciclo más largo, y obtendrá una mejor limpieza, aun es más gentil en las prendas, que las lavadoras de carga superior.
- Page 39 COMO USAR LA LAVADORA LA PANTALLA DE LED (LED DISPLAY) Temperatura del Agua Sugerida Prenda...
- Page 40 COMO USAR LA LAVADORA TIEMPO RESTANTE ESTIMADO (EST. TIME REMAINING) OPCIONES (OPTION) INDICADOR DE ESTADO (STATUS INDICATOR) SEGURO PARA NIÑOS (CHILD LOCK) PUERTA ASEGURADA (DOOR LOCKED)
- Page 41 MANTENIMIENTO ■ ■ PRECAUCIÓN...
- Page 42 MANTENIMIENTO ■ SOFTENER SOFTENER ■...
- Page 43 MANTENIMIENTO ■ NOTA : Se recomienda usar el programa de LIMPIEZA DE LA CUBETA una vez al mes.Si ya se hubiera formado moho o se percibiese olor a humedad, ejecute el programa de LIMPIEZA DE LA CUBETA semanalmente durante 3 semanas. Una vez completado el programa de LIMPIEZA DE LA CUBETA o cuando la lavadora no vaya a usarse, deje la puerta de la máquina abierta para lograr una ventilación y un secado interior óptimo.
- Page 44 GUÍA PARA LA DETECCIÓN DE PROBLEMAS Problema Posible Causa Solución...
- Page 45 GUÍA PARA LA DETECCIÓN DE PROBLEMAS Problema Posible Causa Solución...
- Page 46 GUÍA PARA LA DETECCIÓN DE PROBLEMAS Problema Posible Causa Solución...
- Page 47 GARANTÍA Su lavadora LG será reparada o reemplazada, a consideración de LG, si prueba ser defectuosa en material o en ejecución dentro de un uso normal, dentro del periodo de garantía ("periodo de garantía") descrito en la parte inferior, efectivo desde la fecha ("fecha de compra") de la compra del producto por el consumidor.
- Page 48 CARACTÉRISTIQUES DU PRODUIT ■ Moteur à entraînement direct ■ Tambour incliné et très grande ouverture ■ Billes RollerJets ■ Détection automatique de charge de lavage ■ Chauffe-eau intégré ■ Verrouillage enfant 추가선택, 예약, ■ AFFICHEUR DEL EST. TIME EST. TIME EST.
- Page 49 INFORMATIONS IMPORTANTES DE SÉCURITÉ LIRE TOUTES LES INSTRUCTIONS AVANT D’UTILISER AVERTISSEMENT! Pour la sécurité, l’information de ce guide doit être suivie afin de minimiser le risque d’incendie ou d’explosion, de choc électrique, de dommages à la propriété ou de blessures. I I N N S S T T R R U U C C T T I I O O N N S S I I M M P P O O R R T T A A N N T T E E S S D D E E S S É...
- Page 50 DONNÉES TECHNIQUES Tuyau de vidage Distributeur Porte Capuchon du couvercle inférieur Fiche de drainage ■ ■ ■ ■ ■ ■ Accessoires ■ Pieds réglables Filtre de la pompe de vidage ” ” ” Boulons d’expédition Fiche Panneau de contrôle Tambour Entrée eau froide Évent de Entrée eau...
- Page 51 INSTRUCTIONS D’INSTALLATION ■ ■...
- Page 52 INSTRUCTIONS D’INSTALLATION ■ ■ ■ 11 / 16 " (98,3 cm) 1" (2,5 cm) ■ ■ " 4" (75,6 cm) (10 cm) [Vue latérale] 27" 1" (2,5 cm) (68,6 cm) [Vue avant]...
- Page 53 INSTRUCTIONS D’INSTALLATION ■ ■...
- Page 54 INSTRUCTIONS D’INSTALLATION ■ environ environ environ environ EST. TIME EST. TIME EST. TIME WASH SPIN WASH WASH SPIN SPIN environ environ EST. TIME EST. TIME EST. TIME WASH WASH SPIN SPIN WASH SPIN...
- Page 55 INSTRUCTIONS D’INSTALLATION ■ Vérification diagonale En pressant les bords du dessus de la laveuse de façon diagonale, l’appareil ne devrait pas bouger (vérifier les deux sens). Si l’appareil bascule, régler les pieds de nouveau.
- Page 56 MISE EN ŒUVRE AVANT LE LAVAGE AVERTISSEMENT...
- Page 57 UTILISATION DU DISTRIBUTEUR ■...
- Page 58 UTILISATION DU DISTRIBUTEUR...
- Page 59 CYCLES ■ Sélectionner les cycles conçus pour les différents types de tissus et le niveau de saleté. Temp. lavage Type Type de tissu /rinçage Sanitaire Coton/ serviettes Normal Pressage permanent Délicat Lavable à la main/ Laine Lavage rapide LAVABLE À LA MAIN/LAINE Préla Cycle Vitesse...
-
Page 60: Utilisation De La Laveuse
UTILISATION DE LA LAVEUSE bouton de selection de cycle voir page 59). REMARQUE: Le temps de lessive peut être grandement réduit pour les petites charges ou les vêtements légèrement souillés, en choisissant le cycle de lessive rapide et réglant le bouton de niveau de saleté... - Page 61 UTILISATION DE LA LAVEUSE LED DISPLAY (AFFICHEUR DEL) Température d’eau suggérée Vêtements...
- Page 62 UTILISATION DE LA LAVEUSE OPTION EST. TIME REMAINING (TEMPS RÉSIDUEL ESTIMÉ) STATUS INDICATOR (VOYANT DE POSITION) CHILD LOCK (VERROUILLAGE ENFANT) DOOR LOCKED (VERROUILLAGE DE PORTE) Ne mettez pas de détersif dans le casier de détersif car cela pourrait entraîner un moussage excessif et un débordement.
- Page 63 ENTRETIEN ■ ■ ATTENTION...
- Page 64 ENTRETIEN ■ SOFTENER SOFTENER ■...
- Page 65 ENTRETIEN ■ REMARQUE : Il est recommandé de répéter le cycle TUB CLEAN une fois par mois.Si la corrosion ou l'odeur de moisi sont déjà présentes, exécutez le cycle TUB CLEAN pendant 3 semaines consécutives. Après la fin du cycle TUB CLEAN ou quand la machine à laver n'est pas utilisée, laissez la porte de la machine ouverte pour une meilleure ventilation et un séchage de l'intérieur.
- Page 66 GUIDE DE DÉPANNAGE Cette laveuse est dotée de fonctions sécuritaires automatiques qui détectent et effectuent un diagnostique rapidement et elle réagit de façon appropriée. Lorsque l’appareil ne fonctionnement pas correctement ou pas du tout, vérifier les points suivants avant d’effectuer un appel de service. Problème Cause possible Solution...
- Page 67 GUIDE DE DÉPANNAGE Problème Cause possible Solution...
- Page 68 GUIDE DE DÉPANNAGE Problème Cause possible Solution...
- Page 69 GARANTIE...
- Page 70 NOTES...
- Page 71 NOTES...
Need help?
Do you have a question about the WM2101HW and is the answer not in the manual?
Questions and answers