Table of Contents
Advertisement
Quick Links
Advertisement
Table of Contents

Related Manuals for Celcook CEL1100HT


Summary of Contents for Celcook CEL1100HT
- Page 1 CEL1100HT CEL1800HT CEL2100HT Commercial Microwave Oven Instruction Manual Read these instructions carefully before using your microwave oven and keep in a safe place for future reference. Please call Celco if you need assistance or for more information: 905-364-5200 / 1-866-772-3526...
- Page 3 (2) Hinges and latches (broken and/or loose) (3) Door seals and sealing surfaces The oven should not be adjusted or repaired by anyone except properly qualified service personnel. SPECIFICATIONS Model: CEL1100HT CEL1800HT CEL2100HT Rated Voltage 120V ~ 60Hz 208/230V ~ 60Hz...
-
Page 4: Important Safety Instructions
IMPORTANT SAFETY INSTRUCTIONS When using electrical appliances basic safety precautions should be followed, including the following: WARNING – To reduce the risk of burns, electric shock, fire, injury to persons or exposure to excessive microwave energy: 1. Read all instructions before using the appliance. 2. - Page 5 To Reduce The Risk Of Fire In The Cavity: 1. Do not overcook food. Carefully watch when paper, plastic, or other combustible materials are placed inside the oven. 2. Remove wire twist ties from paper or plastic bags before placing into the oven. 3.
-
Page 6: Grounding Instructions
GROUNDING INSTRUCTIONS This appliance must be grounded. In the event of an electrical short circuit, grounding reduces the risk of electric shock by providing an escape wire for the electric current. This appliance is equipped with a cord having a grounding wire with a grounding plug. The plug must be plugged into an outlet that is properly installed and grounded. -
Page 7: Radio Interference
SAFETY 1. The oven must be on a level surface. 2. Place food gently into the oven to avoid possible breakage of the ceramic plate. 3. Do not cook popcorn in a commercial microwave oven. 4. The oven has several built-in safety switches to ensure that the power remains off when the door is open. -
Page 8: Utensil Test
CONTAINERS / UTENSILS CAUTION - Personal Injury Hazard Tightly closed containers could explode. Closed containers should be opened and plastic pouches should be pierced before cooking. See the instructions on “MATERIALS YOU CAN USE IN MICROWAVE OVEN” and “MATERIALS TO BE AVOIDED IN MICROWAVE OVEN”. There may be certain non-metallic containers that are not safe to use for microwaving. -
Page 9: Countertop Installation
Countertop Installation Remove all packing material and accessories. Examine the oven for damage such as dents or broken door. Do not install if oven is damaged. Remove any protective film found on the microwave cabinet surface. Installation 1) Select a level surface that provides enough open space for the intake and / or outlet vents (Figure 1). - Page 10 The appliance can be stacked (see Figure 2). Maximum stacking height is 2 ovens. A) Loosen screws from the stacking plate on the top and bottom oven and remove B) Remove 4 screws as shown in the picture. C) Put the stacking plate into place and fix into place with the screws.
-
Page 11: Cleaning Instructions
Cleaning Instructions ALWAYS KEEP THE OVEN CLEAN – INSIDE AND OUTSIDE 1) Clean the glass viewing window, the inner door panel and oven front face. For best performance and to maintain the high degree of safety, the inner door panel and oven front face should be free of food or grease build-up. -
Page 12: Operation
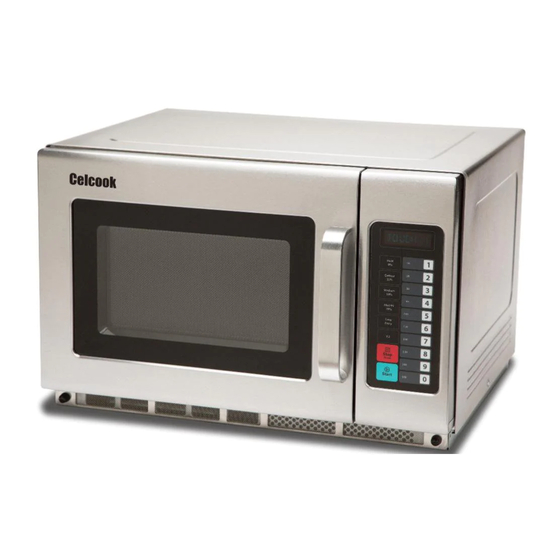
OPERATION Control Panel and Features (1) Power Buttons (2) Time Cook Buttons (3) X2 Button (4) Stop / Reset Button (5) Start Button (6) Number Buttons... - Page 13 OPERATION INSTRUCTION Five Power Levels are available. Level High Med. High Med. Defrost Hold Power 100% Display PL10 Appendix A User Options (bolded items below are the default values) Option Setting Description OP:10 3 Seconds Beep End Of Cycle Tone OP:11 Continuous Beep OP:12...
-
Page 14: Default Cook Times
Appendix B Default Cook Times Button Display (Time) Power Cook Factors 0:10 100% 0:20 100% 0:30 100% 0:45 100% 1:00 100% 1:30 100% 2:00 100% 2:30 100% 3:00 100% 3:30 100%... - Page 15 Plug Unit In “-- --“ is displayed when the oven is plugged in for the first time. If the Stop/Reset button is pressed, the oven will change to idle mode. Note: Under idle mode, no button can be pressed. The 1800 and 2100 will ask you to confirm if you are using 208V or 230V power.
- Page 16 Pause Mode 1) While in Manual Cook Mode, or Preset Cook Mode, if the door is opened or closed, or if the Stop/Reset pad is pressed, the oven will enter Pause Mode. 2) While paused, the LED will display the remaining cook time. 3) Only the fan and light work.
- Page 17 End Of Cook Cycle Mode 1) After the time has expired in a Manual Cook Mode, or a Preset Program Cook Mode, the oven shall go into End Of Cook Cycle Mode. 2) During this mode, END displays in the LED. 3) If User OptionOP:11 or OP:12 is selected the oven shall continue to sound until the user acknowledges this by either opening the door or pressing STOP/Reset.
- Page 18 Programming Mode This mode allows the user to assign cook times and power levels to the one touch pads. User Option OP:90 allows for 10 single digit touch programs. User Option OP:91 allows for 100 double digit touch programs. NOTE: When using programmed cycles, food should be in the oven before selecting the program as the program will start automatically after it is selected.
- Page 19 Double Quantity Cooking 1) Under Ready Mode, press X2 and then press number buttons 0-9. In 5 seconds, the oven will start cooking with the quantity preset cooking time x 0.8 (default factor for X2). 2) Press X2 and doub displays in the LED. When you press the number pads, the LED will display the quantity preset time.
- Page 20 User Option Mode 1) Open the oven door and press pad 2 until the buzzer sounds and OP:-- displays in the LED. 2) Using the chart on Page 11, select the pad for the option you wish to change. The option will display in the LED with the current selection showing.
- Page 21 How To Remove and Install The Filter Turn the metal screws left to loosen them Take off the filter To re-install, align the filter to the holes and turn the screws right to tighten...
- Page 22 How To Remove and Install The Grease Splatter Guard...
-
Page 23: Troubleshooting
Trouble Shooting Normal Microwave Oven Interfering with TV Radio and TV reception may be Reception interfered with when microwave oven is operating. It is similar to the interference of small electrical appliances like mixer, vacuum, or electric fan. It is Normal. Dim Oven Light In low power microwave cooking, oven light may become dim. - Page 24 PN:16170000A55658...
Need help?
Do you have a question about the CEL1100HT and is the answer not in the manual?
Questions and answers