Advertisement
Quick Links
Advertisement

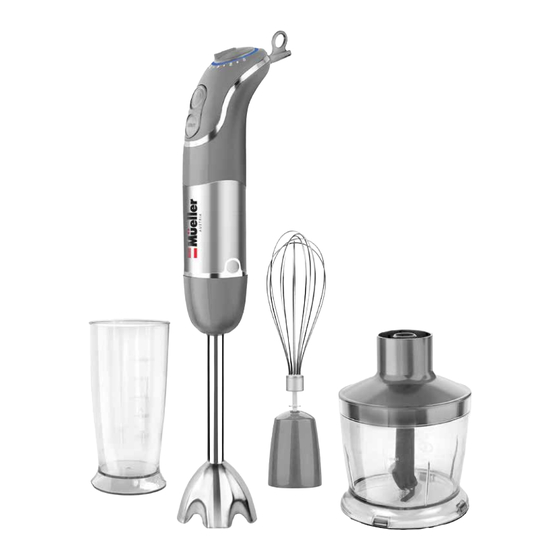
Summary of Contents for Mueller SmartStick MU-HB-10
- Page 1 SmartStick Model: MU-HB-10 INSTRUCTION MANUAL...
-
Page 2: Important Safeguards
• Do not run the appliance if it has a damaged cord or plug or after the appliance has malfunctioned or has been dropped or damaged in any way or is simply not operating properly. Contact Mueller Customer Service for help with the repair. - Page 3 Do not run this unit for longer than 1 MINUTE at a time; otherwise the inner parts can be damaged. If you are using the blender for mixing heavy or hard food, we recommend taking a break every 15 seconds. Your satisfaction is guaranteed.
-
Page 4: Before First Use
BEFORE FIRST USE • Before using the SmartStick Hand blender for the first time, we recommend that you wipe the Motor Body with a clean, damp cloth to remove any factory residue or dust. Mild dish soap on a cloth may be used, but do not use abrasive cleansers. - Page 5 3. Insert the Blending Attachment into your container with ingredi- ents ready for blending. You can use the Blending Beaker provided or an alternative container. NOTE: Make sure that the blade does not touch the bottom of the container. CAUTION: Do not let any liquid reach the Motor Body.
- Page 6 IMPORTANT: Do not hold the Power button for longer than 1 minute at a time. If you are using the blender for mixing heavy or hard food, we recommend taking a break every 15 seconds. BLENDING TIPS • A gentle up-and-down motion is all you need to make the most flavorful, full-bodied recipes.
- Page 7 HOW TO USE THE WHISK ATTACHMENT The whisk attachment is great for whipping cream and egg whites, and for mixing light cake mixes and cookie batter. 1. Insert the top of the Whisk Attach- ment into the slot of the Whisk Gear- box and push together to secure in place.
- Page 8 7. Unplug immediately after use. 8. To disassemble, pull out the Whisk Attachment and then press both the Release buttons at the same time to remove the Gearbox from the Motor Body. IMPORTANT: Do not hold the Power button for longer than 1 minute at a time.
- Page 9 HOW TO USE THE CHOPPER ATTACHMENTS The Chopper is perfectly suited for hard food such as meat, cheese, onion, herbs, garlic, carrot, walnut, almond, prunes, etc. Do not use on extremely hard food such as ice cubes, coffee beans, nutmeg, and similar. Before chopping •...
- Page 10 5. Insert the Motor Body into the Chopper Lid and push down to secure until a click is heard. 6. Turn the speed control knob to adjust the speed of the blender. 7. Hold the Motor Body with one hand and use your other hand to the firmly hold the Chopper Bowl by its lid.
-
Page 11: Cleaning And Maintenance
CLEANING AND MAINTENANCE • Always unplug the Hand blender from the power outlet before cleaning. • Remove all the attachments from the Motor Body. • Clean the Motor Body and the Whisk Gearbox with a damp cloth only. Do not use abrasive cleaners which could scratch the surface. - Page 12 Happiness is Homemade! 1-Year Limited Warranty This product is warranted to be free from defects in material and YEAR workmanship under normal use and service for one year from the date of the original purchase with the receipt. The manufacturer's obligation shall be limited to repairing or replacing any part of the product that is defective.


Need help?
Do you have a question about the SmartStick MU-HB-10 and is the answer not in the manual?
Questions and answers
can you give me a phone number for tech support?
CAN I buy attachments to this model, if yes please tell me how